From: Gord (NEOMEGA)
Hi. I have a curved surface and need a series of lines of a specific width and depth engraving into the surface. I try using the offset too, but am struggling as it seems to only do the outside edge.
I'm trying to engrave plank lines on a curved deck surface BTW! I have tried adding planks using deform, which seems to work until I boolean them to the surface, whereupon they simply disappear !
Is there another way?
Tx!
Gordo
Attachments:
 decktest.3dm
From: bemfarmer
Hi Gord,
So thinking about planar wooden plank flooring for a home, the feature to engrave would be approximately a "vee" groove.
The groove could have the three angles slightly rounded.
So come up with the desired profile of the "vee".
Draw the desired plank edges on the curve as slightly curved line curves. The Iso command may be helpful.
The Unwrap script will make these curves into same length lines.
Sweep the profile "vee" along the lines.
Use Flow to map the "vee" lines back onto the curved deck.
- Brian
Or just sweep the "vee" profile along the deck Iso-line curves...
Then trim or Boolean diff.
From: Frenchy Pilou (PILOU)
Project any lines from a Top view ?
As your volume is very thin copy move the top surface...
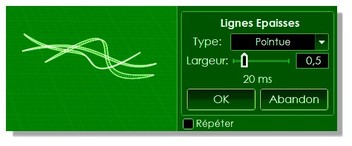
And after maybe FatLines by Max Smirnov for some fantasy...

Maybe after extrude the curves for have a volume & Boolean Diff by a curve for be smaller then original volume
and make a boolean Diff
http://moi3d.com/forum/index.php?webtag=MOI&msg=7594.31
From: Gord (NEOMEGA)
Thanks Brian.
I'll try that using the V shape and sweep. However, I did like the deform thing which was cool, but I can't understand why it goes away when I boolean it on!
G
From: Frenchy Pilou (PILOU)
With the description above :)
more detailed here
Take the bottom Side line of your Surf
maybe you must join its different part for have a unic curve
Rebuild it for have less points
extrude the "any curves lines" who trimed your Surf
Move the bottom curve line for be smaller
move some points to the extremities of the "any curves lines"
Extrude it for have a perpendicular plane
and make some Boolean diff of all that :)

Here view 3D


From: Michael Gibson
Hi Gord,
re:
> However, I did like the deform thing which was cool, but I can't understand why it goes away when I boolean it on!
Can you post a .3dm file with your objects in it that you are booleaning?
- Michael
From: Gord (NEOMEGA)
Thanks! As enclosed.
G
Attachments:
decktest.3dm
From: Michael Gibson
Hi Gord, thanks for posting the file. It's difficult for the booleans to process situations where faces are skimming along shared or nearly shared surface area. So when you make the cutting object you will want to have it stick out a little bit from the other object instead of skimming right along the top surface. Check out the attached file for an example.
- Michael
Attachments:
decktest2.3dm
From: Gord (NEOMEGA)
Hi Michael
That looks to work for some reason. However, I can't reproduce that over the whole surface. How can a flat object be 'bent to fit'?
Tx
G
Attachments:
decktest1.0.3dm
From: bemfarmer
Sweep the rectangular end, of the current cutting object, along a curved iso-line curve.
With the rectangle away from the curve, MoI seems to pick the center of the rectangle for the sweep...
So half the height of the rectangle would determine depth of cut...
or place the rectangle at the desired depth w.r.t the isoline curve...(?)
- B
The isolines start angling near the stern and bow, so taking some cross section trims with each plane located where a teak plank ends, might help in forming alternate "isolines" which are parallel. (In parallel planes)
(I'll leave it up to the experts now:-)
From: Frenchy Pilou (PILOU)
You don't want my method above? :)
Any curves can be drawn !
And any form of drilling if wanted...like a boat's hull! ;)
From: bemfarmer
Pilou's method of projecting a series of line segments located above the ends (and/or sides) of the teak planks looks like a good way
to make parallel curves for sweeping the rectangle.
- Brian
From: Gord (NEOMEGA)
Hi.
I'm not too good at this and, to be fair, you lost me very early on. I don't really know much about commands. I know where I think they are to go, but have no idea how to work them. What I need is a sequence of idiots instructions or a small vid showing exactly how to operate them.
Then I can learn a little
From: Frenchy Pilou (PILOU)
Here a speed one about the above method
a little difficulty with your own object :it's very thin...
but you can with a bigger thin for understand the process to take the bottom curve (or any trimed curve) ;)
Project any curves from Top
erase the second bottom projection
Extrude the projected curves
Copy Move it out the volume for better view
Take the bottom Side line of your original Surf
maybe you must join its different part for have a unic curve
Rebuild it for have less points (select a curve Press Tab write Rebuild and enter your number of points)
movup a little in side view for drawing a cool triminng curve
Move some points to the extremities of the "any curves lines"
Extrude it for have a perpendicular plane
maybe Blend the Bottom curves for the background
and make some Boolean Diff of all that :)
Sorry for the masking pannel at the end, i am not in a comfortable place...for work!

All is here in 3 D view but of course change view (Left) for drawing or modify curves!
Message 10027.15 was deleted
From: Michael Gibson
Hi Gord,
re:
> That looks to work for some reason.
The reason is what I wrote earlier - the top of that new one is not skimming right along the same surface area as the top of the other object so it doesn't have to try and resolve a complex intersection between 2 surfaces that are overlapping over top of each other.
re:
> However, I can't reproduce that over the whole surface. How can a flat object be 'bent to fit'?
The Transform > Deform > Flow command can be used to map a flat object onto a curved surface:
http://moi3d.com/3.0/docs/moi_command_reference8.htm#flow
So for your case you would probably want to build a surface that is not pinched together at the ends, something like a sweep like this:

Then with a set of flat objects you can put a base plane around them like this:

And the Transform > Deform > Flow command can map them from the base plane onto the curved sweep surface:

- Michael
Image Attachments:
gord_flow1.jpg
gord_flow2.jpg
gord_flow3.jpg
From: bemfarmer
After struggling with projecting lines from the planks, and extruding groves, I think that flow is a better/easier solution, adding the planks to the top of the curved deck.
The scale of the grooves should maybe be greater than a physical model, to reduce the size differential? Current planks look good.
The current deck might be drawn as single surface, with the edges smoother?
- Brian
From: Frenchy Pilou (PILOU)
Ah funny...never thought that was for a boat!:)
I had believed that will be for engrave something with letters!
So i will start for build an inversed boat's hull for have any form of engraving! :)
A boat floor deck is totally other thing!
I am not sure that the deck is longitudinally curvated!
It's generally flat! Flat inclined or domed laterally for evacuate water! ;)


From: bemfarmer
Watching teak deck maintenance, repair and replacement is interesting.
The narrow teak planks are spaced with deliberate gaps. The gaps are filled with various materials, to prevent leaks. Oakum/pitch historically, with screws and bungs. Special caulk has been used. More recently, 9mm teak veneer, epoxy bonded, no screws nor bungs, with black epoxy filling the gaps. Steam bending.
- Brian