From: Lara (MALA)
Hello,
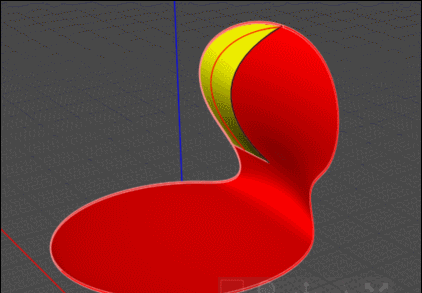
I would like to bend this seat shell at the top. However, I don't have any ideas for how to approach this. Just for one side. MOI can't really bend, or am I mistaken?

Attachments:
 _Forum Obj2Bend.3dm
Image Attachments:
Obj2Bend.png
From: Frenchy Pilou (PILOU)
https://vimeo.com/370146519 ;)
or something like this ?
Iso curve on a surface and trim... but not sure of what do you want...
From: Barry-H
Hi,
this is based on Pilou's link
https://vimeo.com/370146519 ;)
Cheers
Barry

Image Attachments:
2025.08.28-22.43.59-[3D].png
From: Michael Gibson
Hi Mala, there is a command Transform > Deform > Flow
(
https://moi3d.com/4.0/docs/moi_command_reference8.htm#flow)
which can do bending but it works better for bending a straight object onto a curved path and also it can be difficult for it to bend just one small area of an object instead of the whole thing.
The kind of localized bend that you want is probably better done in a polygon modeling program.
- Michael
From: Lara (MALA)
Hey,
bending is in progress - deform works pretty fine. THANK YOU ALL - especially PILOU for the impulse on vimeo.
OK - but now I need to reduce the spline points for finetuning the shape. I used "spline points reduce" (don´t know the correct term) longer ago - but my wiki is lost in space. Do not know anymore that...
What is the way for reduce points of spline?

Image Attachments:
BendReducePointsNeeded.png
From: Frenchy Pilou (PILOU)
Select curve(s)
Press Tab
write rebuild (Rebuild, reBuild ...etc but without spaces)
Select Mode # Points
Enter the number of points wished ;)
From: Ken (OKURO)
Great info ! Big Thanks !
From: Lara (MALA)
My first rebuilt own Wiki entry. THANKS...
From: Lara (MALA)
I know it is not proper made. But what´s my main constructive faults? Need to cut the fat...

Attachments:
_shape forum.3dm
Image Attachments:
Shape faults.png
From: Frenchy Pilou (PILOU)
Try to make only one half part...maybe more easy...then mirror it !
And put some thickness from the start as in reality...
From: Lara (MALA)
I thought about it that night in bed and I guess I just have to follow "simply" your tutorial-video - and also bend the horizontal splines - not only the main shaped outlines. I inserted these horizontals later and modified them. I guess this is nonsens...I give feedback...
From: MO (MO_TE)
Hi
I also go with using the "Deform >> Flow" method (Flow Surface To Surface)
For this particular object put the base and target surfaces behind your object to get minimal deformation on the seat.
Target face's history is enabled, so you can change the bending as you want.

Attachments:
_Forum Obj2Bend_2.3dm
Image Attachments:
_Forum Obj2Bend_2.png
From: Zooen
Excellent MO, very clever use of “Flow.”
From: Lara (MALA)
Hello MO,
this technique is once again amazing. THANK YOU SO MUCH IN DEED !!!
I was also able to achieve the asymmetrical pull of the backrest — wow.
My formal goal, and what I need to change, is the seat. It MUST become dome-shaped later on. First i need it straight flat. Then I guess new splines brings the shape to the dome.
Some points on this way....
1 The seat is deformed/included in the current base and target surfaces.
2 That's why I wanted to cut off both surfaces from bottom - exluding the down meshpoints. (see a in picture attached)
3 What I can't manage is to remove the ghosted points after cutting—because I think they still influence the seat surface. I cannot hide them with the "rebuild" command. (see a in picture attached)
4 Remaking both surfaces—I can't even manage something as simple as that—how do you divide the mesh points? (see c in picture attached)
5 How do you retain the flow history so that you can still bend the shell by deforming the target surface after executing the command?

Image Attachments:
questions mesh.png
From: Zooen
1 The seat is distorted/included in the current base and target surfaces.
That's okay. The help section explains that for the flow, the line (it's the same for a plane) must pass through or along the edge of the object to be distorted.
2 That's why I wanted to cut the two surfaces from the bottom, excluding the lower mesh points. (see a in the att
ached image)
3 What I can't do is remove the ghost points after cutting, because I think they still influence the seat surface. I can't hide them with the “rebuild” command (see a in the attached image). They cannot be deleted
. You can use ShrinkTrimmedSurface, but the lines of points will still be on the surface, concentrated at the bottom. It would be better to make a new surface, add points and copy it to the side (see the _Forum Obj2Bend_Lara.3dm file).
.4 Redo the two surfaces: I can't even do something as simple as that. How do I divide the mesh points? (see c in the attached image)
Use draw_solid>Plane to make the first surface, then use add pt to add points. You can repeat add pt several times.
5 How can I keep the flow history so that I can still bend the shell by deforming the target surface after executing the command?
Normally, when the file is saved and then reopened, you can activate the points and deform them again.
You can use the attached files. See also the attached image.
Sorry, I'm an old French guy who doesn't know English.
Attachments:
_Forum Obj2Bend_3.1.3dm
_Forum Obj2Bend_Lara.3dm
Image Attachments:
Lara_help.jpg
From: MO (MO_TE)
Hi Lara,
The flow command affects the whole object. On complex objects, sometimes you need to separate the objects into parts, bend them separately, then reconstruct the spaces between them and connect them together.
You can still use different base and target faces in different positions in different steps. For example, deform the back part with base/target face behind the object, then deform the seat using a base/target face beneath it.
For this model, this time, I used an "L" shape base face to keep the back part standing still, yet I can change the seat as I want.

quote:
How do you retain the flow history?
To enable the history update, simply press the tab key and type "history," then press enter. Or, use the "History" tool in the UI. Select the resultant object (the object generated by the flow command) then press the "Enable Update" button.
Attachments:
_Forum Obj2Bend_03.3dm
Image Attachments:
_Forum Obj2Bend_03.png
From: Barry-H
Hi,
think flow is not needed you can get the results required from 2 curves.
The photo shows by rebuilding curves with less points you can loft them and
get the adjustments needed by manipulating the curve points.
Hope this is of some use.
Cheers
Barry

Attachments:
Chair Curves.3dm
Image Attachments:
Chair Curves.png