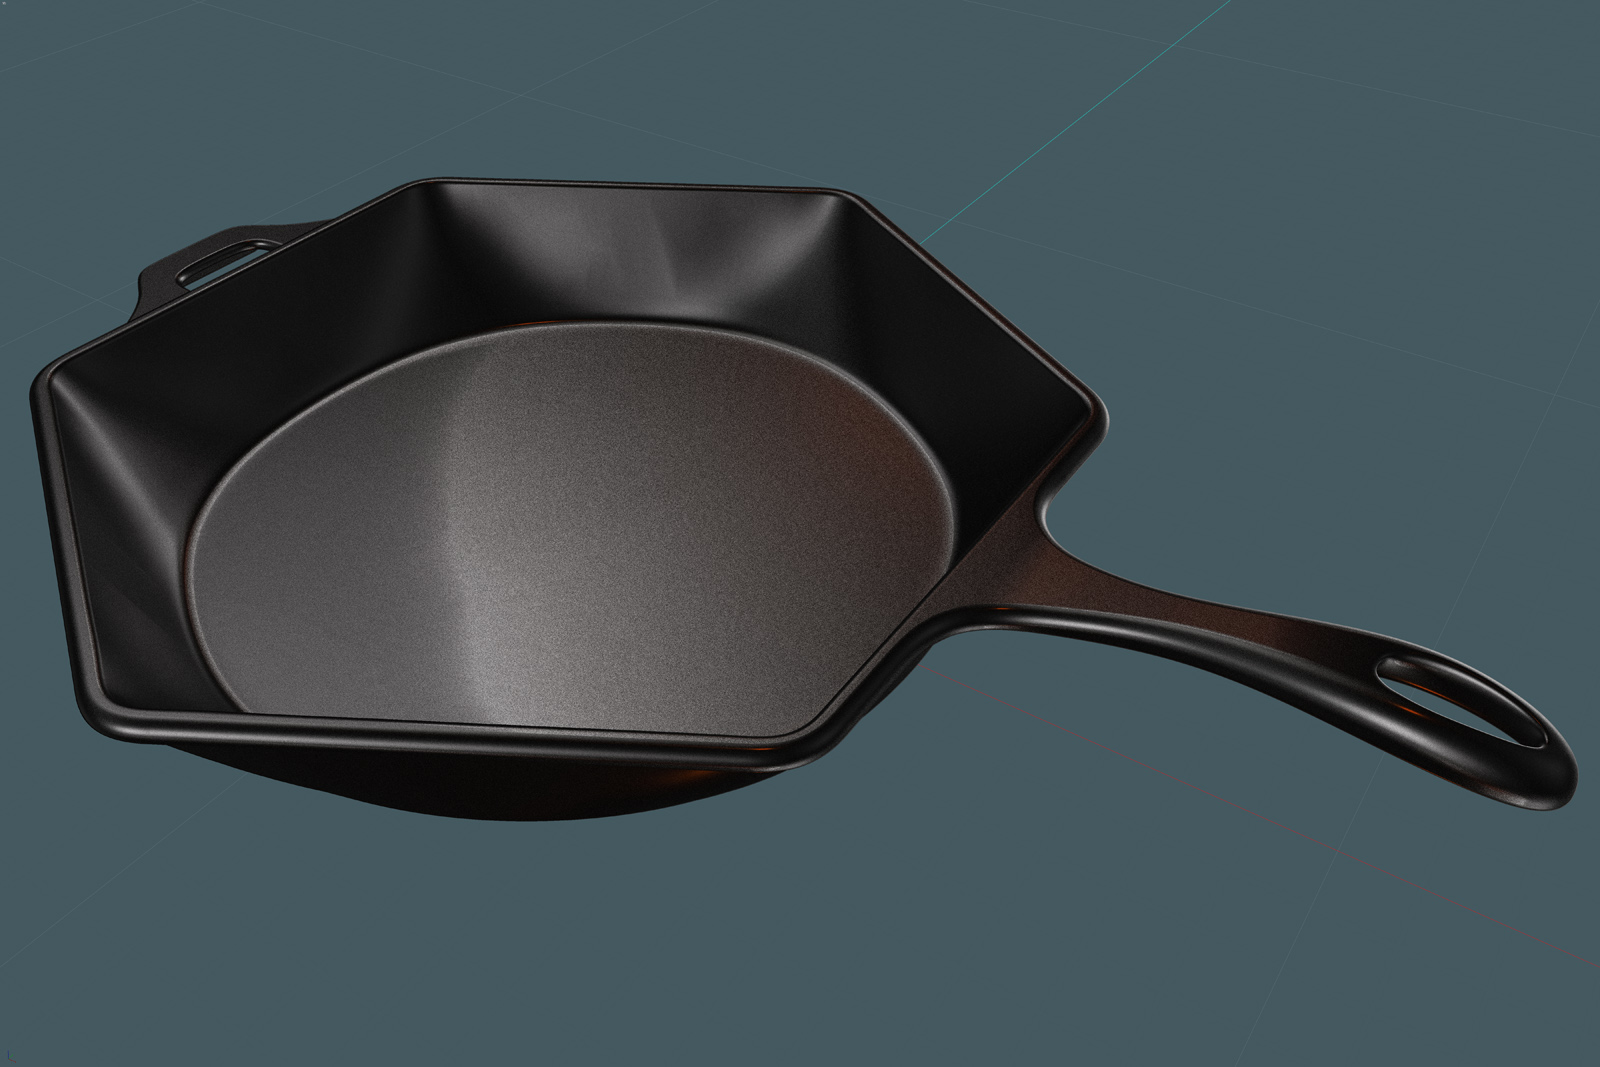
I placed the lip in an off-center position on purpose.
There is now a sharp recess formed. Delete this.
Smooth it over with a new "G2" Blend surface, and Join everything.
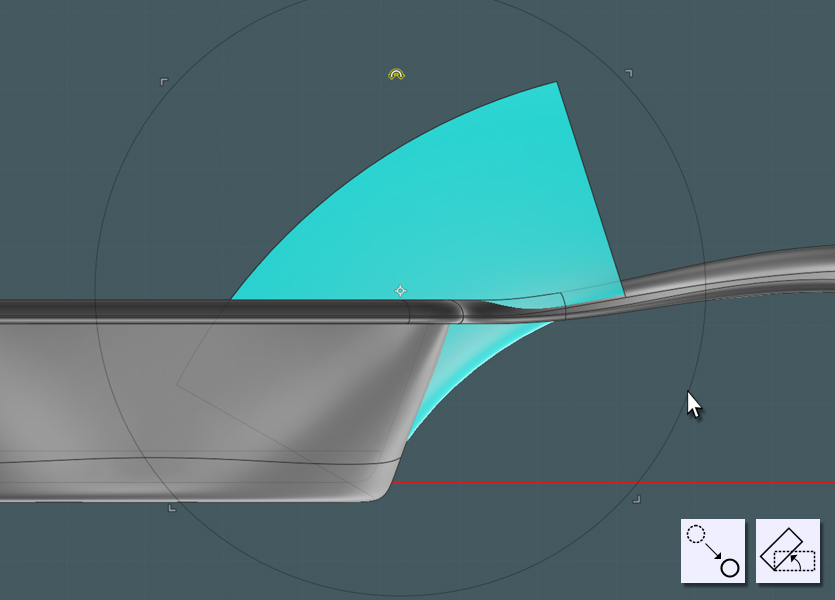
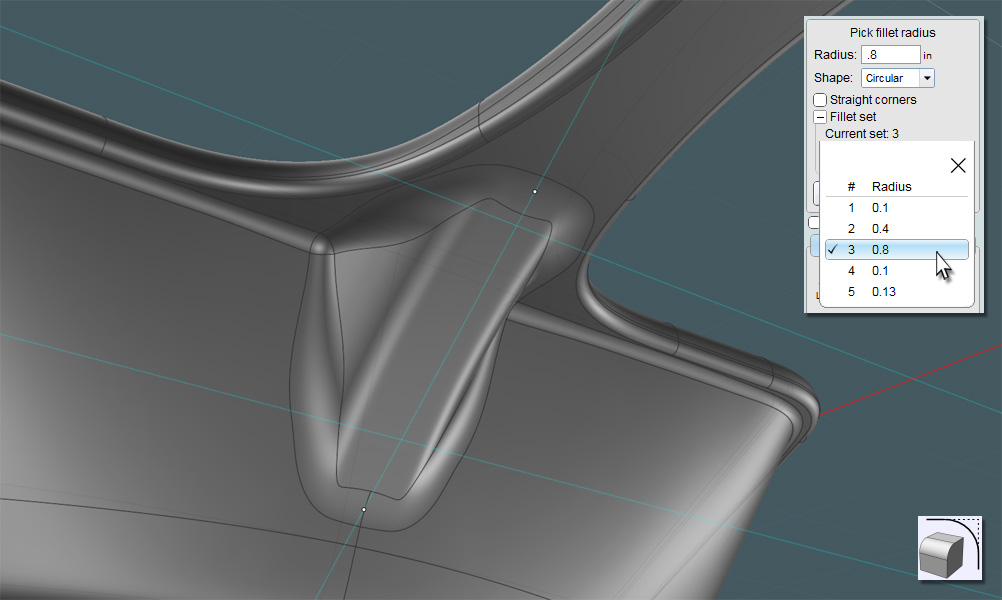
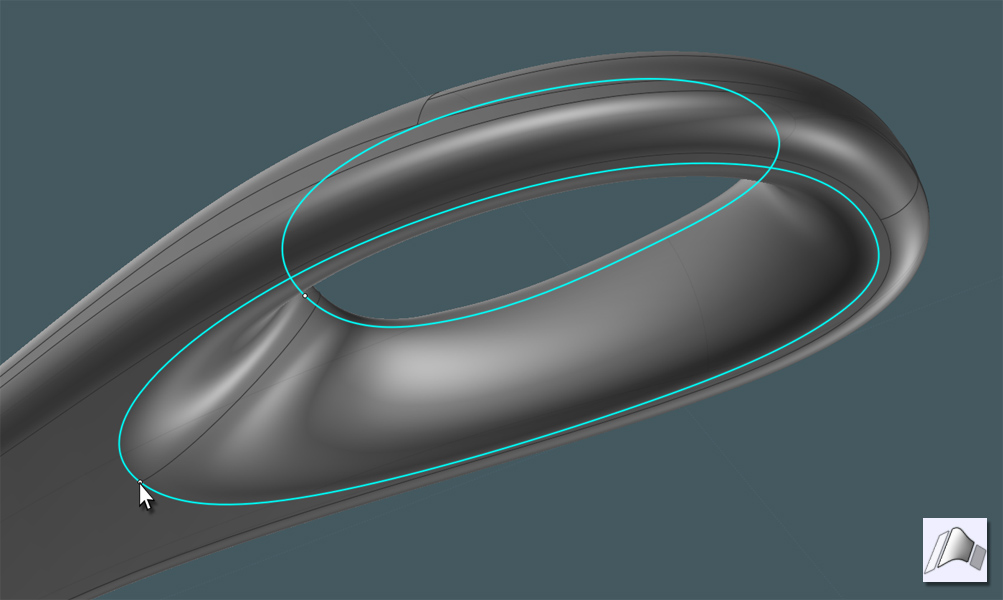
LET'S HAVE FUN WITH MOI3D's NEW VARIABLE FILLETS!
Select the top perimeter surface edges.
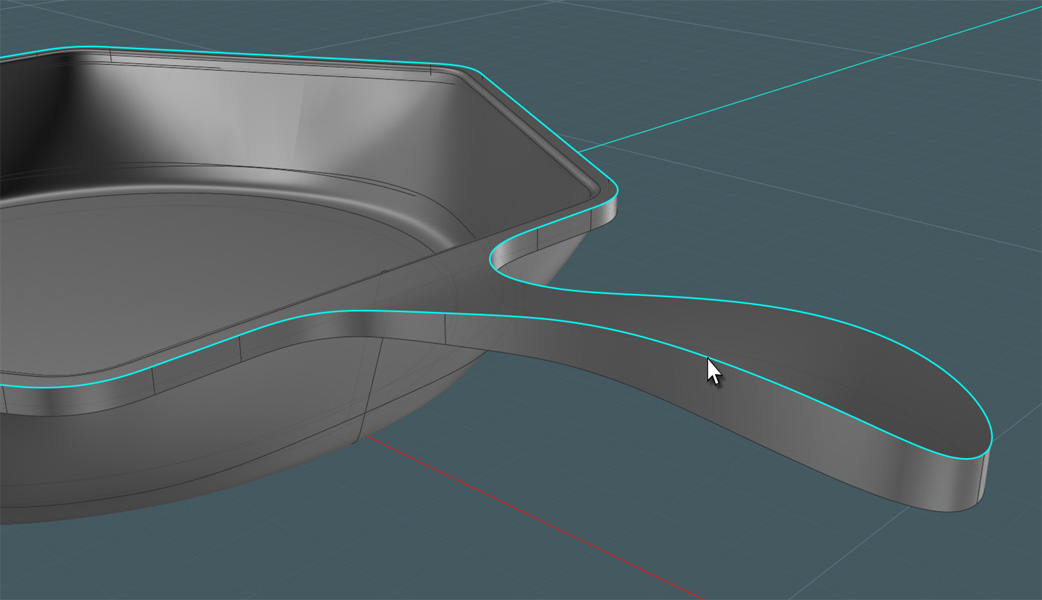
Start off with a nice radius, and leave yourself a little space on the bottom of the lip.
Experiment!!!
I can't really guarantee details here because Fillets are trial-and-mostly-error animals.
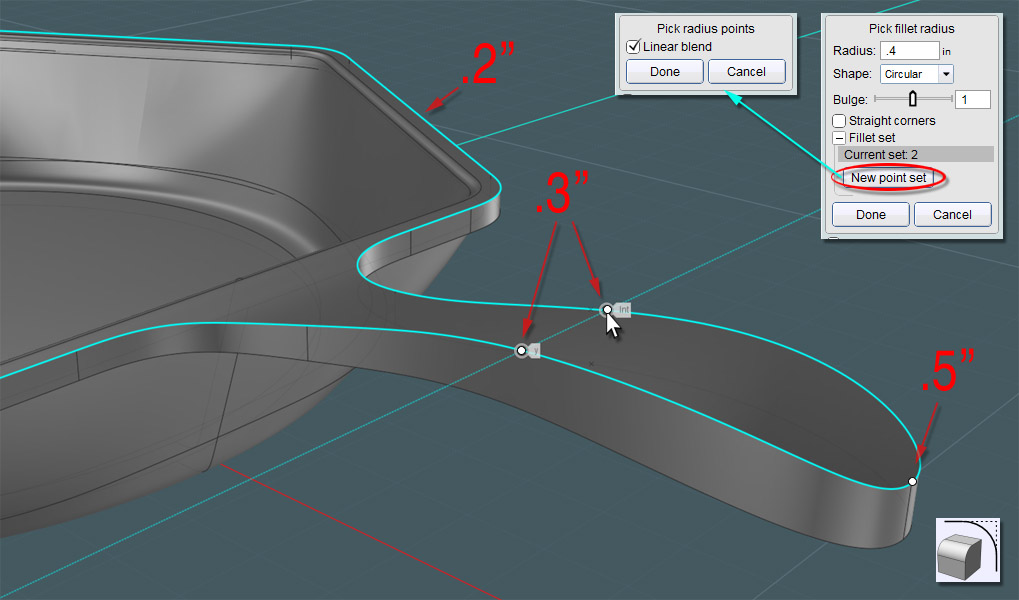
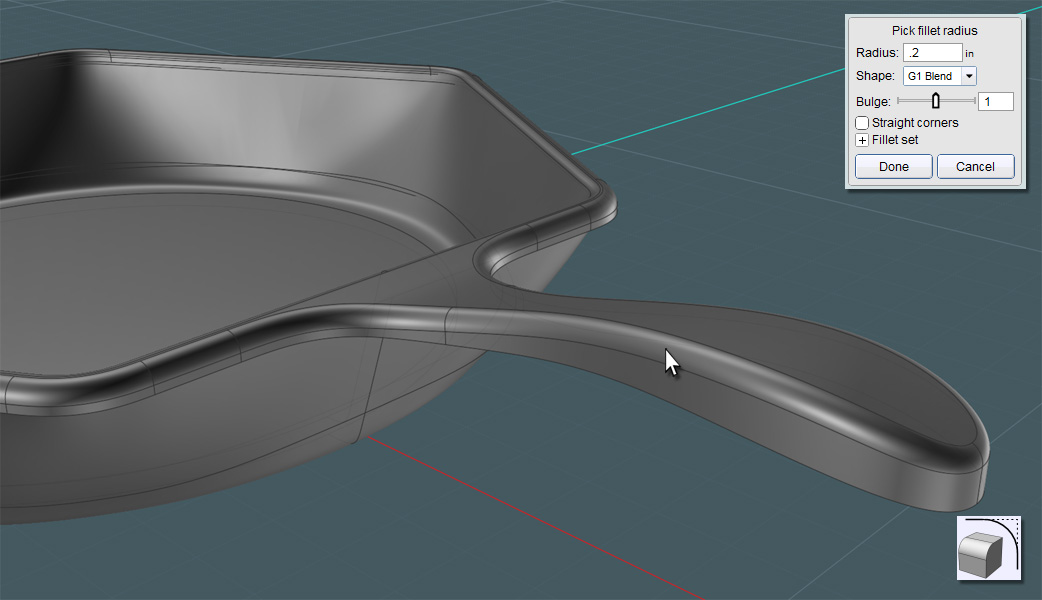
Create a smaller bottom Fillet. Notice how it wraps nicely around the whole skillet body.
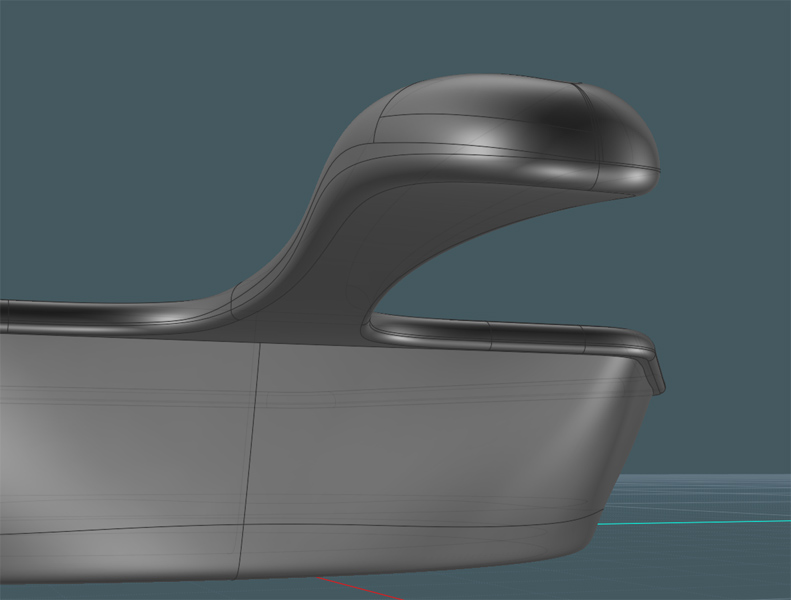
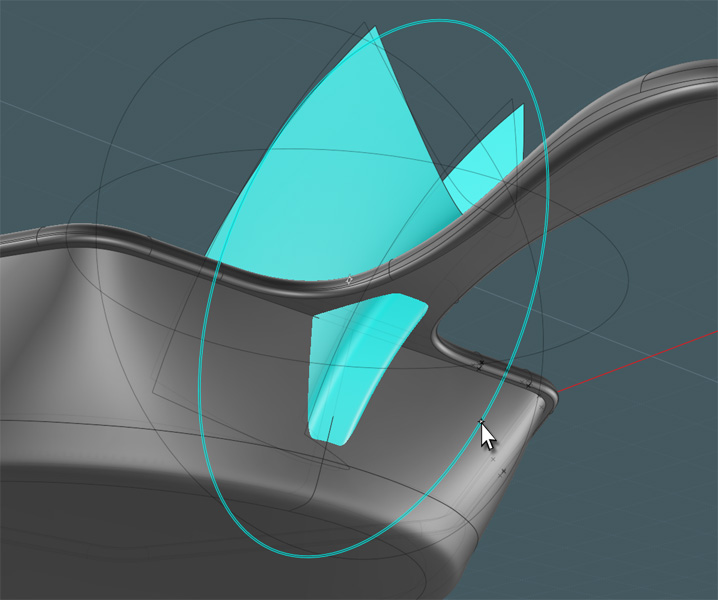
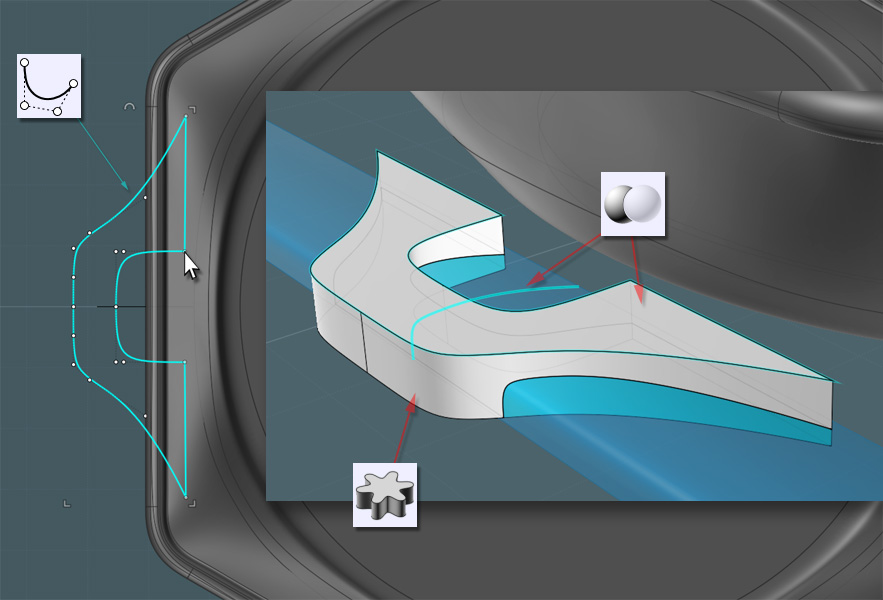
Okay... the area where the handle meets the pan is rather sterile.
So I'll add a "bridge" or "rib" to give the model more interest...
Make a profile shape...
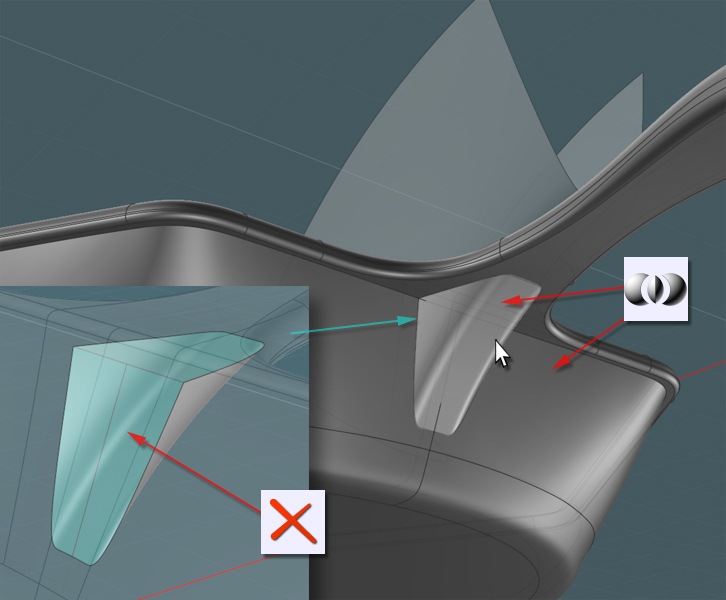
Do you want to not have an ugly seam present if you Sweep any shape using multiple Joined curves?
Just delete the adjoining control point!
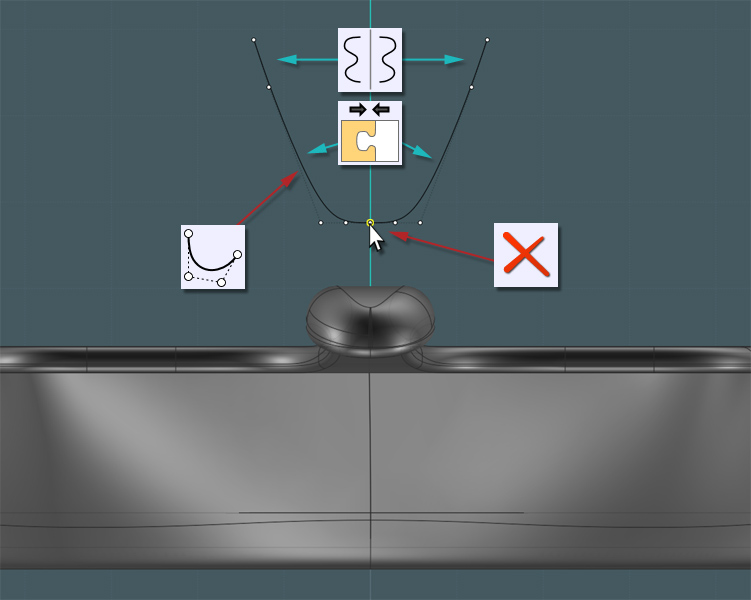
No explanation here... just Sweep the profile along a subtle Arc.
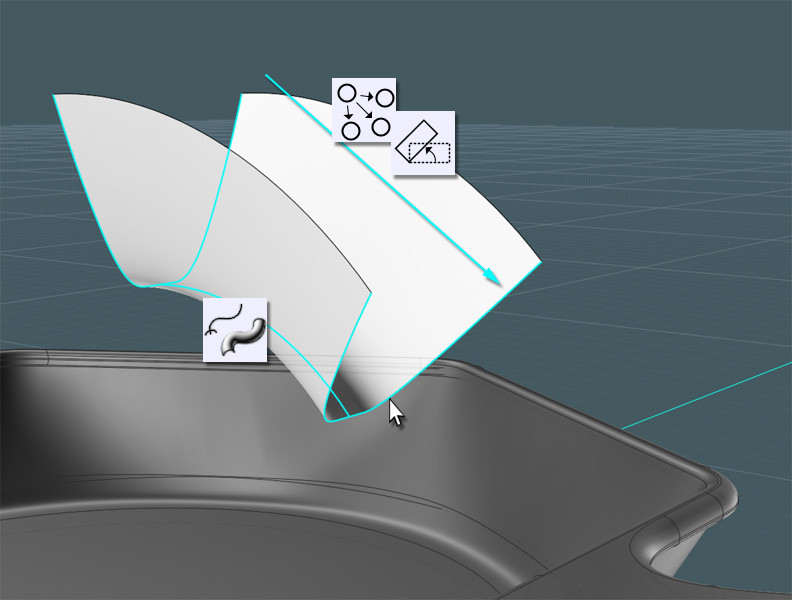
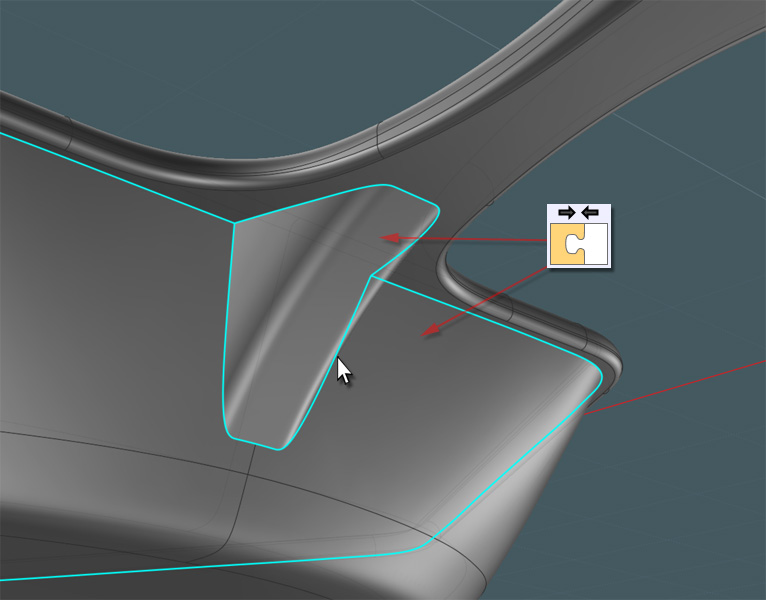
In the side view, you can laterally adjust the position and angle of the surface.
If you happen to select the rotation icon when the handlebars are active, if you go to Perspective View, you can play with these global rotation circles!
Adjust, giving you enough room for Fillets.
Here's a tricky part: When Michael releases the new selective-face Boolean option, this will be easier.
I found that not only did I have to use Boolean Merge, but I had to do to pre and post cutting and pasting to get what I needed.
Once you have your shapes cut, they will not Join until you remove the back-faces.
Now Join them together...
OH! You have to love the new Fillet!
The result was hard to figure out, and the result is kinda wonky, but I am happy with the result.
Let's make an apposing utility handle.
This feature allows you to hand the skillet from the other side and also facilitates in helping you lift the skillet with both hands if there's a lot of food inside.
Make a profile as shown and trim some of the bottom out to create an interesting flange.
Oh yes... More Fillets!
Don't Fillet the back parts so that you can better affix it to the skillet.
Move the handle near the top of the skillet... since this item is sand-casted, you cannot really have any odd objects jutting out on the side without some difficulty in manufacturing... but what do I know?
Notice my interesting dimples in the handle?

Boolean Union the handle to the skillet body and (try) to Fillet a nice transition.

The main handle needs a hole for hanging...
Draw two profile shapes.
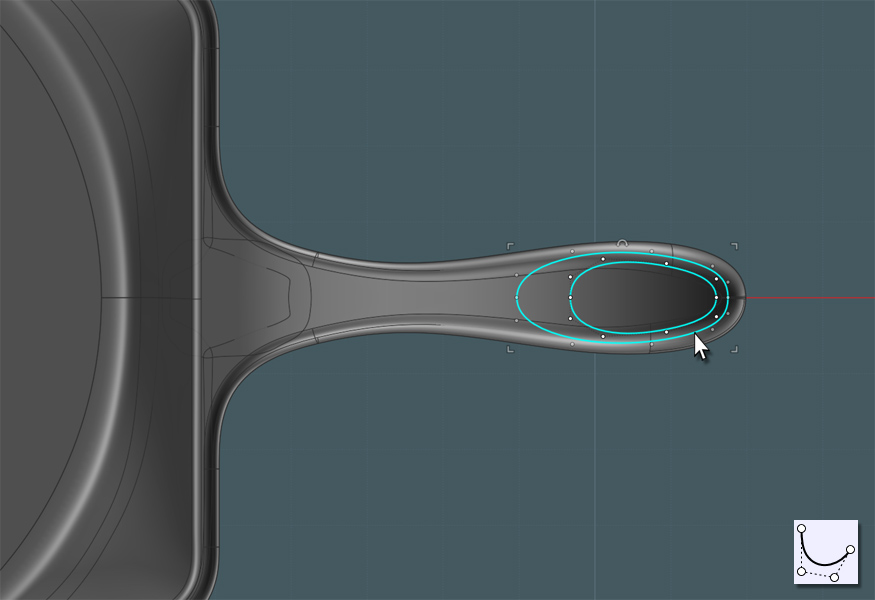
Use Trim to take their projections out of the handle's surfaces.
I put the smaller one on top.
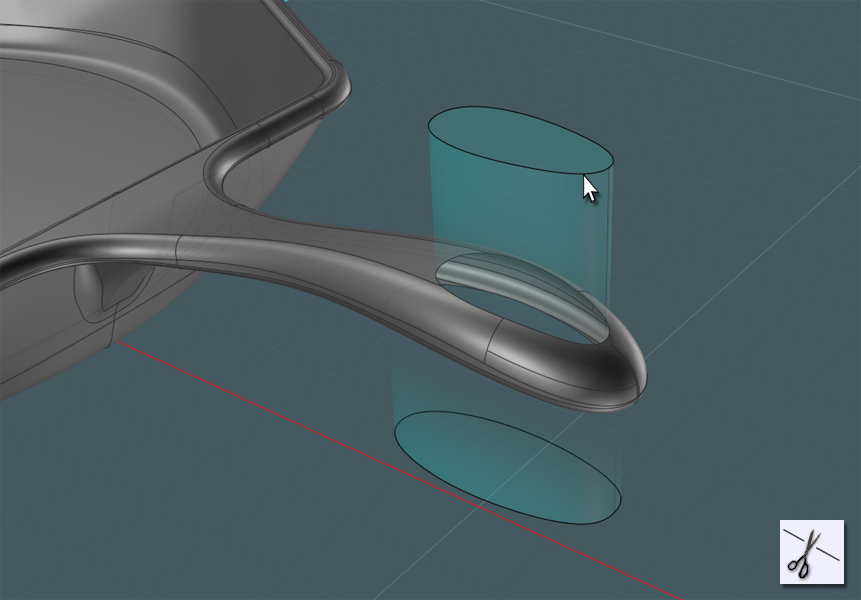
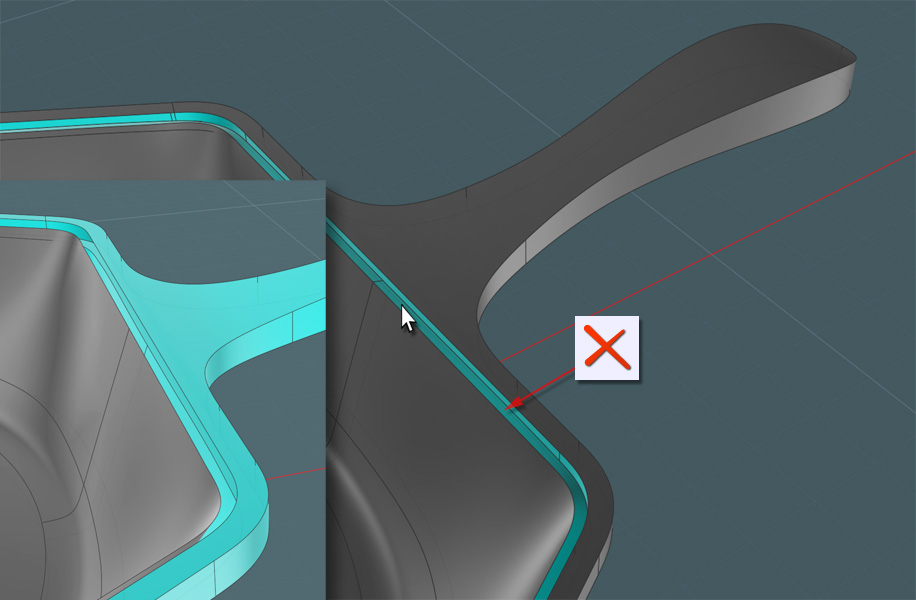
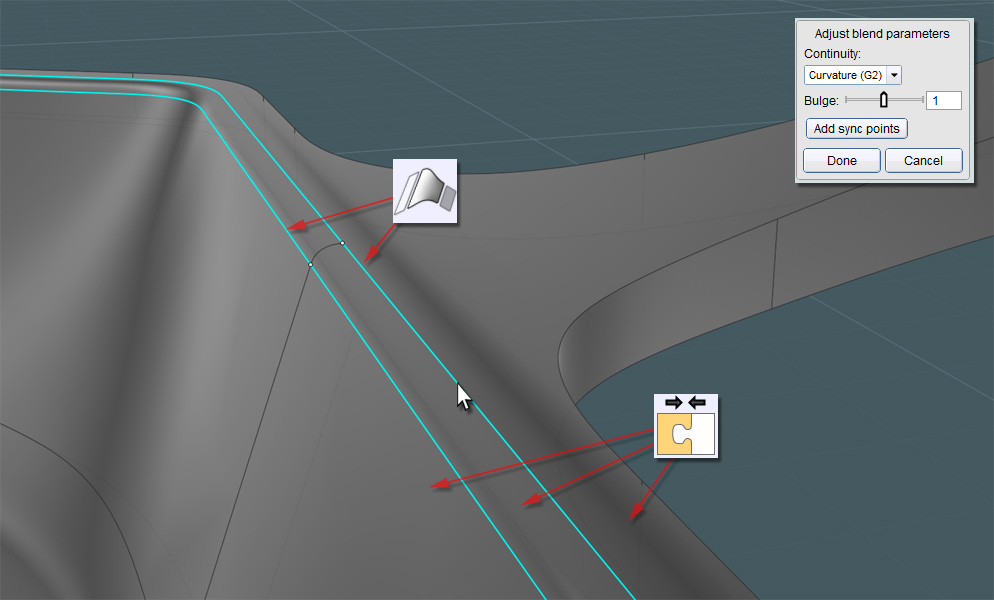
HEY! I failed to mention Moi3D's new Blend-to-Everything command!
Well, you can Blend on surface edges with seam-intersections included... you can also add adjustment points for fine-tuning in not-so-favorable situations.
Create a Blend between both holes - and Join all.
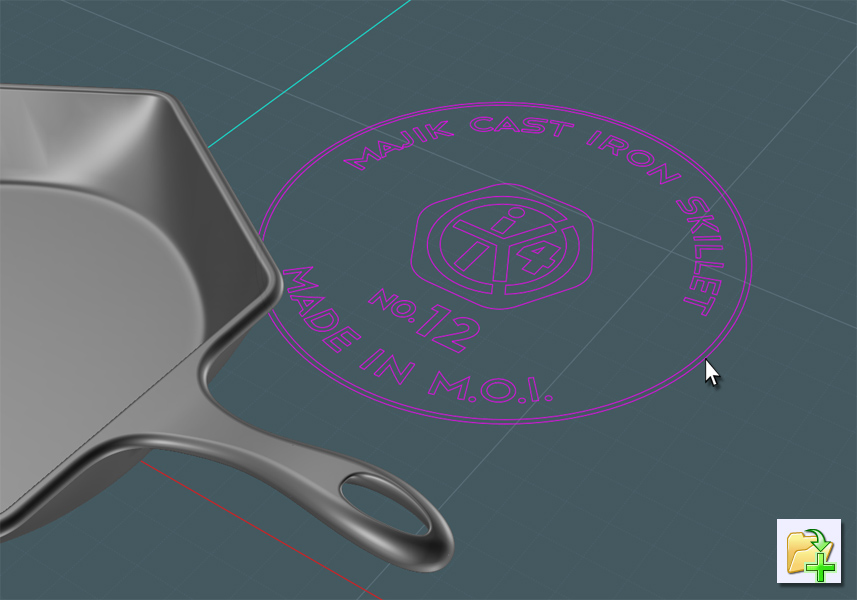
One nice feature of the Finex skillet that caught my eye was the bold engraving on the bottom.
So what I've done here was created a template in my vector graphics program and Imported it into my model.
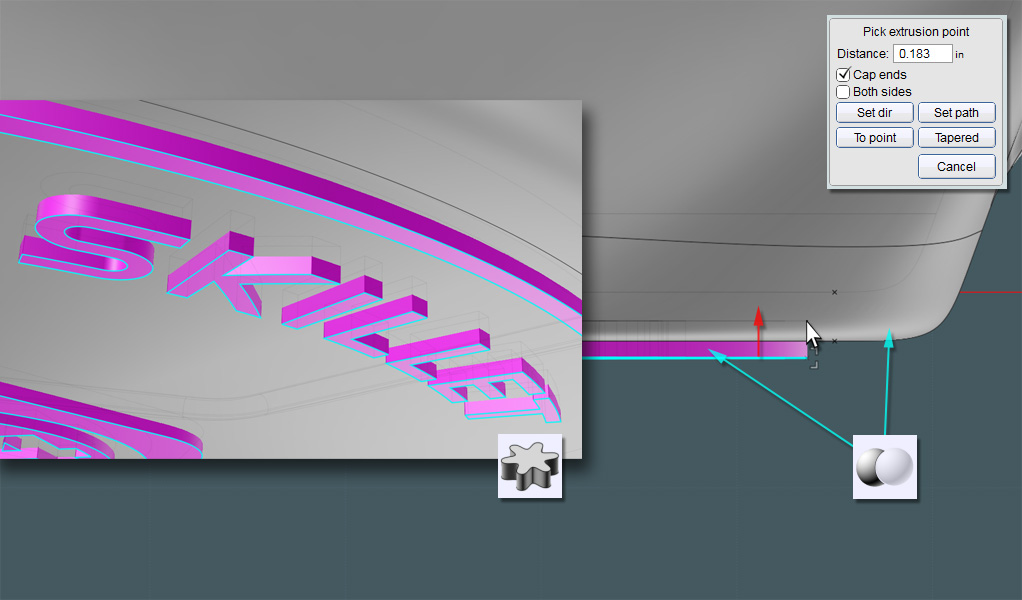
The following is not for novices!
First of all, make sure that your vector import objects are composed of very simple shapes and curves.
Try to eliminate small perturbances and tiny segment you'll have Michael pulling his hair out showing you close zoom-in you have have known better to find yourself. ;-)
Position then Extrude the template as a solid object into the body of the skillet solid.
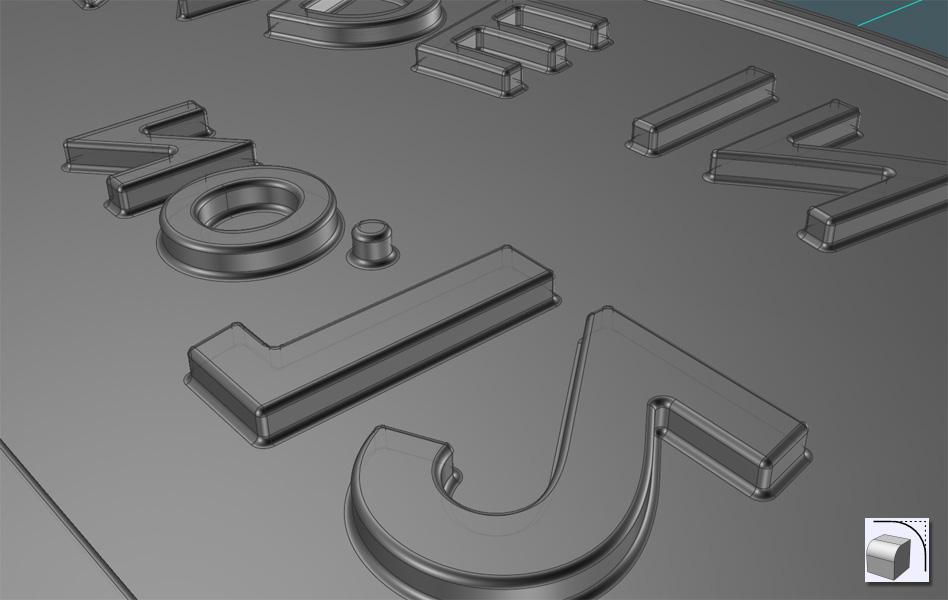
I used a very simple and small Fillet on the result.
Why Fillet something so intricate and tiny? ....Fantastic render results!!!
As you might be able to tell, I isolated the bottom circle surface to keep Moi3D from crying.
So here is the result!
This image was a composite in PhotoShop of different Lighting Options and a little noise added.
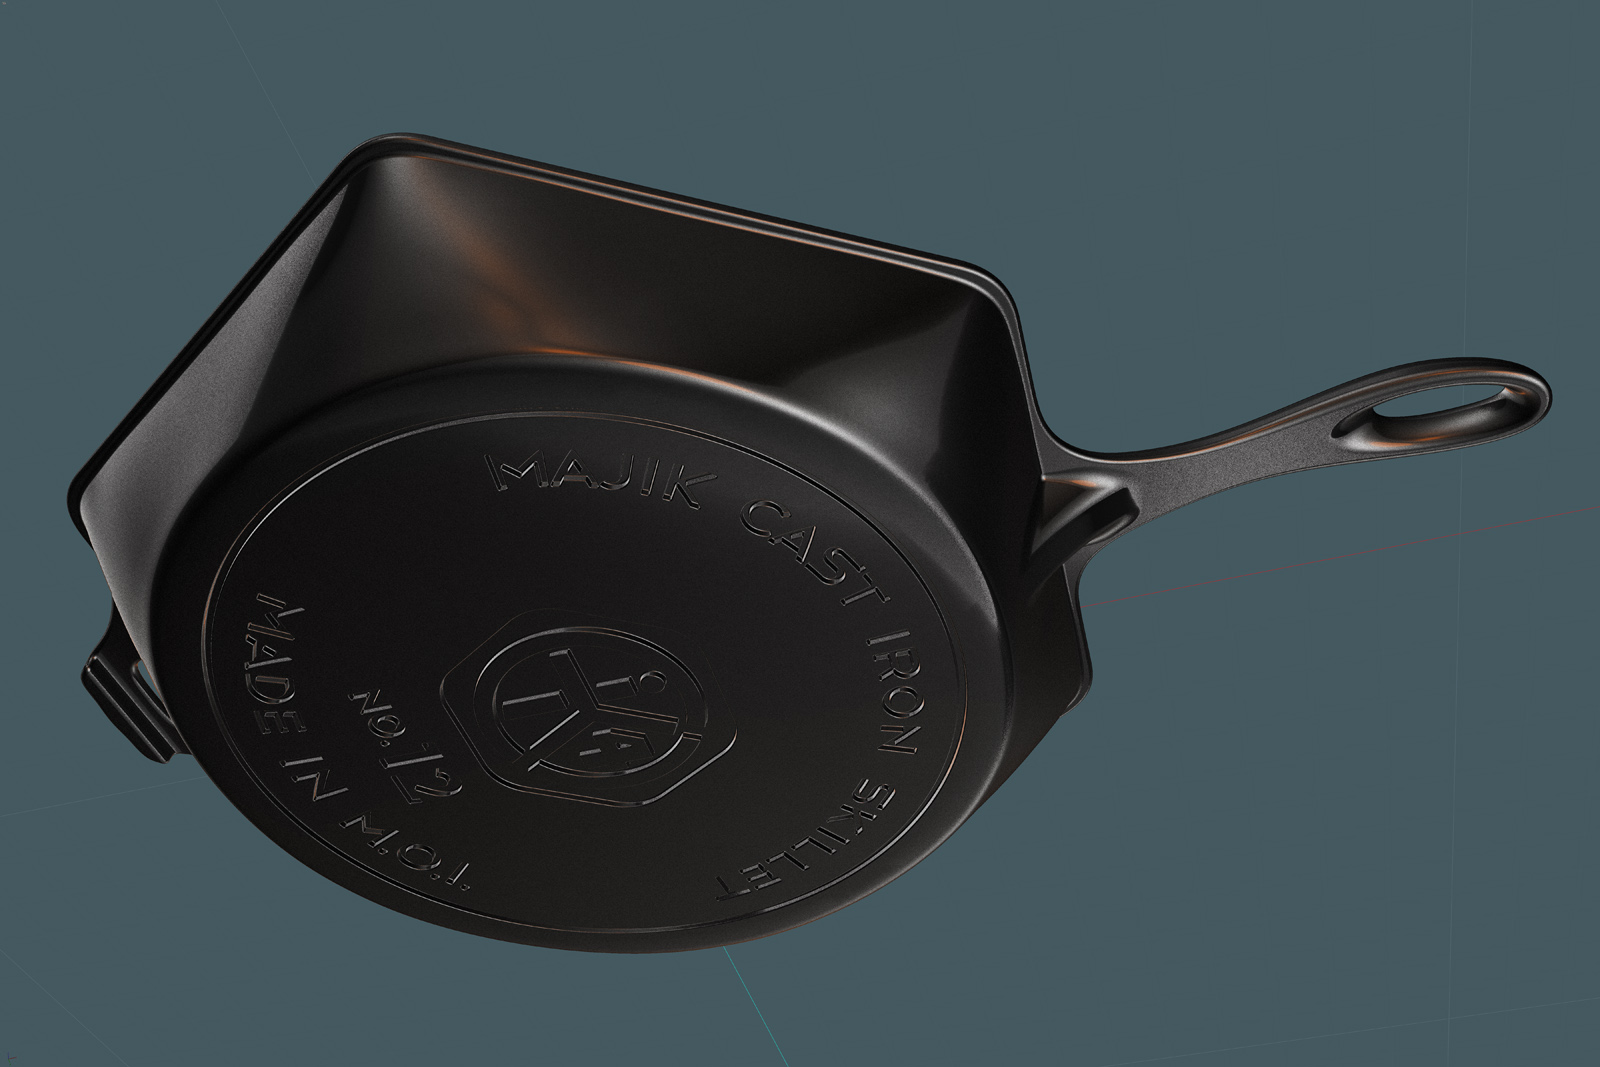
A very nice result!
This is a far cry from the engineering mastery of the Finex guys... I would advice ordering the real-deal.
In my opinion, why wouldn't any kitchen savvy person not consider such a nicely executed product?
Eat those amazing Variable-Fillets up modelers! Michael worked hard on them. ;-)