The new blend
All  1-2  3-17

Previous
Next
 From:  Michael Gibson
6085.3 In reply to 6085.1 
Hi Burr, that's great, I hope the blend update will be useful too!

> I had a question. Is it doing anything automatically with "C2" at the same time?
> (I am thinking in regards to the very end point (The touching point) of the blend)
> Maybe thats just part of the calc, then the resulting surface point structure is
> just the G2 ref?

Sorry I'm not quite sure what the question is exactly.... The blend surface is G2 where it touches the other surface, not C2, but usually what people are interested in is G1 or G2 which refers to continuity of geometric properties like tangent and curvature values. C1 and C2 means not only geometric continuity but also parametric continuity where basically some of the other underlying mathematical properties are equal at the juncture point. That's only really of interest to people doing pretty specialized things though.

- Michael
  Reply Reply More Options
Post Options
Reply as PM Reply as PM
Print Print
Mark as unread Mark as unread
Relationship Relationship
IP Logged

Previous
Next
 From:  BurrMan
6085.4 In reply to 6085.3 
I made an edit above while you were typing....

{EDIT] I think I made a mistake refering to it being set on a "point" as opposed to working in surfaces only. Disregard this part.

My bad.
  Reply Reply More Options
Post Options
Reply as PM Reply as PM
Print Print
Mark as unread Mark as unread
Relationship Relationship
IP Logged

Previous
Next
 From:  Michael Gibson
6085.5 In reply to 6085.2 
Hi Burr, yeah there's a new "Calculation failed" message that will be generated if nothing was able to be generated by a command.

It's not in place of any previous fillet behavior, it will still try to allow partial fillet results if possible. The new message will only be displayed if there was nothing generated at all from the current operation.

The way it used to work was that if you were inside the fillet command and adjusting the radius value, if the value you just entered did not produce a result nothing happened at all which means any previous result from prior radius tweaking would still be visible on the screen. That was kind of bad because it could sometimes be hard to tell whether you actually got a new result or not.

Now when it fails to generate something, it erases any previous result (so the original unfilleted object will be displayed) and will give that "Calculation failed" message so it's easy to know that you're not looking at some "stale" previous result.


The old way was particularly bad if things were taking a while and you left your desk while it was chugging away, when you got back to your desk if it didn't say "Calculating..." anymore you knew that it was finished but it was not entirely clear if it had failed or not. The new way should clear up that particular scenario I think.

Let me know if this doesn't make sense or doesn't match what you are seeing.


It should work like this in every command now, not just fillet - if the command did not generate any result you'll get that "Calculation failed" message.


- Michael
  Reply Reply More Options
Post Options
Reply as PM Reply as PM
Print Print
Mark as unread Mark as unread
Relationship Relationship
IP Logged

Previous
Next
 From:  Michael Gibson
6085.6 In reply to 6085.4 
Hi Burr,

> {EDIT] I think I made a mistake refering to it being set on a "point" as
> opposed to working in surfaces only. Disregard this part.

No problem! I'm not entirely certain if there's a question there for me to answer still? Am I supposed to disregard the whole question or only some particular part of the question?

- Michael
  Reply Reply More Options
Post Options
Reply as PM Reply as PM
Print Print
Mark as unread Mark as unread
Relationship Relationship
IP Logged

Previous
Next
 From:  Michael Gibson
6085.7 
Hi Burr, also let me know if you see "Calculation failed" pop up when it doesn't seem like it should.

It's implemented in a generic way where it kicks in for any command if it does not produce any geometry output, and maybe some particular command might trigger it inadvertently if it happens to do something that looks the same as a failed calculation while it is in its initialization step.

It could be possible that some command may need a little bit of tuning to deal with it.

- Michael
  Reply Reply More Options
Post Options
Reply as PM Reply as PM
Print Print
Mark as unread Mark as unread
Relationship Relationship
IP Logged

Previous
Next
 From:  Michael Gibson
6085.8 
Also the "Calculation failed" thing comes from this previous discussion here:
http://moi3d.com/forum/index.php?webtag=MOI&msg=5803.1

- Michael
  Reply Reply More Options
Post Options
Reply as PM Reply as PM
Print Print
Mark as unread Mark as unread
Relationship Relationship
IP Logged

Previous
Next
 From:  BurrMan
6085.9 In reply to 6085.6 
""""""I'm not entirely certain if there's a question there for me to answer still?""""""""

No, the first post was just an ataboy for the blend. The failed question negated any question with it.... It's done.

I questioned the new "failed mechanism", just so I understood your effort, and could pay attention in the future.

All's good now, Thanks.
  Reply Reply More Options
Post Options
Reply as PM Reply as PM
Print Print
Mark as unread Mark as unread
Relationship Relationship
IP Logged

Previous
Next
 From:  Mike K4ICY (MAJIKMIKE)
6085.10 
Michael,
Great work on the updated Blend feature!

Already I'm loving the ability to 'see' past intersections and segmented edge curves.
I'm excited by what I've tried!

A Question:
Do you think there may be the possibility of eventually adding an 'additional shapes' feature, or in other words; being able to tweak the to-and-from orientations specifically placed along the general sweep of the Blend surface?
By adding this new ability to span longer runs, there seems to be introduced the possibility of kinking due to a 'tracking' difference, as it were. Being able to say; "at this point, and at this point - the Blend's knots will definitely be placed." would be useful.

Thanks!
  Reply Reply More Options
Post Options
Reply as PM Reply as PM
Print Print
Mark as unread Mark as unread
Relationship Relationship
IP Logged

Previous
Next
 From:  Mike K4ICY (MAJIKMIKE)
6085.11 
Here you go!

Something for everyone...


A chocolaty Loft blended 'creamy smooth' to a strawberry N-Sided star patch (both trimmed) for a tasty Neapolitan tri-fecta. ;-)

You gotta love the vanilla layer...
  Reply Reply More Options
Post Options
Reply as PM Reply as PM
Print Print
Mark as unread Mark as unread
Relationship Relationship
IP Logged

Previous
Next
 From:  TpwUK
6085.12 In reply to 6085.11 
Very nice ... A confectioner as well as Moi guru :)

Martin Spencer-Ford
  Reply Reply More Options
Post Options
Reply as PM Reply as PM
Print Print
Mark as unread Mark as unread
Relationship Relationship
IP Logged

Previous
Next
 From:  Michael Gibson
6085.13 In reply to 6085.10 
Hi Mike,

> Do you think there may be the possibility of eventually adding an 'additional shapes' feature,
> or in other words; being able to tweak the to-and-from orientations specifically placed along
> the general sweep of the Blend surface?

You mean like being able to synchronize specific areas together to control how the shapes are connected? Yup, that's on my todo list.


> By adding this new ability to span longer runs, there seems to be introduced the
> possibility of kinking due to a 'tracking' difference, as it were. Being able to say; "at this point,
> and at this point - the Blend's knots will definitely be placed." would be useful.

If you have any particular example files where this would have helped can you please send them, they could be helpful for testing.

- Michael
  Reply Reply More Options
Post Options
Reply as PM Reply as PM
Print Print
Mark as unread Mark as unread
Relationship Relationship
IP Logged

Previous
Next
 From:  Mike K4ICY (MAJIKMIKE)
6085.14 In reply to 6085.13 
Hi Michael,

Here is one small example:

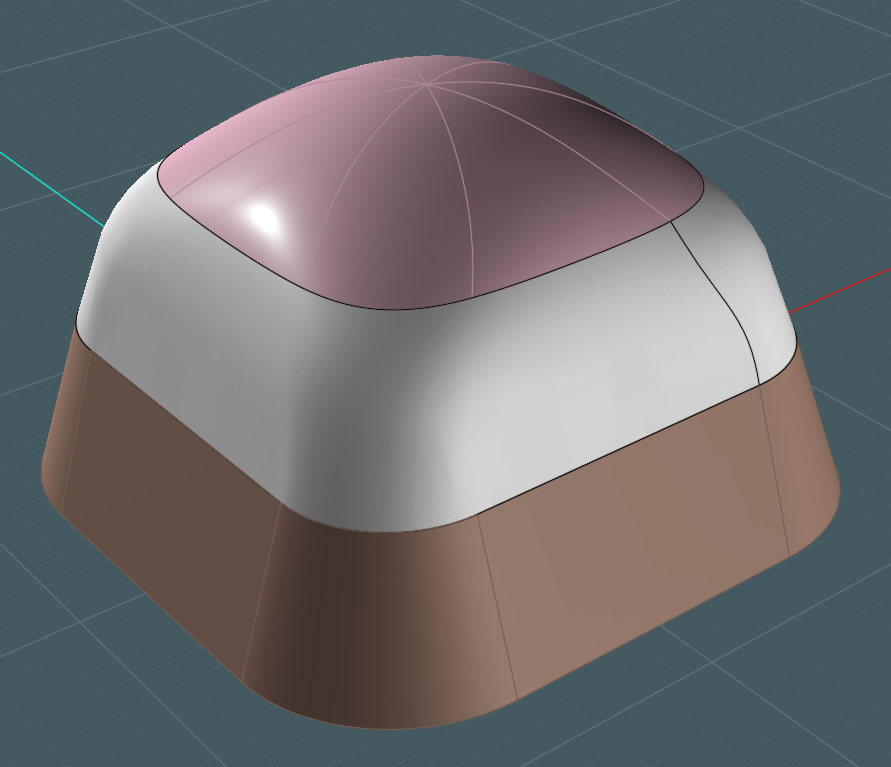
I have a lofted area that is blended into a trimmed shape.

Where ever the control points are placed, the resultant surface pretty much does what you want in that approximate area, but sometimes has to negotiate tight bends and often forms kinks.

Here's Blend...

Here is an "artist's rendition" of added Blend synchronization controls, (or "shapes" as Rhino calls them.)

Here's Blend on drugs. (the prescribed kind) ;-)

I know this would probably work, because my usual method involves Trimming the edge curves to form smaller blend panels, which have to sometimes be "scallop blended" between each other.


Speaking of the Trim command; it has a button to [Add Trim Points] and then gives you a picker... perhaps adding control points to Blend could be done in like fashion.

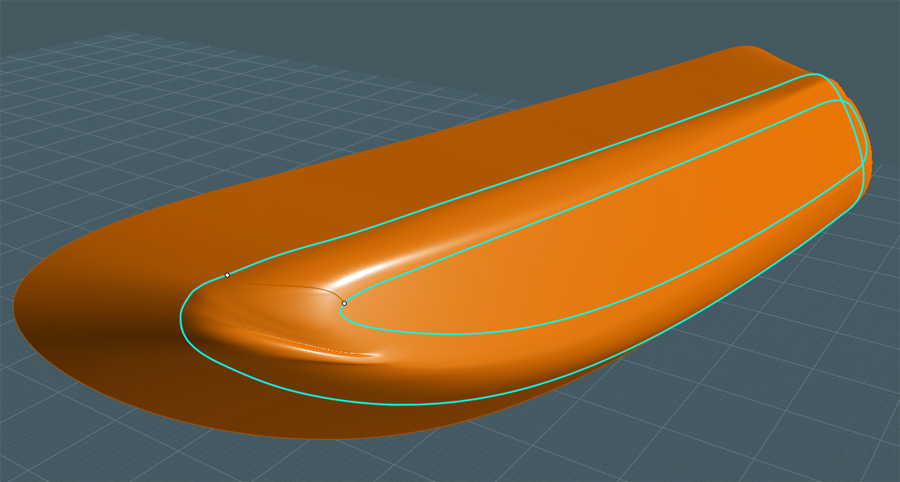
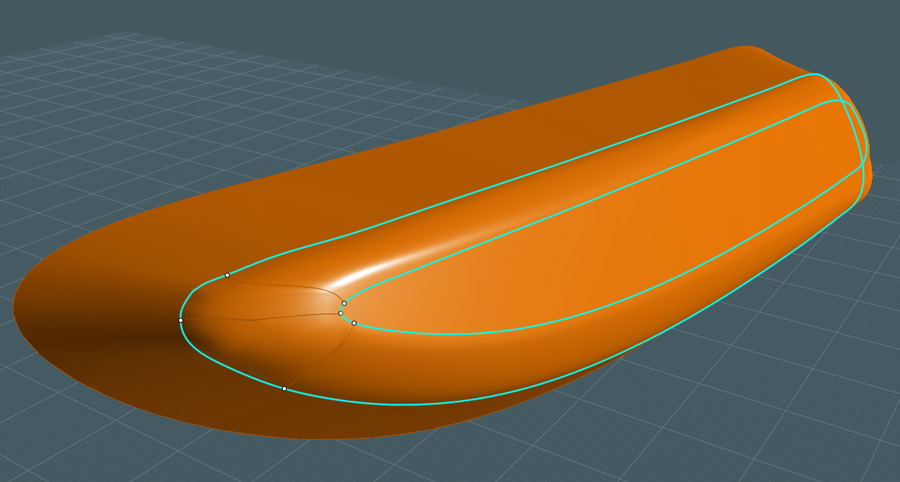
Here's an example to show the 'not so clean' Blend result:
http://k4icy.com/Moi3D_Tutorials/blend_control_ex.3dm

Yes, the edges are wiggly and the G2 Blend was probably too sharp, plus the to and from shapes have a great deal of difference between them with one being sharper... but I think this ability would help, as they say, help "keep a tight formation."

Thanks for including that one on your laundry list... Honest - I'll promise to feed it, water it and take good care of it. ;-)

And again, thanks for the new feature, I've been playing with it all day. In fact, I keep catching myself wanting to "Merge" and "AddTrimPoints" to edges.
This one ALSO will blend from touching edge curves on surface elements that are not even Joined! AWESOME!


Oh... and would it be beneficial to add independent Bulge control to each sync pair?

EDITED: 4 Aug 2013 by MAJIKMIKE

  Reply Reply More Options
Post Options
Reply as PM Reply as PM
Print Print
Mark as unread Mark as unread
Relationship Relationship
IP Logged

Previous
Next
 From:  Michael Gibson
6085.15 In reply to 6085.14 
Hi Mike, thanks for the example file, that's a good case for me to test with.

There's another thing that can help with bunching up blends like that possibly even more than adding "sync points" which is what I called "Planar sections" in Rhino. That's an option that changes how the blend cross sections are formed. In the default mode each blend cross section tries to come off perpendicular to the curve tangent of each edge curve. When the edge are kind of wiggly it makes the sections kind of writhe around and that creates lumpy shapes.

Planar sections makes each blend cross section to be in one single plane, it's sort of like what is called a "pencil of planes" which is like a bunch of planes rotating around one single direction, so you have to pick a sort of "up" direction that's used to orient the family of planes that are used.

That then makes each blend section to be sort of more orderly and not jiggle around as much when there are little wiggles in the edge curves.


You'll probably need that option as well in order to make this particular blend example behave very well.

- Michael
  Reply Reply More Options
Post Options
Reply as PM Reply as PM
Print Print
Mark as unread Mark as unread
Relationship Relationship
IP Logged

Previous
Next
 From:  Michael Gibson
6085.16 In reply to 6085.14 
Hi Mike, also:

> In fact, I keep catching myself wanting to "Merge" and "AddTrimPoints" to edges.

Yup, this update should really help cut down on needing to do those extra "prepare to blend" steps!


> Oh... and would it be beneficial to add independent Bulge control to each sync pair?

That could certainly be useful but it would involve a quite substantial increase in the amount of work involved to implement it... So probably farther off in the future than just having sync points to start with.

- Michael
  Reply Reply More Options
Post Options
Reply as PM Reply as PM
Print Print
Mark as unread Mark as unread
Relationship Relationship
IP Logged

Previous
 From:  Mike K4ICY (MAJIKMIKE)
6085.17 In reply to 6085.16 
Thanks for the insight, Michael!

"Planar Sections" to force a more orderly Blend result... that would be interesting.
  Reply Reply More Options
Post Options
Reply as PM Reply as PM
Print Print
Mark as unread Mark as unread
Relationship Relationship
IP Logged
 

Reply to All Reply to All


Show messages: All  1-2  3-17