How to make this figure?
 1  2-21  22-34

Previous
Next
 From:  Michael Gibson
5935.2 In reply to 5935.1 
Hi mir4ea - it's probably better to make a more simplified full object and then trim it to make a hole in it in this red area here:


The more regular shaped you make your base shape will tend to be easier to make it smooth. If you try to initially build a surface that tries to "go around" a hole it will usually put more stress on the surface construction and make it more difficult to make a nice quality surface.

- Michael
Attachments:

  Reply Reply More Options
Post Options
Reply as PM Reply as PM
Print Print
Mark as unread Mark as unread
Relationship Relationship
IP Logged

Previous
Next
 From:  Frenchy Pilou (PILOU)
5935.3 In reply to 5935.1 
Why your object is out of the grid at the end of the space?
We must recentered it at each time, so time consumming! :)

I redraw one curve with "rebuild" for have less points

Seems Networks works fine :)


EDITED: 3 Jun 2013 by PILOU

  Reply Reply More Options
Post Options
Reply as PM Reply as PM
Print Print
Mark as unread Mark as unread
Relationship Relationship
IP Logged

Previous
Next
 From:  Andrei Samardac
5935.4 In reply to 5935.3 
Thank you, but what do you mean "Why your object is out of the grid at the end of the space? We must recentered it at each time, so time consumming! :)"
  Reply Reply More Options
Post Options
Reply as PM Reply as PM
Print Print
Mark as unread Mark as unread
Relationship Relationship
IP Logged

Previous
Next
 From:  Frenchy Pilou (PILOU)
5935.5 In reply to 5935.4 
Do you think that is easy to work with such position ? ;)
3 moves are necessary for have a correct position ;)

Very more easy when all is align on the grid on the 4 views !


EDITED: 3 Jun 2013 by PILOU

  Reply Reply More Options
Post Options
Reply as PM Reply as PM
Print Print
Mark as unread Mark as unread
Relationship Relationship
IP Logged

Previous
Next
 From:  Michael Gibson
5935.6 In reply to 5935.1 
And also just in general areas of tight transition bends like these here:


can be easier to initially model as sharp and then use filleting to generate the rounded transition parts instead of trying to build a single surface that goes through multiple transition areas like that.

Take a look at the attached 3DM file which shows a progression from doing an initially sharp cornered shape, then applying fillets, then cutting with a side profile. Hope that might be close to what you are looking for.

- Michael

  Reply Reply More Options
Post Options
Reply as PM Reply as PM
Print Print
Mark as unread Mark as unread
Relationship Relationship
IP Logged

Previous
Next
 From:  Andrei Samardac
5935.7 In reply to 5935.5 
ok) This just a one detail of big model so it stay on it's position, I just remove all stuff around it and leave it as it was.
  Reply Reply More Options
Post Options
Reply as PM Reply as PM
Print Print
Mark as unread Mark as unread
Relationship Relationship
IP Logged

Previous
Next
 From:  Andrei Samardac
5935.8 In reply to 5935.6 
Thank you Michael, could you pleas help me make this figure, I can do it with last method you showed with fillets, but how to make it with network?

EDITED: 20 Jul 2013 by ANDREI SAMARDAC

  Reply Reply More Options
Post Options
Reply as PM Reply as PM
Print Print
Mark as unread Mark as unread
Relationship Relationship
IP Logged

Previous
Next
 From:  Frenchy Pilou (PILOU)
5935.9 In reply to 5935.7 
<< This just a one detail of big model so it stay on it's position

Sure but you can open an another session in the same time and make Ctrl +C / Ctrl + V between the 2 sessions!
So you have your entiere modele in one, the "extract little object" in the another one where you have centered it on the grid!
Not a big deal to reput on the good position when you come back on the big object! One click on a specific snap point! :)
More easy working ;)
  Reply Reply More Options
Post Options
Reply as PM Reply as PM
Print Print
Mark as unread Mark as unread
Relationship Relationship
IP Logged

Previous
Next
 From:  Andrei Samardac
5935.10 In reply to 5935.9 
Good, just have a lot of thoughts in my head and didn't think about this)
  Reply Reply More Options
Post Options
Reply as PM Reply as PM
Print Print
Mark as unread Mark as unread
Relationship Relationship
IP Logged

Previous
Next
 From:  Frenchy Pilou (PILOU)
5935.11 In reply to 5935.10 
No problemo! :)
---
Pilou
Is beautiful that please without concept!
My Gallery
  Reply Reply More Options
Post Options
Reply as PM Reply as PM
Print Print
Mark as unread Mark as unread
Relationship Relationship
IP Logged

Previous
Next
 From:  Michael Gibson
5935.12 In reply to 5935.8 
It doesn't work very well to make it with Network - you're trying to force the network through a lot of changes in shape. When you try to force one single surface construction through a lot of shape changes it becomes difficult to make things smooth, the surface is trying to do too many things all at once.

You should generally try to build surfaces that are more like one big sheet of one generally common shape to the sheet, then more tightly curved transitions between them are fillets or blends, usually not a part of just one single surface operation.

If you want to do it in a surfacing way you could try something like build a couple of different separate pieces and then use Blend between them.

Other things that can help with Network are - make sure you're using v3 because there have been improvements in that area, and try to make your pieces touch each other more precisely rather than having gaps and overshoots where cross sections come together.

It usually just does not work very well to try to build a surface that's going through multiple shape changes in one single surfacing operation though.

And also like I mentioned previously the more regular you make your shape can help as well, so you'd probably want to make it a bit larger probably with vertical profiles and then cut away material from the side.

- Michael
  Reply Reply More Options
Post Options
Reply as PM Reply as PM
Print Print
Mark as unread Mark as unread
Relationship Relationship
IP Logged

Previous
Next
 From:  Michael Gibson
5935.13 In reply to 5935.8 
Hi mir4ea,

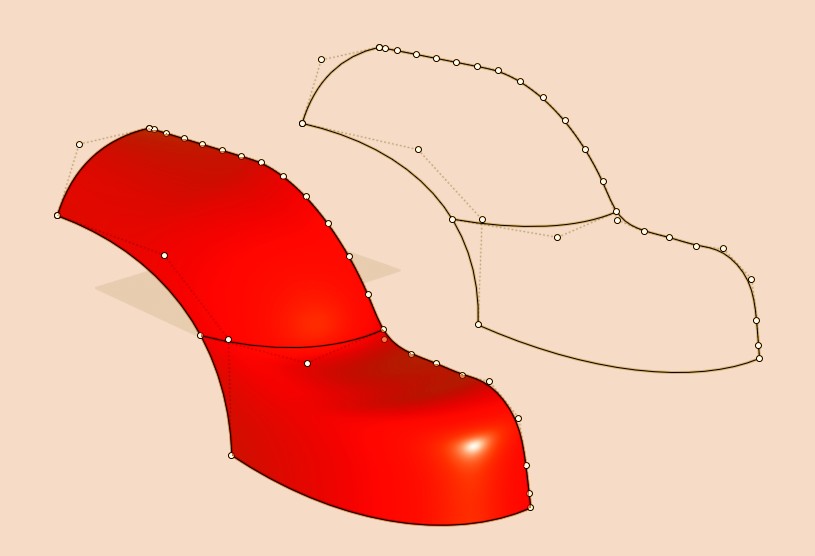
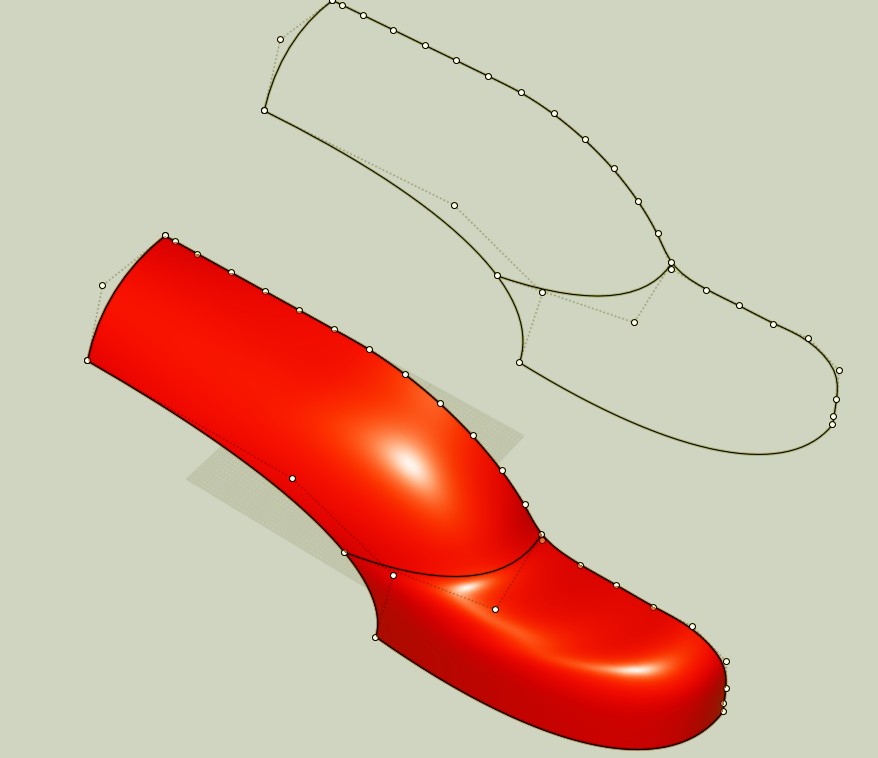
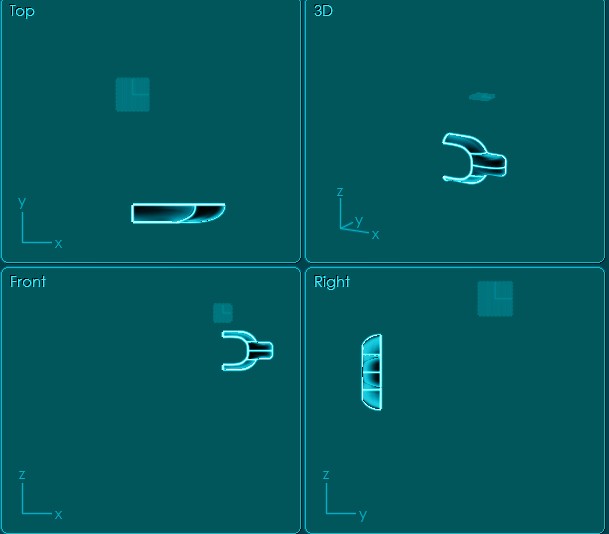
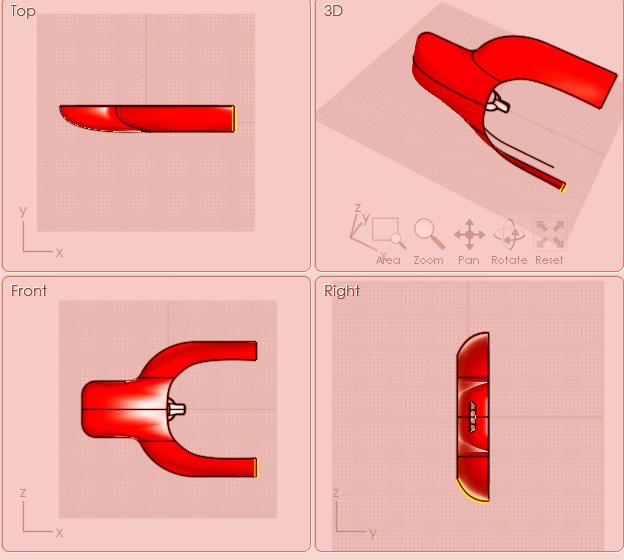
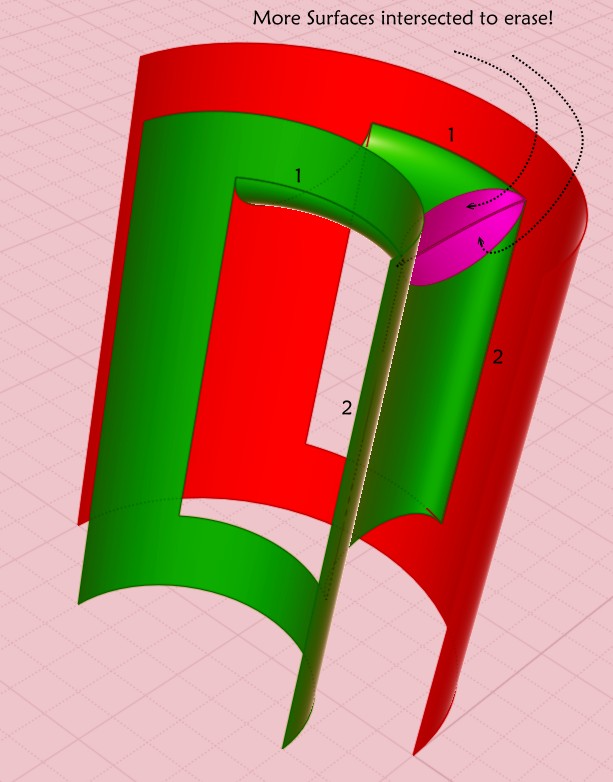
re: attachment tmp3.3dm - that's an even more significant example of trying to do too many shape changes in one single surfacing operation...

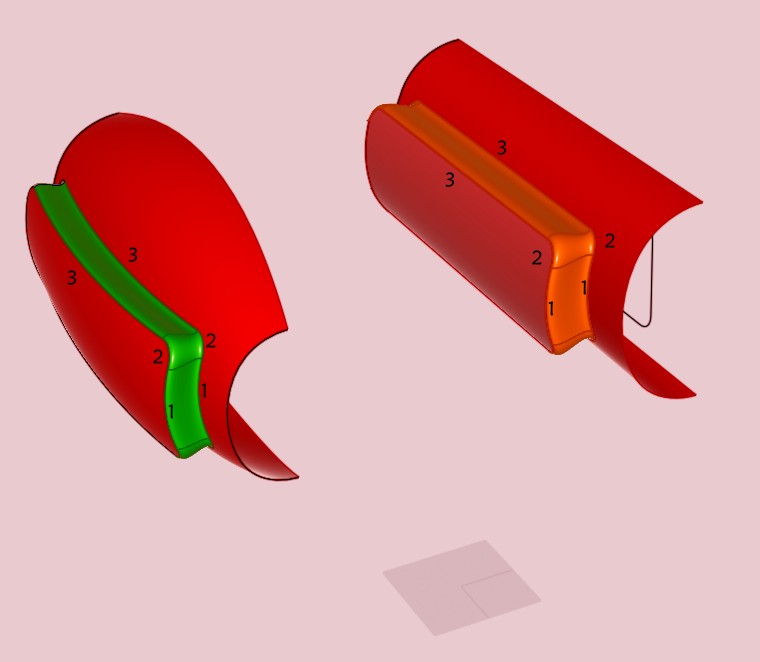
You've got to break things down into smaller components than that, probably something like a base rail revolve to make main shape, some indented areas probably done by booleaning away some swept shapes and then doing fillets to smooth out the cuts.

When using a surfacing command, the surface that is generated should be more of one single common element throughout the form, if you have tight bends in it, that's usually where you should be having fillets or blends between 2 different broadly shaped surfaces instead of trying to build it in one single surface creation command.

- Michael
  Reply Reply More Options
Post Options
Reply as PM Reply as PM
Print Print
Mark as unread Mark as unread
Relationship Relationship
IP Logged

Previous
Next
 From:  Michael Gibson
5935.14 In reply to 5935.10 
Hi mir4ea, also re: attachment tmp3.3dm - just in general the more that your shape becomes a kind of melty blobby shape and not very strongly defined primarily by side profiles, it becomes a better fit for doing in a polygon modeling program using sub-d smoothing rather than using NURBS modeling for it.

- Michael
  Reply Reply More Options
Post Options
Reply as PM Reply as PM
Print Print
Mark as unread Mark as unread
Relationship Relationship
IP Logged

Previous
Next
 From:  Andrei Samardac
5935.15 In reply to 5935.12 
Thanx, starting to understand.
I break this figure on a parts, and starting to make it than i meat this problem
I can not join blanded surface on first figure? On second blend works well

EDITED: 20 Jul 2013 by ANDREI SAMARDAC

  Reply Reply More Options
Post Options
Reply as PM Reply as PM
Print Print
Mark as unread Mark as unread
Relationship Relationship
IP Logged

Previous
Next
 From:  Andrei Samardac
5935.16 In reply to 5935.15 
I solve this problem by using network to make surface between 2 blends... Is it other way?
  Reply Reply More Options
Post Options
Reply as PM Reply as PM
Print Print
Mark as unread Mark as unread
Relationship Relationship
IP Logged

Previous
Next
 From:  Frenchy Pilou (PILOU)
5935.17 In reply to 5935.16 
Very curious : i have absoluytly no problem with your file to use directly the Blend function!

Just click segment 1+1 call Blend
Just click segment 2+2 call Blend
Just click segment 3+3 call Blend
etc... very painful :)


Danger with Blend is that your are not sure that the "latteral sides" are always proof or intersected between them!
So you must very verify that you have a solid at the end!

EDITED: 3 Jun 2013 by PILOU

  Reply Reply More Options
Post Options
Reply as PM Reply as PM
Print Print
Mark as unread Mark as unread
Relationship Relationship
IP Logged

Message 5935.18 deleted 3 Jun 2013 by ANDREI SAMARDAC

Previous
Next
 From:  Andrei Samardac
5935.19 In reply to 5935.18 
try to join these two surfaces. Is it work?

Attachments:

  Reply Reply More Options
Post Options
Reply as PM Reply as PM
Print Print
Mark as unread Mark as unread
Relationship Relationship
IP Logged

Previous
Next
 From:  Frenchy Pilou (PILOU)
5935.20 In reply to 5935.19 
I have erased your red "blended" faces and the other yet blended for have the clean start forms then
click 1 1, 2,2 3,3 as shown on my image above!

Absolutly non problem!

  Reply Reply More Options
Post Options
Reply as PM Reply as PM
Print Print
Mark as unread Mark as unread
Relationship Relationship
IP Logged

Previous
Next
 From:  Andrei Samardac
5935.21 In reply to 5935.20 
shit.. tomorrow i'll bring my v3 here, sorry everybody..
  Reply Reply More Options
Post Options
Reply as PM Reply as PM
Print Print
Mark as unread Mark as unread
Relationship Relationship
IP Logged
 

Reply to All Reply to All


Show messages:  1  2-21  22-34