C-Plane Vertigo

Next
 From:  Mike K4ICY (MAJIKMIKE)
5153.1 
Or... "I flew my C-Plane into the Orient Express!"

After a year of using MoI - one of the simplest 3D modelers in the world - there are possibly a few tools that still allude me.

No, I can believe it myself.... It's not that I can't make them work, it's just that I've so rarely had to use them, I feign to push the button for one reason or another.

The very useful C-Plane tools is one of them. First, it's icon resides in a command panel I rarely ever access.

Second, the Orient tools lump together with C-Plane in my mind. They are all siblings of each other - and I'm having a hard time getting that three-lined "gumball" widget to do what I think it looks like it's supposed to do.

But I do know (somewhat) what these re-orienting tools can do for the MoI modeler:

In the MoI Resource section in the Command Reference http://moi3d.com/2.0/docs/moi_command_reference.htm
You'll find description for each:

C-Plane http://moi3d.com/2.0/docs/moi_command_reference5.htm#cplane
The C-Plane tool will align to an object or construction line and re-orient the C-Plane grid so that the area of your choosing on your model will now be perfectly lined up with the grid as if you constructed it there.

Orient http://moi3d.com/2.0/docs/moi_command_reference8.htm#orient
The Orient tool will align selected object themselves to orientations related to objects or construction lines in your model.

Line-To-Line http://moi3d.com/2.0/docs/moi_command_reference8.htm#orientlinetoline
The Orient Line-To-Line tool will take a curve and magically stretch and reposition it to a target curve, connecting the sets of two end points together.

View-To-View http://moi3d.com/2.0/docs/moi_command_reference8.htm#orientviewtoview
The View-To-View tool "Remaps objects from one view to another view." Okay, never tried it (successfully) it has to be cool, right?


Michael, I would be grateful if you could please elaborate a little on these functions. I can now think of dozens of time where even C-Plane could have saved time.

This file is a part of a model that is part of a larger model, so the need to cut a circular array of the "scoop" object not aligned to x,y or z would be nice.
I think I have the hang of it, except for what happens when you start moving the white ball around and you change the Z orientation.
Nothing like a little disorientation to add spice to a model.


http://k4icy.50webs.com/tutorials/to_orient_ex_01.3dm
  Reply Reply More Options
Post Options
Reply as PM Reply as PM
Print Print
Mark as unread Mark as unread
Relationship Relationship
IP Logged

Previous
Next
 From:  BurrMan
5153.2 In reply to 5153.1 
The "z ball" doesnt need to be re-oriented for the array tool. Youll want it to remain "up" if setting and align to objects will work. It's movable in case your organic object needs to have these axis manipulated. For this part, you dont even need the centerline you have there.

  Reply Reply More Options
Post Options
Reply as PM Reply as PM
Print Print
Mark as unread Mark as unread
Relationship Relationship
IP Logged

Previous
Next
 From:  Michael Gibson
5153.3 In reply to 5153.1 
Hi Mike, so yes Orient and CPlane are related because they both use the "orientation picker" as part of their operation.

CPlane uses the orientation picker to specify an x/y/z axis orientation for the drawing plane, and the Orient command uses it twice - once to set up a base frame and a second time to set up a target frame which then will do a combination move and rotation of objects to do a transform from the base to target frames.

The "Orient line to line" and "orient view to view" commands are not quite so strongly related to cplane - but all 3 orient commands are basically tools that combine movement and rotation in a kind of convenient way. You could get the same result just by using the Move and Rotate 3D command on your objects but it could take a lot more work for the cases where the orient tools are optimized to handle.

The most simple one of the orient tools is orient view to view - all it does it rotate objects from one view to align them to a different view. Say for example you open up an AI file and it is currently sitting in your Top view. But instead of it being in your top view you actually wanted it to be flat to the Right-side view. Orient view to view is optimized for dealing with that exact situation - select the objects you want to transform, run orient view to view and then click once in the Top view and a Second time in the Front view and your objects will be rotated in such a way that they now look the same in the Front view as they did in the original Top view. You can do the same thing with manual rotations, this is just a convenience for doing a quick type of rotation to align between different views where you get to just click in the specific views to do it.

Orient line to line is another mostly convenience type thing - for that you pick 2 base points and 2 target points, and the resulting transform will be the same as a move from the start point of the base line to the start point of the target line, combined with a rotation by the angles between the lines. Again it's just a combination of movement plus rotation it can just be less picks and therefore more convenient with some kinds of positioning tasks.

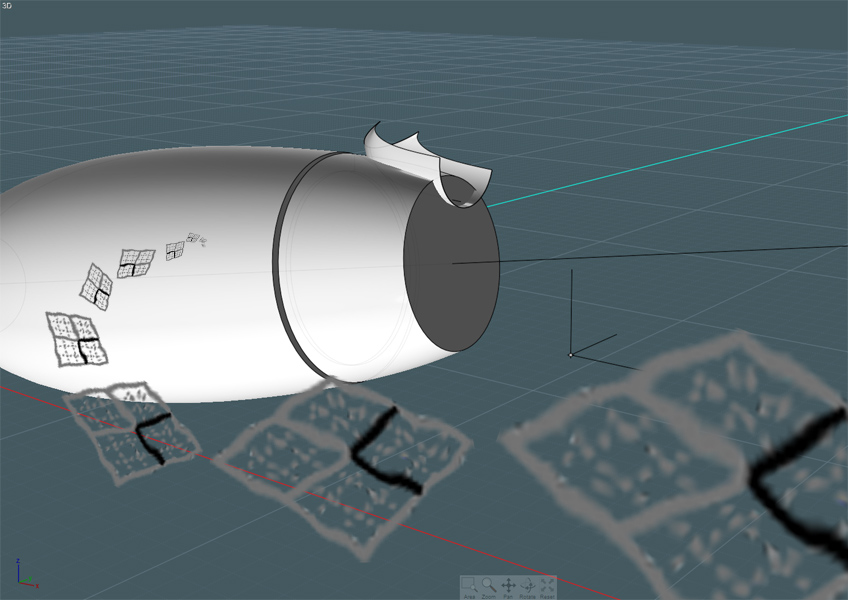
The Orient (just plain "orient", not the "line to line" or "view to view" variety) is somewhat more involved - it also just does what amounts to a move plus a rotation but it is focused on aligning things to surface normals or curve tangents.

See here for some other explanations of orient and see if those help any:
http://moi3d.com/forum/index.php?webtag=MOI&msg=3424.13
http://moi3d.com/forum/index.php?webtag=MOI&msg=3424.14
http://moi3d.com/forum/index.php?webtag=MOI&msg=4228.9
http://moi3d.com/forum/index.php?webtag=MOI&msg=3660.5


> This file is a part of a model that is part of a larger model, so the need to cut
> a circular array of the "scoop" object not aligned to x,y or z would be nice.

So you can see there in Burr's video how the cplane tool can help do exactly that!


> I think I have the hang of it, except for what happens when you start moving
> the white ball around and you change the Z orientation.

Basically you're over complicating it! :) - the orientation picker will align its z axis to be perpendicular to the surface when you first place it so for your case there it's in the orientation you want right when you first place it. So when it's in the orientation you want right from the start, don't mess with dragging any of the pieces of it around, just right click to accept the current position and you've got it.

You only need to mess with more manipulation of those axis lines if you need to do something more custom than that like point a particular axis towards one specific point. If you just want to get something with the z axis aligned to either the surface normal where you placed the base point or a curve tangent on a curve, your first pick already does that (unless you have turned off "align to objects").

See a couple of the above links for some demos that show how you might want to adjust the axis for some particular situations like when you're trying to place some kind of asymmetrical part and you want to align a pointy feature on it towards a specific point on the target face.

Let me know if you are still stuck after seeing the explanation above and on those other links. If you are stuck on something new (like some example with orient or whatever) it helps to post an example file so that it can be used to directly show you the answer. Let me know if Burr's example video and the above explanation still does not answer your question about how to get the result you want with your first example file - the steps there are just to use View > CPlane - place the origin point for the cplane where you see Burr do it, and then the next stage is that you just right-click to accept the position that it is in and then your cplane is set as you need it right after that. With the cplane set the circular array will go in the direction you wanted and then right-click on View > CPlane after you're done to reset it.

- Michael

EDITED: 25 May 2012 by MICHAEL GIBSON

  Reply Reply More Options
Post Options
Reply as PM Reply as PM
Print Print
Mark as unread Mark as unread
Relationship Relationship
IP Logged

Previous
Next
 From:  Michael Gibson
5153.4 In reply to 5153.1 
Hi Mike, also here's a demo of orient line to line in action:


It's not magic though, it's just bundling up a move plus a rotation plus a scale in a convenient way.

You can get the same result by doing a Transform > Move to first move that small curve so that it has one endpoint on top of the one of the other curve's endpoint, and then use Transform > Rotate to rotate it around that same point to point it how you need it, and then follow that with a Transform > Scale to resize it as well.

Orient line to line just combines those things together with fewer picks - with 2 lines that you pick it incorporates a move from the start point of the base line to the start point of the target line, then a rotation by the angle between the 2 lines, followed with a scale (which you can disable or switch to stretch or uniform scaling mode) by the difference in length between the 2 lines.

It can be particularly convenient if you want to do the kind of endpoint matching shown in the animation above, or also if you want to drop a bunch of copies of objects where you want to rotate and scale each one a little differently. When you turn on "make copies" you will then be able to spit out a rotated and scaled copy of the object by doing just 2 picks for a new target line for each copy.

- Michael
  Reply Reply More Options
Post Options
Reply as PM Reply as PM
Print Print
Mark as unread Mark as unread
Relationship Relationship
IP Logged

Previous
Next
 From:  Frenchy Pilou (PILOU)
5153.5 
For me "Line Line" (+ 3 options) + "helpers lines" is the most very cool function for anything!
As soon as you want snap connect something, scale something, strecht something, move something, rotate something, modify homothetic something, copy place something, orient something, etc...
Infinite uses!
And all without cerebral reflexion, very more easy than the Edit Frame! :)
My first number one!

EDITED: 26 May 2012 by PILOU

  Reply Reply More Options
Post Options
Reply as PM Reply as PM
Print Print
Mark as unread Mark as unread
Relationship Relationship
IP Logged

Previous
Next
 From:  Mike K4ICY (MAJIKMIKE)
5153.6 
Thanks for the visual example Burr!

Works like a charm: :-)


I'll have to make it a point to include some of these alignment/orient tools in my workflow.

Thanks for the detailed explanation Michael - there appears to be many useful things that can be done with these tools.
You can also use C-Plane to draw 2D elements in any peculiar axis, say if you wanted to project shapes more cleanly to an angled surface.
  Reply Reply More Options
Post Options
Reply as PM Reply as PM
Print Print
Mark as unread Mark as unread
Relationship Relationship
IP Logged

Previous
 From:  Michael Gibson
5153.7 In reply to 5153.6 
Hi Mike,

> You can also use C-Plane to draw 2D elements in any peculiar axis, say if
> you wanted to project shapes more cleanly to an angled surface.

Yup! Basically anytime you would have been considering doing something like repositioning objects to align them to the world axes to do some kind of drawing operation and then putting them back in their angled position later, you can instead set the construction plane so that all your drawing and modeling commands will operate in that angled location directly.

That's usually quite a few less steps especially because it's easier to reset the cplane when you're done, you don't have to move any objects around.

- Michael
  Reply Reply More Options
Post Options
Reply as PM Reply as PM
Print Print
Mark as unread Mark as unread
Relationship Relationship
IP Logged
 

Reply to All Reply to All