A Drone and Rail sweep advice

Next
 From:  Stever_uk (STEVER)
4773.1 
Hi,


Here I had a little fun exercise with this made up drone based on the predator.


However I did rack my brain on how to do the front of the drone. I did end up creating the top half with with a two rail sweep + scaling rail and the same with the bottom half but with a different profile.

1) Is this a valid approach or would there be a better way to do this?

2) I had to play around quite a lot with the rails to achieve what I wanted. I did get imperfections a quite a few times so had to constantly play with the points of my curves that defined my rails.

when defining a rail will having more points defined your 2d curve achieve better results?

Also once I defined my shape I had issues trying to fillet the edges and also "boolean union" the top half and bottom half. I ended up just placing very close together for the render

Any advice would be appreciated

Thanks
Steve

EDITED: 9 Dec 2011 by STEVER

Image Attachments:
Size: 193.7 KB, Downloaded: 97 times, Dimensions: 1280x720px
  Reply Reply More Options
Post Options
Reply as PM Reply as PM
Print Print
Mark as unread Mark as unread
Relationship Relationship
IP Logged

Previous
Next
 From:  Mike K4ICY (MAJIKMIKE)
4773.2 
Good job Stever! That drone looks deadly...
I see no flaws from my point of view, so your methods worked very well.

With MoI, there is often more than one way to achieve the same effect.

Just in case it helps, here is my example on how to use Network to create some complex shapes:

http://moi3d.com/forum/index.php?webtag=MOI&msg=4610.1


And also, if a Fillet does not want to take effect, you can try working with Blend to make a smooth round-over between two surface edges.

  Reply Reply More Options
Post Options
Reply as PM Reply as PM
Print Print
Mark as unread Mark as unread
Relationship Relationship
IP Logged

Previous
Next
 From:  Stever_uk (STEVER)
4773.3 In reply to 4773.2 
Hey mike, how's it going?

Thanks for the advice I will have a good read up on your network command tut

Cheers

Steve

EDITED: 8 Dec 2011 by STEVER

  Reply Reply More Options
Post Options
Reply as PM Reply as PM
Print Print
Mark as unread Mark as unread
Relationship Relationship
IP Logged

Previous
Next
 From:  Michael Gibson
4773.4 In reply to 4773.1 
Hi Steve, like Mike says your method looks like it was fine.

Rail revolve might be another additional option for the upper part - things that look like they have a rounded tip can often be done with revolve or rail revolve.

See here for a kind of similar example:
http://moi3d.com/forum/index.php?webtag=MOI&msg=4374.4


> when defining a rail will having more points defined your 2d
> curve achieve better results?

No - the number of points in the rail doesn't really particularly matter, it's the shape of the rail that matters.

The way sweep works is that it starts with a small number of cross-sections generated along the sweep path, and then builds a surface through those. That surface is tested for accuracy and if it is not accurate enough the sweep gets refined with more cross-sections added, so it's a kind of refining process.

That process doesn't really have much to do with control point structure, the accuracy measurement has to do with sections being generated at different spots along the rails, so it's only the position and direction of the curve that really directly impacts the sweep.

- Michael
  Reply Reply More Options
Post Options
Reply as PM Reply as PM
Print Print
Mark as unread Mark as unread
Relationship Relationship
IP Logged

Previous
Next
 From:  Stever_uk (STEVER)
4773.5 In reply to 4773.4 
Thanks Michael,


I really don't know why I dismissed the revolve rail command.

It seems to be case with me later that I look at the command reference and it's examples and decide there and then if its the way to go.
Then I looked at another example from someone where the same command is used in a totally in different manner with great or better results like in Mike's Network tutorial and your example link

Great stuff

Thanks
Steve
  Reply Reply More Options
Post Options
Reply as PM Reply as PM
Print Print
Mark as unread Mark as unread
Relationship Relationship
IP Logged

Previous
Next
 From:  Stever_uk (STEVER)
4773.6 In reply to 4773.5 
HI Michael,

Just wonder if you can quickly explain in simple terms :) or point me in the right direction why I have trouble filleting the underneath edges of the resulting shape via revolve command

Cheers
Steve

EDITED: 8 Dec 2011 by STEVER

Attachments:

  Reply Reply More Options
Post Options
Reply as PM Reply as PM
Print Print
Mark as unread Mark as unread
Relationship Relationship
IP Logged

Previous
Next
 From:  Michael Gibson
4773.7 In reply to 4773.6 
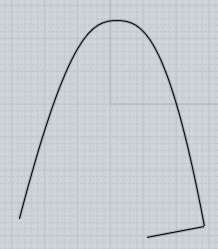
Hi Steve - there's a bit of irregularity in the shape near the tips, if you look closely right at the tip here you can see it's slightly pointed:


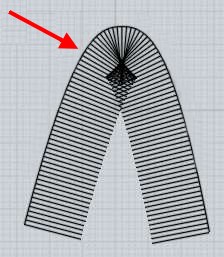
That's not good for filleting, because any sharpness between edges like that means that fillets generated from them do not touch exactly and need to have a corner patch put in between them, and that tends to be difficult for it to figure out when it's only going to be a little slivery patch piece.

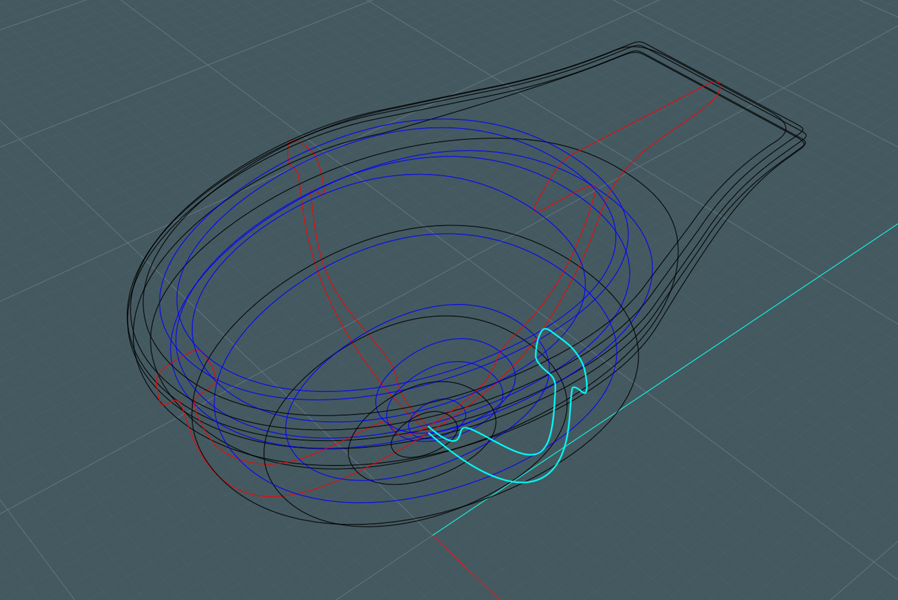
So to tune that up, you want to go to this area of your profile curve:


And get these points here to be all in a flat line with one another instead of slightly zig-zagging around:


You can do that by grabbing one corner of the edit frame and squishing it down until you get "flat" snap. The other end of the curve also needs that done as well to make the revolve nice and smooth on the other end.

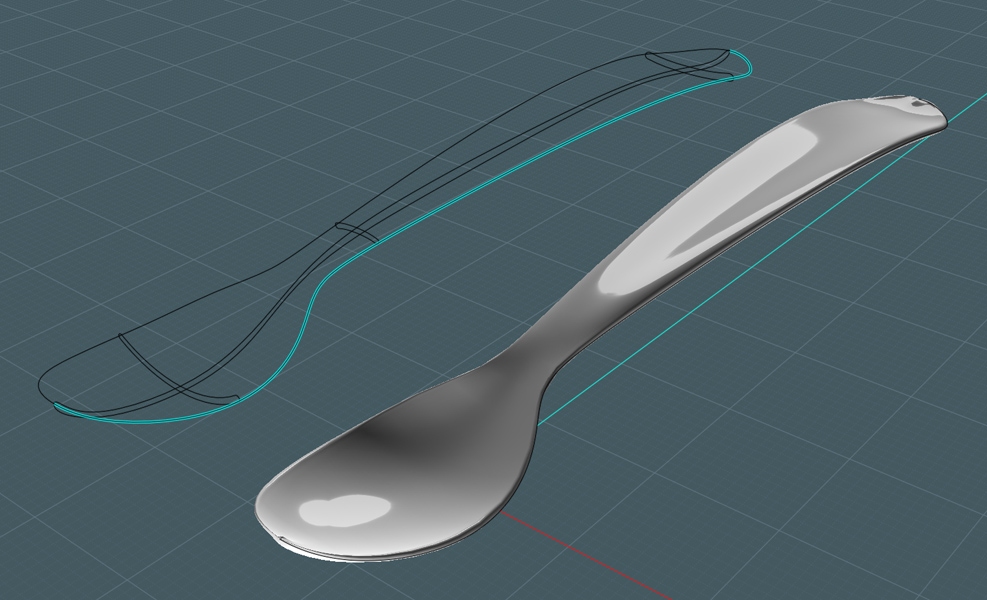
I've attached a 3DM model file with that done to it, and it will now fillet but you'll be limited to a pretty small radius of something around 0.1 units, because much more than that and these tightly bent areas that you have will start to collapse in on themselves:


If you want to fillet it, you may want to make these tightly bent areas to instead be totally sharp corners in the initial revolve and then fillet them at the same time to round them off:


- Michael

  Reply Reply More Options
Post Options
Reply as PM Reply as PM
Print Print
Mark as unread Mark as unread
Relationship Relationship
IP Logged

Previous
Next
 From:  Stever_uk (STEVER)
4773.8 In reply to 4773.7 
Thanks very much Michael.

Your advice and support is so impressive ,really can't get over it
  Reply Reply More Options
Post Options
Reply as PM Reply as PM
Print Print
Mark as unread Mark as unread
Relationship Relationship
IP Logged

Previous
Next
 From:  Stever_uk (STEVER)
4773.9 In reply to 4773.8 
BTW as you said making that little outset with straight edge allowed me to bevel to 0.2.


I was under the impression that rounding edges actually helped filleting.
  Reply Reply More Options
Post Options
Reply as PM Reply as PM
Print Print
Mark as unread Mark as unread
Relationship Relationship
IP Logged

Previous
Next
 From:  Michael Gibson
4773.10 In reply to 4773.9 
Hi Steve,

> I was under the impression that rounding edges
> actually helped filleting.

If it's a tight bend that's basically resembling a fillet, it's usually best to actually let it be filleted as well.

If it's quite a bit broader of a bend than the fillet radius that you want then it's fine, but tight bends make things difficult for the filleter because basically a fillet has some similar qualities to an offset that it wants the fillet to hang off of the surfaces at a particular offset distance of the radius that is being used.

When you have something hanging off of a curve and the thing is larger than the curvature of the bend in the curve it causes this kind of bunching/self-intersecting type effect which then makes things difficult for the filleter in those areas:


- Michael
  Reply Reply More Options
Post Options
Reply as PM Reply as PM
Print Print
Mark as unread Mark as unread
Relationship Relationship
IP Logged

Previous
 From:  Stever_uk (STEVER)
4773.11 In reply to 4773.10 
Oh great, thanks for the explanation

Steve
  Reply Reply More Options
Post Options
Reply as PM Reply as PM
Print Print
Mark as unread Mark as unread
Relationship Relationship
IP Logged
 

Reply to All Reply to All