Majik Tutorial: Flow On Revolved Surface ("Pinch-Punch" Edition)

Next
 From:  Mike K4ICY (MAJIKMIKE)
4697.1 
Another use for MoI's new Flow tool is presented when you need to "fish-eye" (bulge) or pinch in part of an object on a 2D level.

This is easy to do in Photoshop with an image at the click of the mouse. But how does one do this in MoI?

With a "Flow on Revolved Surface" procedure, of course.


Here's an example:


Here is a grouping of objects.


We need a reference surface to run Flow from.

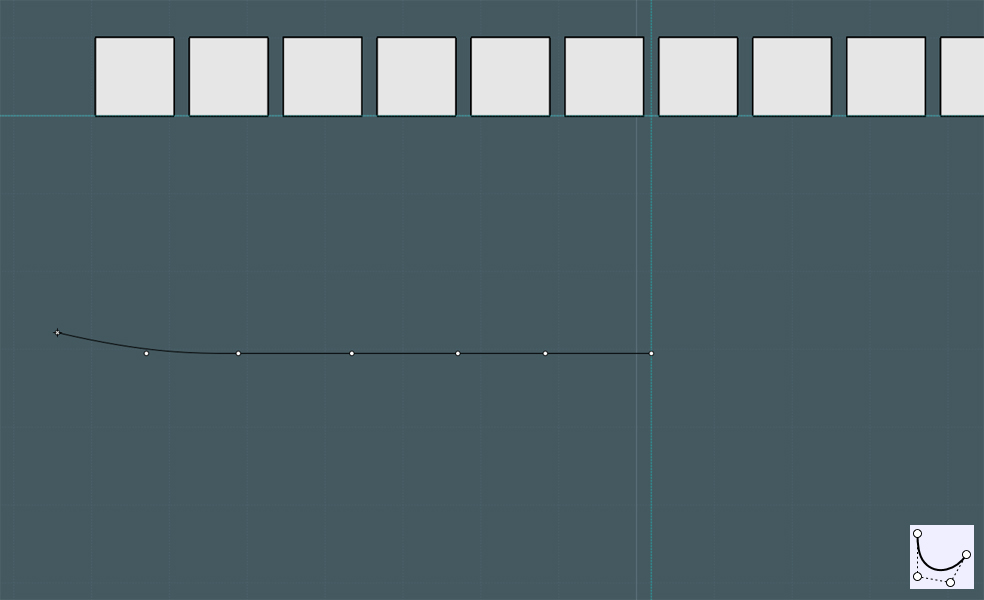
Draw a line with the Free-Form curve tool, including at least one control point in the middle.
Leave one point off the line of the path so that when revolved, the point structure is carried through.


Revolve the line.


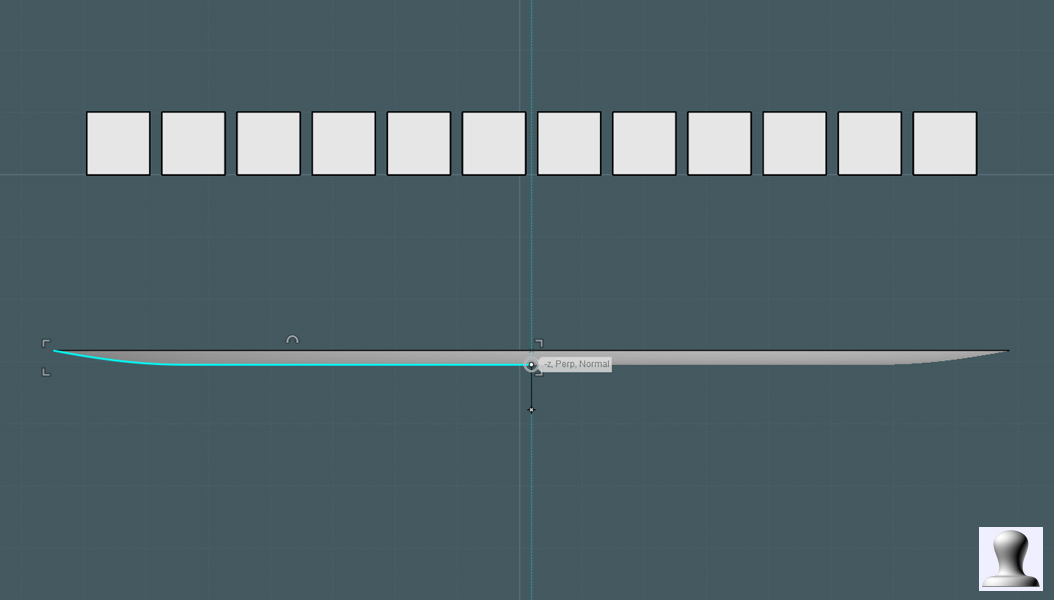
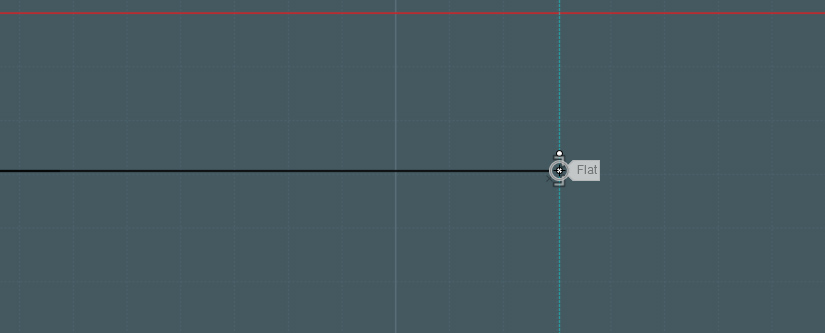
Now flatten the revolved surface.


Copy the revolved surface. I made two to show two different examples.


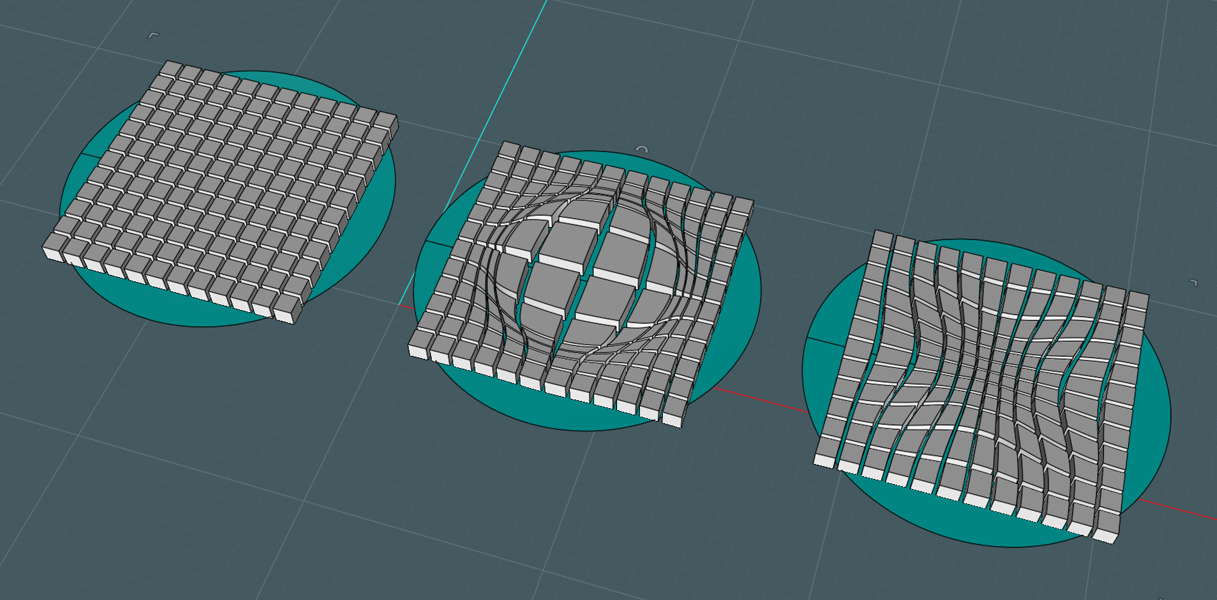
Pay careful attention to the following pic:


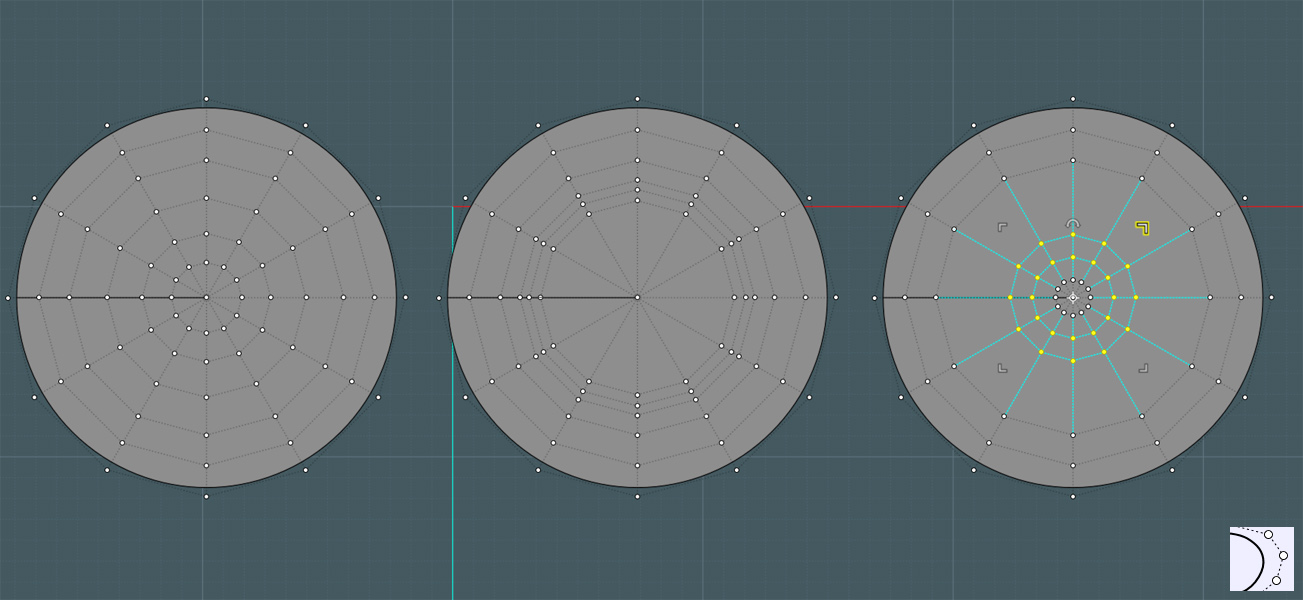
The one on the left is the original "reference" surface.
The right two are "target" surfaces.

Activate Show-Points.

Select a ring of points (as show) and use the UI based scale handles to change their size, thus the relative positioning from the center.

You'll see that the middle surface is "punched" out and the one on the right is "pinched" in.


Before using the Flow command, you may want to make sure that no object crosses the center point. You may get unexpected results.

Use the Flow command on your objects, choosing the reference and target surfaces.


You can see that one set was warped with a 2D bulge displacement in the center and the one on the right has an inward pinched displacement.


You can sort of do this with a grid of points on a standard Flowed grid surface, but a revolved surface is configured in a round pattern,
thus the results will be evenly distorted in 360 degrees.

Here is a real-world type application:


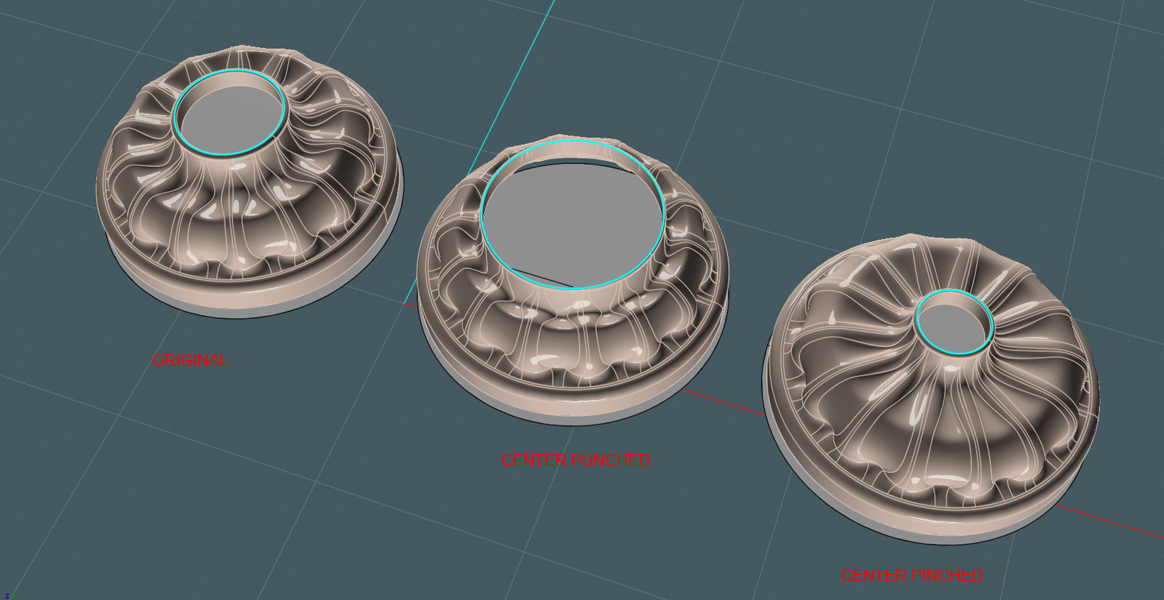
I have a decorative escutcheon object that has a hole in the middle that is not the right size, but the outer dimension needs to remain the same.
This is a complex object that cannot simply be reconstructed nor can just be chopped up and re-glued.

This technique allowed me to tweak the inner diameter with a resulting object that works nicely.
  Reply Reply More Options
Post Options
Reply as PM Reply as PM
Print Print
Mark as unread Mark as unread
Relationship Relationship
IP Logged

Previous
Next
 From:  Frenchy Pilou (PILOU)
4697.2 
Appetezing Jell-O :)
---
Pilou
Is beautiful that please without concept!
My Gallery
  Reply Reply More Options
Post Options
Reply as PM Reply as PM
Print Print
Mark as unread Mark as unread
Relationship Relationship
IP Logged

Previous
Next
 From:  BurrMan
4697.3 In reply to 4697.2 
I think this one really illustrates your method, Majik... Nice!
  Reply Reply More Options
Post Options
Reply as PM Reply as PM
Print Print
Mark as unread Mark as unread
Relationship Relationship
IP Logged

Previous
Next
 From:  Michael Gibson
4697.4 In reply to 4697.1 
Hi Mike - this is really great that you're getting such a wide variety of deformation effects out of the new Flow tool!

- Michael
  Reply Reply More Options
Post Options
Reply as PM Reply as PM
Print Print
Mark as unread Mark as unread
Relationship Relationship
IP Logged

Previous
Next
 From:  Rich_Art
4697.5 In reply to 4697.4 
Thanks Mike... cool example. :-)
I wish I had some more free time to play with Moi.

Peace,
Rich_Art. ;-)

| C4DLounge.eu | Our Dutch/Belgium C4D forum. Cinema4D R13 Studio + VrayForC4D + UVLayout Pro + 3DCoat
  Reply Reply More Options
Post Options
Reply as PM Reply as PM
Print Print
Mark as unread Mark as unread
Relationship Relationship
IP Logged

Previous
Next
 From:  Mike K4ICY (MAJIKMIKE)
4697.6 In reply to 4697.5 
Sneak it in when no one's looking. ;-)
  Reply Reply More Options
Post Options
Reply as PM Reply as PM
Print Print
Mark as unread Mark as unread
Relationship Relationship
IP Logged

Previous
Next
 From:  Rich_Art
4697.7 In reply to 4697.6 
lol I have it installed here but just no time to play with it. :-(

Peace,
Rich_Art. ;-)

| C4DLounge.eu | Our Dutch/Belgium C4D forum. Cinema4D R13 Studio + VrayForC4D + UVLayout Pro + 3DCoat
  Reply Reply More Options
Post Options
Reply as PM Reply as PM
Print Print
Mark as unread Mark as unread
Relationship Relationship
IP Logged

Previous
 From:  Mike K4ICY (MAJIKMIKE)
4697.8 
BTW - Just added links for my "Flow on Revolved Surface" tuts to my site for future reference of those new to MoI and Flow.

http://k4icy.50webs.com/tutorials.html
  Reply Reply More Options
Post Options
Reply as PM Reply as PM
Print Print
Mark as unread Mark as unread
Relationship Relationship
IP Logged
 

Reply to All Reply to All