Michael did an outstanding job, by providing two solutions! :-)
So now we have total flexibility. :-)
But don't forget when not giving names to objects IIRC it can
happen in some 3D apps, you import to, that they get confused
with color assignments, when no object names are given.
@ Michael How gradient numbers colors itselve are made following the path ?
Following the number of objects selected or following an arbitrary number (eg 100) ?
re:
> But I must admit I don't know how to set up a correct shortcut to trigger the command. :-(
>
> I remember that from v3 with other scripts, but now with v4 I am lost, even if the UI is the same.
Did you get this figured out?
To set up the shortcut key, go to Options > Shortcuts, then click the "Add" button to add in a new one.
A dialog box will pop up that says "Press shortcut key:" - now you need to press the key combination that you want to use for the shortcut key. So for example if you want it to be triggered with Ctrl+G hold down the Ctrl key and push G, the dialog should then show "Ctrl+G" in it. Then push OK.
Then click in the right-hand "Command" column for the new entry in the list and put in the command you want triggered. For these new ones the command would be CreateGradientStyles or CreateGradientStylesAlongPath.
re:
> Does it possible to have something for restore the Default Style that we have when we launch Moi ?
> (seven colors Black, Red, Orange, Green , Cyan, Blue, Magenta)
re:
> @ Michael How gradient numbers colors itselve are made following the path ?
> Following the number of objects selected or following an arbitrary number (eg 100) ?
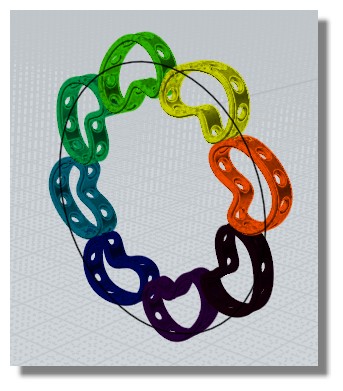
It is assigned by taking the center of the object's bounding box and then finding the closest point on the path curve to that center point.
Then the parameter value of that point along the curve becomes the parameter for the gradient, with the start of the curve being the start color, blending up to the end of the curve being the end color.
<<> Does it possible to have something for restore the Default Style that we have when we launch Moi ?
> (seven colors Black, Red, Orange, Green , Cyan, Blue, Magenta)
<<< Yes, using File> New will do that.
Yes but i want keep that is on the screen and don't want close the actual file...
Just remake the original Style by default after any gradients
Maybe a script if you can't make an option
or a selection multiple for erase something large!
re:
> Yes but i want keep that is on the screen and don't want close the actual file...
> Just remake the original Style by default after any gradients
What about select what is on your screen, use Ctrl+C , then File>New, then Ctrl+V ?
re:
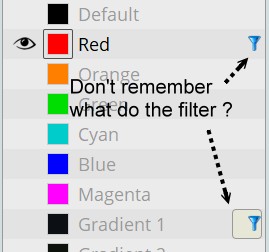
> ...and how works the filter? (Ctrl + Click)
That restricts object selection to only work on the filtered items. So for example if you set the filter on Style = Red, then when you click in the viewport (or do any selection action like Ctrl+A or whatever), only objects that have Style = Red assigned to them will be targeted for selection and any other objects not matching the filter will be skipped over.
<< What about select what is on your screen, use Ctrl+C , then File>New, then Ctrl+V ?
Ok above + new file keeps the colors used for the objects created! Cool!
<< when you click in the viewport (or do any selection action like Ctrl+A or whatever)
it's that i had forgotten!
Ctrl + A ok, Rectangular Selection ok, Click on an object ok = selection following filters selected
but what do you mean by only "Click on the viewport" ?
re:
> Ctrl + A ok, Rectangular Selection ok, Click on an object ok = selection following filters selected
> but what do you mean by only "Click on the viewport" ?
Same as what you say there for "click on an object".