Make It With MoI
 1-11  …  112-131  132-151  152-171  172-174
Thread Split: Some posts in this thread have been moved here

Previous
Next
 From:  pekeron
4388.152 In reply to 4388.138 
Hello,
I'm a new user, sorry for the question.. How exactly did you make the cut in the path? see the image
Thank you
Franz


Attachments:

  Reply Reply More Options
Post Options
Reply as PM Reply as PM
Print Print
Mark as unread Mark as unread
Relationship Relationship
IP Logged

Previous
Next
 From:  TpwUK
4388.153 In reply to 4388.152 
Hi Franz - Select both curves and do a mutual trim, 
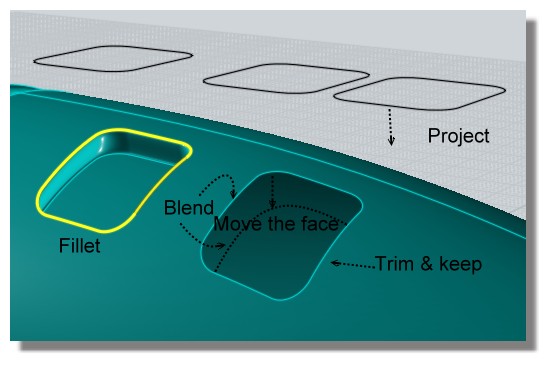
remove the top two lines which will leave a |_| shape, then do a fillet on that shape and you should then get the outline curves you are looking for.

Martin
Attachments:

  Reply Reply More Options
Post Options
Reply as PM Reply as PM
Print Print
Mark as unread Mark as unread
Relationship Relationship
IP Logged

Previous
Next
 From:  pekeron
4388.154 In reply to 4388.153 
Hello Martin, many thanks... I didn't understand that I have to select the "entire" joined curved and then Moi asked me to select the vertices... now it looks obviuos...
I have downloaded MoI 2.5 trial some days ago and I'm looking for tutorials and examples to learn t use it. I will continue trying to follow this tutorial, may I ask you something else if (surely) I will need?

thank you
ciao Franz
  Reply Reply More Options
Post Options
Reply as PM Reply as PM
Print Print
Mark as unread Mark as unread
Relationship Relationship
IP Logged

Previous
Next
 From:  TpwUK
4388.155 In reply to 4388.154 
Just ask away, if I can't help, there are more here who will respond too. Have fun with MoI, it's a wonderful tool, but it does take a little getting used to it, and we all understand that.

Martin
  Reply Reply More Options
Post Options
Reply as PM Reply as PM
Print Print
Mark as unread Mark as unread
Relationship Relationship
IP Logged

Previous
Next
 From:  Mike K4ICY (MAJIKMIKE)
4388.156 
Pekeron, good luck with your learning of MoI!

When I produced my tutorials I was also learning how to use MoI at the same time. There are many smaller procedures that were not included.

Simply post your modeling question to the Forum and someone is sure to tackle it for you.


I have realized that MoI, with all it's simplicity has a lot of subtle rules that are not in any books, but are better learned through experience and use.
It's user interface isn't overloaded with mysterious icons and menus, so it is only as complex as you need it to be according to your level of expertise.
That's one beauty of MoI - it's intuitive enough so that many of the more esoteric procedures and methods for modeling are learned cumulatively by trial and error, and not so much by official instruction or course.
Every few days or so I still learn some new little part of MoI. After a year and all my tutorials, I just recently learned how to use C-Plane and Silhouette.

I'll be making more tuts in good time, but at the moment I'm engrossed in a more complex design/art project. I've been working on it for a month now and the end product is not as close as I'd like it to be.
  Reply Reply More Options
Post Options
Reply as PM Reply as PM
Print Print
Mark as unread Mark as unread
Relationship Relationship
IP Logged

Previous
Next
 From:  Michael Gibson
4388.157 In reply to 4388.156 
Hi Mike, yeah that's basically become the primary strategy - trying to get something that hopefully lets you get stuff done initially but that has enough depth that you can gain efficiency with it over time as you learn various nuances.

The tricky part can be that some kinds of models are just inherently more challenging than others, especially ones where there is more stuff swooping around in 3D and not as heavily based off of 2D curve construction. There is just more stuff to absorb for those kinds of things before being able to make things work.

- Michael
  Reply Reply More Options
Post Options
Reply as PM Reply as PM
Print Print
Mark as unread Mark as unread
Relationship Relationship
IP Logged

Previous
Next
 From:  pekeron
4388.158 In reply to 4388.157 
Hi all, many thanks for your help:)
I have a problem with the second step. When I Boolean Union the two pieces they don''t become really "united", I can delete one of the part and the first image shows what remains. I have tried also with Merge but the result is the same. I think this is the reason why I can't fillet the intersection.
Franz
Image Attachments:
Size: 71 KB, Downloaded: 13 times, Dimensions: 1131x772px
Size: 80.7 KB, Downloaded: 18 times, Dimensions: 1113x709px
  Reply Reply More Options
Post Options
Reply as PM Reply as PM
Print Print
Mark as unread Mark as unread
Relationship Relationship
IP Logged

Previous
Next
 From:  Michael Gibson
4388.159 In reply to 4388.158 
Hi Franz, is it possible that one of your objects is not a fully closed solid? When you select them, what does the object type in the upper right area of the window read (in the panel that shows the properties of the current selection) - does it say "Joined srf" or "surface" or "solid".

The result that you show in your screenshot could be the kind of thing that you get when you try to boolean with a not fully closed object, if the intersection does not form a closed loop instead of cutting a spot out it can basically leave an imprint of an inifinitely thin slit instead.

It's hard to know for sure though just by looking at the screenshot - often times if you have a question about a particular situation it can really help if you also post the 3DM model file with actual geometry in it along with your question as well, then it's possible for others to take a look at your objects, zoom in and examine things from different angles, etc...

- Michael
  Reply Reply More Options
Post Options
Reply as PM Reply as PM
Print Print
Mark as unread Mark as unread
Relationship Relationship
IP Logged

Previous
Next
 From:  pekeron
4388.160 In reply to 4388.159 
Hi Michael,
the first object (the big one) is a "solid", the second one is a "joined srf". I post the 3dm file, many thanks.
Franz
Attachments:

  Reply Reply More Options
Post Options
Reply as PM Reply as PM
Print Print
Mark as unread Mark as unread
Relationship Relationship
IP Logged

Previous
Next
 From:  Frenchy Pilou (PILOU)
4388.161 In reply to 4388.160 
You have better time to remake your surface in a solid! ;)

As you put the little solid inside the big no matter if the internal curve of the little solid is not absolutly like your first one ;)
Now the boolean Union will works like a charm!


And the fillet a game's boy ;)


Of course I take only one rail from your model, just retake any number you want ;) 2 is the maximum for the rails except the possible third scaling rail ;)
Else you must make your Sweep by parts and merge all at the end!

EDITED: 30 Aug 2012 by PILOU

  Reply Reply More Options
Post Options
Reply as PM Reply as PM
Print Print
Mark as unread Mark as unread
Relationship Relationship
IP Logged

Previous
Next
 From:  Michael Gibson
4388.162 In reply to 4388.160 
Hi Franz, thanks for posting the example.

So actually in that case there even though you've got an open surface object and not both solid volumes, since the open surface is sticking all the way through the solid and making a well defined closed intersection curve with it, it is actually supposed to be ok to use in a boolean union like that. But there is a bug in boolean union that is preventing it from working 100% properly, I think it's something that I can fix up for the next v3 beta release.

In the meantime, the boolean union will actually make all the pieces you need, you will just need to manually discard one piece and then join the other pieces together to glue things into a solid.

Here are the steps - select both the objects in your moulinex2.3dm that you posted above, then run Construct > Boolean > Union.

This will calculate a result but it will be fragmented into some pieces. There is one piece that you need to delete manually. To do that select this piece here:


You actually want to keep that piece, but it's in the way so you will need to hide it to more easily get at the actual piece you need to delete which is underneath it.

So push Edit > Hide - that will hide that selected object (if you push Edit > Hide with something selected, if you push it with nothing selected it shows all the hidden objects). So after hiding it you will see this:


That's not actually one single object, it's 2 different objects in separate pieces - select this one here:


And then delete that one. You will see a result like this:


Now show that piece that was hidden earlier, and now you have the proper 2 pieces to make up your solid - select the 2 pieces and use Edit > Join and they will be glued together into a solid.

The bug is that boolean union is supposed to automatically delete pieces like that which are forming a sort of "interior cell wall" between 2 solid regions. But the code that is doing that is getting confused by the "seam edge" of the closed surface and not recognizing it as being a piece fully bounded by all non-manifold edges. Once I fix the bug and take seam edges into account the union calculation should then get the proper result and automatically remove that interior piece as part of the boolean and you won't need to do any extra steps here.

Thanks for posting the file, sometimes the reason why things don't work as expected is because it's a bug that needs to be fixed and it really helps to have the example to work with to find out what's going on!

It is however not necessarily a bad idea to form solids for each piece that you are using to do the booleans - when each part is a solid you know it's a closed object and the booleans will be a little more bulletproof as far as giving you the expected results when the pieces involved are all solids initially.

- Michael

  Reply Reply More Options
Post Options
Reply as PM Reply as PM
Print Print
Mark as unread Mark as unread
Relationship Relationship
IP Logged

Previous
Next
 From:  pekeron
4388.163 In reply to 4388.161 
Ciao,
I have built a real solid starting from a closed U profile and now it works fine :)
I continue with other parts, thank you very much.
Franz
Image Attachments:
Size: 71.4 KB, Downloaded: 29 times, Dimensions: 937x660px
  Reply Reply More Options
Post Options
Reply as PM Reply as PM
Print Print
Mark as unread Mark as unread
Relationship Relationship
IP Logged

Previous
Next
 From:  pekeron
4388.164 In reply to 4388.163 
Hello, I made some proofs with some holes + fillets. I saw that I have to use a different tecnique depending on the case. If one fails the other one works. See the image.
Ciao, Franz
Image Attachments:
Size: 80.5 KB, Downloaded: 181 times, Dimensions: 886x663px
  Reply Reply More Options
Post Options
Reply as PM Reply as PM
Print Print
Mark as unread Mark as unread
Relationship Relationship
IP Logged

Previous
Next
 From:  Michael Gibson
4388.165 In reply to 4388.164 
Hi Franz,

> I saw that I have to use a different tecnique depending on the case. If one fails the other one works. See the image.

Really either method should work, just as long as you have constructed a result that does fully intersect the other object.

If you want some more feedback on the ones that don't work, could you please post a 3DM file with the objects in them so I can test over here and see what's going on?

One tip - it can be easiest to make sure your cutting object extends a bit past just the outer surface of the object to be cut, that way you can be sure that it actually fully divides the object where it cuts into it.

- Michael
  Reply Reply More Options
Post Options
Reply as PM Reply as PM
Print Print
Mark as unread Mark as unread
Relationship Relationship
IP Logged

Previous
Next
 From:  pekeron
4388.166 In reply to 4388.165 
Hi Michael,
I will try to replicate the issues then I will upload the file. Thank you very much.
Franz
  Reply Reply More Options
Post Options
Reply as PM Reply as PM
Print Print
Mark as unread Mark as unread
Relationship Relationship
IP Logged

Previous
Next
 From:  Loganka
4388.167 
Hi everybody !

I'm currently learning Moi and am stucked with the 8th step of this tutorial : the inward extrusion.
I've tried with the Extrude and Shell tools but it goes wrong everytime.
After a lot of tries, I have to admit that I'm rather lost and would like to have this step a bit more detailed..

Could someone please help me?
I've attached my 3dm file.


Thank's !
Attachments:

  Reply Reply More Options
Post Options
Reply as PM Reply as PM
Print Print
Mark as unread Mark as unread
Relationship Relationship
IP Logged

Previous
Next
 From:  Frenchy Pilou (PILOU)
4388.168 
Like this ?

---
Pilou
Is beautiful that please without concept!
My Gallery
  Reply Reply More Options
Post Options
Reply as PM Reply as PM
Print Print
Mark as unread Mark as unread
Relationship Relationship
IP Logged

Previous
Next
 From:  Loganka
4388.169 In reply to 4388.168 
Hi,

No, I talk about the step before. My bad. I can't get the thickness of the body.:

"Here I Extruded the edge shape inward a little to get depth, I used a line to guide the direction of the extrude to 45 degrees where needed.
You can also shrink all of the port shapes (copies of them) inward and perform a Loft between the edge curves and the copy.
Join these new walls to the body. Try to Fillet them to get a nice "punched-in" contour."

http://moi3d.com/forum/get_attachment.php?webtag=MOI&hash=c16cad76a239d19240c369df9a670679&filename=mix_015_08_extrude-join-fillet.jpg


I'm not sure if I didn't understand what he means or if I did understand but it doen't work because i did something wrong before..

Thank's for your help !
  Reply Reply More Options
Post Options
Reply as PM Reply as PM
Print Print
Mark as unread Mark as unread
Relationship Relationship
IP Logged

Previous
Next
 From:  Frenchy Pilou (PILOU)
4388.170 
Ah sorry like this ?
Maybe not the same than in the tutorial but result will be the same! :)

  Reply Reply More Options
Post Options
Reply as PM Reply as PM
Print Print
Mark as unread Mark as unread
Relationship Relationship
IP Logged

Previous
Next
 From:  Michael Gibson
4388.171 In reply to 4388.169 
Hi Loganka,

> I'm not sure if I didn't understand what he means or if I did understand but it
> doen't work because i did something wrong before..

So I think that step means to select the edges around your hole, like for example make a selection like this on your model that you posted:


Then run the Construct > Extrude command, which will punch out those edges into a surface along one straight direction. By default the direction will be along a world x, y, or z axis direction like this:


That will work fine for your top one but for the side ones where you want it to go along a 45 degree angle, you will need to push the "Set dir" option in Extrude:


Once you push "Set dir" in Extrude, that then asks you to pick 2 points and the extrusion direction will go on the line between those 2 points. So to get the extrusion to go at a 45 degree angle you would want to switch to the Front view, pick the first point at the origin snap and the second point anywhere along a 45 degree angle line from the origin. You can use angle constraint to get an exact 45 degree angle by typing in <45 and push enter right before you pick the second point. That will enable a one shot angle constraint of 45 degrees so that straight snap will go in 45 degree increments for that one pick rather than the regular default 90 degrees. Or if you are going to be doing a lot of 45 degree angle things, you can change the default straight snap to 45 degrees under Options> Snaps > Straight snap options > Snap angle.

Once you pick the 2 points you will then be back in the extrude distance stage and you can enter in a distance or pick a point with the mouse and your mouse will track along that newly defined direction line.

Once you have built an extrusion in this way you then select the extrusion and the main body and use Edit > join to glue them togeher.

Hope this helps!

- Michael

  Reply Reply More Options
Post Options
Reply as PM Reply as PM
Print Print
Mark as unread Mark as unread
Relationship Relationship
IP Logged
 

Reply to All Reply to All


Show messages:  1-11  …  92-111  112-131  132-151  152-171  172-174