Hi BlackBird, and also if you maybe meant "Blend" and not "Bend" as you wrote in the title, check here for a description of the Blend command:
http://moi3d.com/2.0/docs/moi_command_reference7.htm#blend
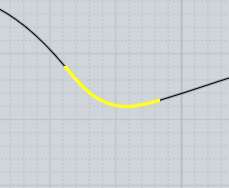
The way the Blend command works is that it creates a new smooth piece in some empty area between the endpoints of already existing objects.
For curves it will create a blend between the endpoints of 2 existing open curves, like this:
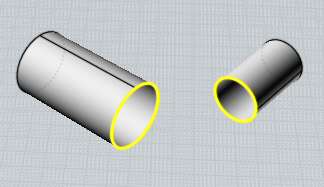
You can't use it between 2 closed curves like 2 circles because those do not have any open endpoints to connect between.
You can use Blend between 2 circular surface edges like the ends of a cylinder though - if you want to do that you should delete the planar end cap faces on the cylinders so there is no confusion about which of those 2 surfaces (cylinder surface or planar end cap surface) should be used as the source of the blend. That looks like this:
 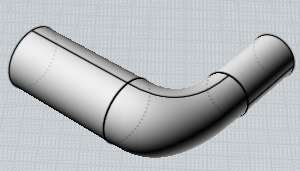
But using blend is a somewhat more advanced modeling technique that you can use to make a smooth connection between 2 existing pieces. I would recommend not using it for your initial model construction - try to build some profile curves and use some more regular surface construction commands like extrude, sweep, or loft to build the different pieces of your models.
Build the pieces of your model so that different sections punch through each other and then boolean those together to combine them, and if you need to then apply fillets at the sharp edges. That's the basic modeling technique for NURBS modeling construction, it is covered in the tutorial videos here:
http://moi3d.com/2.0/docs/tutorials.htm
- Michael |


