Crease
 1-11  12-31  32-38

Previous
Next
 From:  Lara (MALA)
10132.12 In reply to 10132.11 
ok - the secrets...of rebuild. I thought until now it is only for reduce a complex structure.
should´ can go on...best, MALA
  Reply Reply More Options
Post Options
Reply as PM Reply as PM
Print Print
Mark as unread Mark as unread
Relationship Relationship
IP Logged

Previous
Next
 From:  Lara (MALA)
10132.13 In reply to 10132.12 
Thanks for that family...


EDITED: 10 Feb 2021 by MALA

  Reply Reply More Options
Post Options
Reply as PM Reply as PM
Print Print
Mark as unread Mark as unread
Relationship Relationship
IP Logged

Previous
Next
 From:  Lara (MALA)
10132.14 In reply to 10132.13 
Hi, I got an construction/modelling modification.
The oval is not horizontal - it is turned for some degrees.
I tried some things but I failed making a crease that is turned in the oval direction.
Main idea was modelling it on the oval plane and then operate with the flow command...hmmm´...


EDITED: 10 Feb 2021 by MALA

  Reply Reply More Options
Post Options
Reply as PM Reply as PM
Print Print
Mark as unread Mark as unread
Relationship Relationship
IP Logged

Previous
Next
 From:  Michael Gibson
10132.15 In reply to 10132.14 
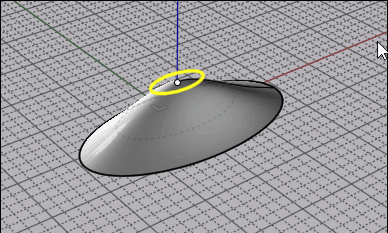
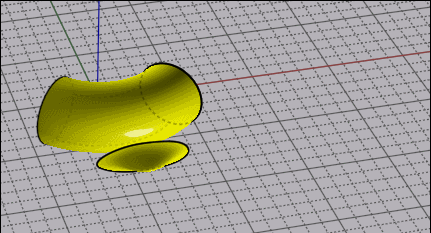
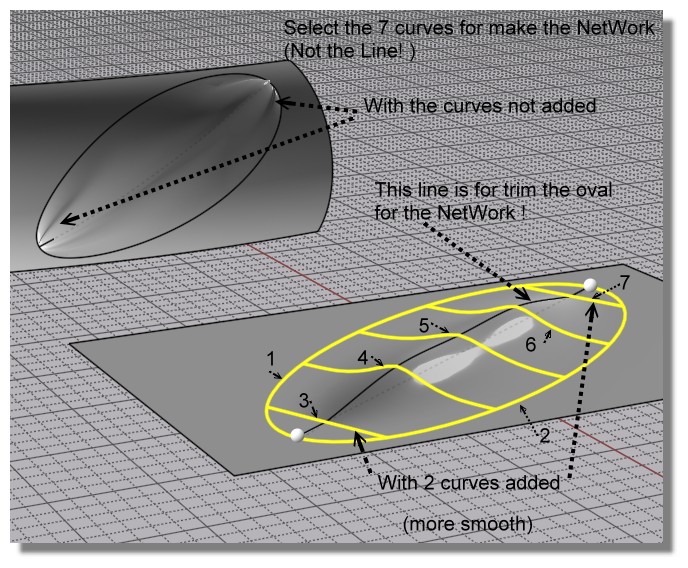
Hi Mala, I'd probably put in a plane as the base surface as described above, keep your target surface like it was before, only enlarged if needed and instead rotate the base objects in relation to the base plane instead of trying to rotate the target piece.

What you're running into is that surface to surface flow works on the "underlying surfaces", and if you show the underlying surface of your target surface that was created by trimming you should see that underneath the trim boundaries it is still the same underlying surface as before. Basically the target surface trimming will not have an effect on flow since it does not work by following trim curves, it works on the underlying surface. So trimming a rotated oval out will not introduce rotation. But rotating the base objects in relation to the base plane will.

- Michael
  Reply Reply More Options
Post Options
Reply as PM Reply as PM
Print Print
Mark as unread Mark as unread
Relationship Relationship
IP Logged

Previous
Next
 From:  Frenchy Pilou (PILOU)
10132.16 
If i take 2 inclined oval surfaces Start / Target

  Reply Reply More Options
Post Options
Reply as PM Reply as PM
Print Print
Mark as unread Mark as unread
Relationship Relationship
IP Logged

Previous
Next
 From:  Lara (MALA)
10132.17 In reply to 10132.16 
Thank you Michael for that step. I did not yet try that step because I thought it is the second one. The first step I already failed was the sweep of the surface. I never did it with a sourrounding profile (oval) and that 3 splines. How to do that?
  Reply Reply More Options
Post Options
Reply as PM Reply as PM
Print Print
Mark as unread Mark as unread
Relationship Relationship
IP Logged

Previous
Next
 From:  Michael Gibson
10132.18 In reply to 10132.17 
Hi Mala, I mean something like this, I used Trim with the Isocurve option to trim out a section of the torus. Then the rotation is introduced by rotating the objects to be deformed by the Flow to be rotated with respect to the base plane:


- Michael

  Reply Reply More Options
Post Options
Reply as PM Reply as PM
Print Print
Mark as unread Mark as unread
Relationship Relationship
IP Logged

Previous
Next
 From:  Lara (MALA)
10132.19 In reply to 10132.18 
Sorry for that confusion - Pilou, you made that suggestion I thanked Michael for...(new messages are shown for me alone on a webpage and then I do not see what was before...confused...)

Ok - this step is clear for me. What I do not know is how to make the topografy/surface out of the curves and the oval?
  Reply Reply More Options
Post Options
Reply as PM Reply as PM
Print Print
Mark as unread Mark as unread
Relationship Relationship
IP Logged

Previous
Next
 From:  Michael Gibson
10132.20 In reply to 10132.19 
Hi Mala, it can be difficult to get a good surface with cross sections running in one direction like that. It can get a pinched type shape at the tips as the profiles collapse down to a point.

You might try a more radial type construction, maybe a loft with loft style = "loose" through sections like this:


- Michael

  Reply Reply More Options
Post Options
Reply as PM Reply as PM
Print Print
Mark as unread Mark as unread
Relationship Relationship
IP Logged

Previous
Next
 From:  Frenchy Pilou (PILOU)
10132.21 In reply to 10132.19 
As you can see the Michael example result is "inside" so just enable case "Flip Surface Normal" in the Flow Menu fonction

For the surface maybe this if i well understand your question...
Of course curves 3 & 7 can be an Arc little rounded... (2 little white spheres show trimming points of the oval curve)


PS Crossing Michael message ! :)
So you have 2 methods ! Loft & NetWork ! :)
and this one more general by Chipp Walters for any surfaces!

Bon courage!


EDITED: 5 Feb 2021 by PILOU

  Reply Reply More Options
Post Options
Reply as PM Reply as PM
Print Print
Mark as unread Mark as unread
Relationship Relationship
IP Logged

Previous
Next
 From:  Barry-H
10132.22 
Hi,
perhaps the following method may help.
Cheers
Barry


Attachments:

  Reply Reply More Options
Post Options
Reply as PM Reply as PM
Print Print
Mark as unread Mark as unread
Relationship Relationship
IP Logged

Previous
Next
 From:  Lara (MALA)
10132.23 In reply to 10132.22 
Thanks Barry. I cannot follow fully. What is with the back seam? You mean it should be placed there in order to get no surface trouble where the crease is placed?
After rotation you flowed it, I guess. And it must be rotated before flowing it...I try that out...
  Reply Reply More Options
Post Options
Reply as PM Reply as PM
Print Print
Mark as unread Mark as unread
Relationship Relationship
IP Logged

Previous
Next
 From:  Lara (MALA)
10132.24 In reply to 10132.23 
Now I begun with modelling the crease new.
First I start with the concept of michael, which brings a shape that comes near to my technical efforts.
And - what shall I say - I has not the moi-skills to bring it to the end by myself.
Perhaps somebody here give me a kick how to go further...


EDITED: 10 Feb 2021 by MALA

  Reply Reply More Options
Post Options
Reply as PM Reply as PM
Print Print
Mark as unread Mark as unread
Relationship Relationship
IP Logged

Previous
Next
 From:  Lara (MALA)
10132.25 In reply to 10132.20 
May somebody take look onto my try of michaels concept? I cannot go further...hmmmm´....

EDITED: 10 Feb 2021 by MALA

  Reply Reply More Options
Post Options
Reply as PM Reply as PM
Print Print
Mark as unread Mark as unread
Relationship Relationship
IP Logged

Previous
Next
 From:  Frenchy Pilou (PILOU)
10132.26 
You must add a " Top Point" on the Loft Loose for more easy search form!

And you can run it in Real Time at the end of the Function for find the best form for you!
Of course it will be the same for any curve(s) of the surface (So change also the size in real Time of them!
will show a moving surface!
(not show here) ;)


With change of size, place etc...

EDITED: 7 Feb 2021 by PILOU

  Reply Reply More Options
Post Options
Reply as PM Reply as PM
Print Print
Mark as unread Mark as unread
Relationship Relationship
IP Logged

Previous
Next
 From:  Michael Gibson
10132.27 In reply to 10132.25 
Hi Mala, yes like Pilou says above you need to place a point object for the last profile of the Loft.

You can draw in a point object using Draw curve > More > Pt. It should be placed in the same plane as the ending curve, like this:


You can then select these 3 curves and also the point:


And then use Construct > Loft with the "Loft Style = Loose" option:


- Michael

  Reply Reply More Options
Post Options
Reply as PM Reply as PM
Print Print
Mark as unread Mark as unread
Relationship Relationship
IP Logged

Previous
Next
 From:  Lara (MALA)
10132.28 In reply to 10132.27 
I´m some steps more on my last way f0r this project.
Thanks for the point. I never saw this object before...
Like you may see the crease is at the place where it belongs. But not outside and not rotated.
How do I fix that?

P.S.: a profile line near the loft curfes is not important? Michael, I saw that kind of profile in your dummy of a crease...


EDITED: 10 Feb 2021 by MALA

  Reply Reply More Options
Post Options
Reply as PM Reply as PM
Print Print
Mark as unread Mark as unread
Relationship Relationship
IP Logged

Previous
Next
 From:  Michael Gibson
10132.29 In reply to 10132.28 
Hi Mala,

re:
> Like you may see the crease is at the place where it belongs. But not outside and not rotated.
> How do I fix that?

You need to apply the rotation to the base object in relation to the base plane, not try to do it by rotating a trimmed area.

See these previous posts:
http://moi3d.com/forum/index.php?webtag=MOI&msg=10132.15
http://moi3d.com/forum/index.php?webtag=MOI&msg=10132.18

- Michael
  Reply Reply More Options
Post Options
Reply as PM Reply as PM
Print Print
Mark as unread Mark as unread
Relationship Relationship
IP Logged

Previous
Next
 From:  Frenchy Pilou (PILOU)
10132.30 
The Flow function don't make the absolutly perimeter filling of the projected perimeter rotated started form!

So a little trick is necessary :)

Move the result of the Flow result and make a new "projection" !
(trim the tube, kill the curve perimeter, move the surface on the hole )
Join all and you will have a perfect new solid with a perfect jointure!

EDITED: 8 Feb 2021 by PILOU

  Reply Reply More Options
Post Options
Reply as PM Reply as PM
Print Print
Mark as unread Mark as unread
Relationship Relationship
IP Logged

Previous
Next
 From:  Lara (MALA)
10132.31 
this is my result of michaels workflow.
I rotated the loft. Now it is placed rotated. But it does not fit.
I do not know if this depends on the point where I do click the base plane in the flow-workflow.
I cannnot take the middle point of the oval base plane. Clicking on it, I select the oval loft.

Pilou - yours I try now too. But I not really look through this concept and how to do...ok...let´s see...


EDITED: 10 Feb 2021 by MALA

  Reply Reply More Options
Post Options
Reply as PM Reply as PM
Print Print
Mark as unread Mark as unread
Relationship Relationship
IP Logged
 

Reply to All Reply to All


Show messages:  1-11  12-31  32-38