From: Don (DON_CHEKE)
I was trying to model a hook in MoI and was wondering how one would finish the round tip on something like this. Here I tried a revolve that seems okay. I tried a network but couldn't seem to get that to work. How would you do it?
Image Attachments:
 Screen-0009.jpg
Screen-0010.jpg
Screen-0009.jpg
Screen-0010.jpg
From: bemfarmer
Blendcap script?
-Brian
From: Michael Gibson
Hi Don, can you post your .3dm model file to test with?
For lofting, the Loft style = "loose" option can be good with an end point that is in the same plane as the last loft profile. See here for some examples:
http://moi3d.com/forum/index.php?webtag=MOI&msg=7766.3
http://moi3d.com/forum/messages.php?webtag=MOI&msg=6082.6
http://moi3d.com/forum/index.php?webtag=MOI&msg=6329.2
http://moi3d.com/forum/index.php?webtag=MOI&msg=6576.8
But it's best do that for the whole shape and not just a separate small area.
- Michael
From: Don (DON_CHEKE)
This was just something I tried quickly in MoI, to point out to someone that having MoI in one's CAD toolbox comes in handy on occasion for things like this. I am afraid that I don't use MoI very often, so I forget much of what I learned between uses. This was from a discussion on the TurboCAD forum where the fellow was asking for best method to make this hook. We can do Loft with Guides in TC, but guides are poorly implemented there so of little use. MoI has good implementation of Loft and Sweep with guides, so thought that would be better for this hook. I thought that leaving the right side hole out of the mix as well as the little tongue would be the way to start. The 3rd image is a similar hook I found as a bit of 3D reference. It would be great to see how you would approach this, but only if you have the time and feel like it.
Attachments:
Tender Hook Trials.3dm
Image Attachments:
Screen-0004.jpg
Screen-0012.jpg
From: corchet


draw the piece and rebuild the curves ( few points is better )
duplicate and align
between the 2 drawings ... place a serie of profiles ( they can be different if you need to obtain variation in final surface ) it's the case on your photo
( the result on the second pict where it's an arrow )
select all profiles and sweep 2 rails ( the 2 rails are your drawings )
to close the guy select each drawing and apply planar
select the 3 surfaces and join ... it's solid
From: corchet

at the right of the chain ( on the photo ) a part is larger than the rest of the piece
profiles can be larger than the distance between the sweep-rails to obtain this shape without creating a second piece ( brown profiles )
From: ed (EDDYF)
Hi Don -
You're real close to capping the hook.
Using your curves, I Trimmed the arc at the tip of the hook in half, then joined the top half to the top rail, and joined the bottom half to the bottom rail.
I also had to join some curve segments at the rear of the assembly to completely form two rails (shown in green & blue)
Then I selected the six orange profiles and performed a Sweep using the green & blue curves for rails.
The result is a nice cap on the hook.
You can finish up with making the cut-out for the hole, add fillets, etc.
I think that little appendage bump-out coming off the left side of the hole is probably best made as a separate object, then Boolean Union & Fillet with the main solid.
Ed Ferguson
From: Don (DON_CHEKE)
Thanks everyone for your input. I appreciate it very much!
From: Michael Gibson
Hi Don, really your revolve is looking pretty good. It's possible to use that and make it connect up better to the main piece.
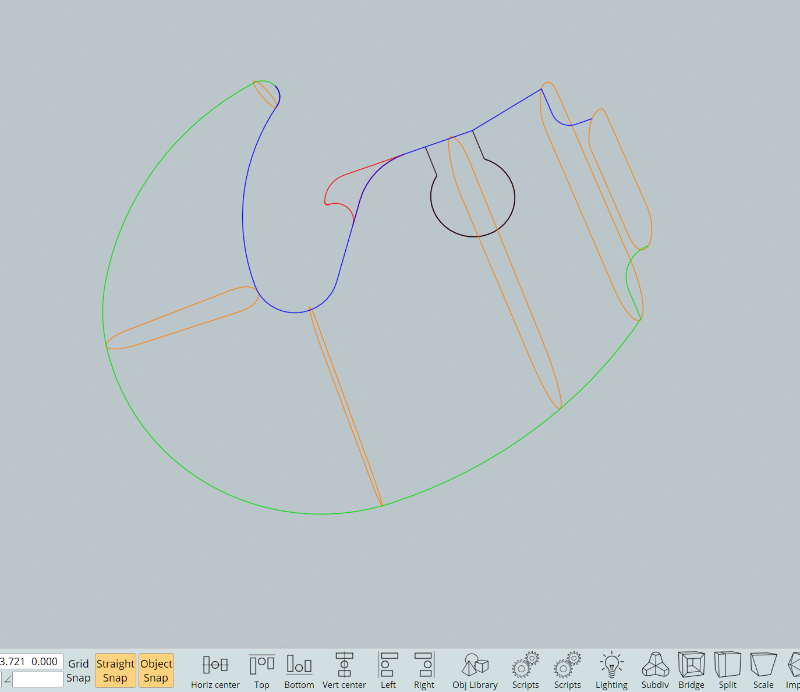
The way you would do that is by putting in some cutting lines and using Edit > Trim to open up some empty space between the pieces like this:


Then select the 2 edges and use Construct > Blend to make a smooth blend surface in the empty area. You kind of need to leave enough empty space for the blend to fit well and be relaxed. If you make a space that is too small it will tend to accentuate any bending in the blend surface. Then to finish it you select the pieces and use Edit > Join to combine them:


- Michael
Attachments:
Tender Hook Trials_blend_3dm.zip
Image Attachments:
don_hook_blend1.jpg
don_hook_blend2.jpg
don_hook_blend3.jpg
don_hook_blend4.jpg
don_hook_blend5.jpg
From: Michael Gibson
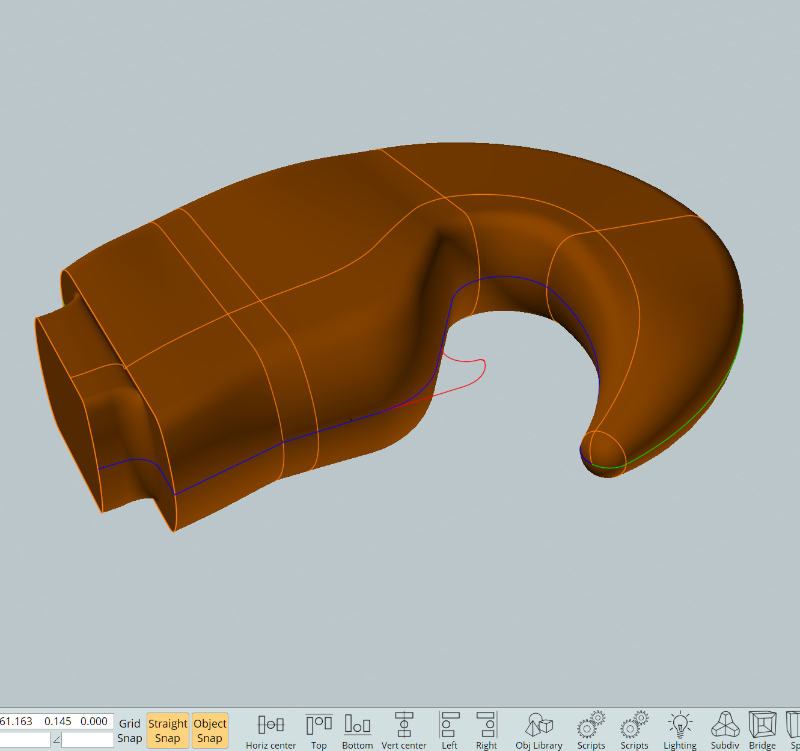
Hi Don, and just to clarify for Sweep - it is possible to make a rounded tip with sweep which you do by having 2 rails that meet up at their tips like this (shown here with one selected so you can see how they are formed), usually you set this up by having a smooth piece there (I used curve blend in this case) that you then trim at the tip:

Then also another piece for a sweep that will be collapsing down to a point at the tip like that is you need to make an additional profile shape before the end. Usually a circle or ellipse to even out the shapes as you approach the collapsing down spot. If you just directly try to collapse a profile with variations in it, those variations will tend to be accentuated. Basically a good rounded tip should be sphere-like in the area around the tip, it won't look good if it was still trying to have the other profile shape right in the area round the tip.
So then you select profiles like this:

And then do a sweep and then select the rails:


- Michael
Attachments:
don_sweep_demo.3dm
Image Attachments:
don_hook_sweep1.jpg
don_hook_sweep2.jpg
don_hook_sweep3.jpg
don_hook_sweep4.jpg
don_hook_sweep5.jpg
From: Don (DON_CHEKE)
Great stuff Michael! Thanks for sharing your procedures.