Show messages:
1-4
5-24
25-35
From: amur (STEFAN)
O.k. i used a slightly different method …
https://www.file-upload.net/download-13528849/RoundingEdges_2.3dm.html
Regards
Stefan
From: Frenchy Pilou (PILOU)
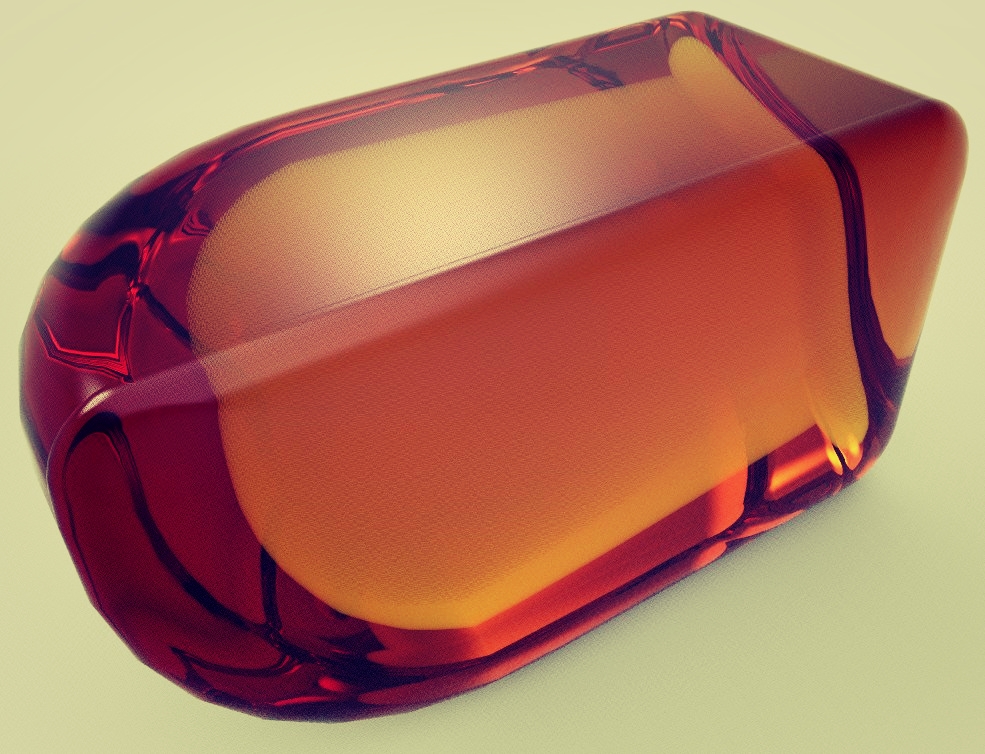
Another solution : Rail revolve ! :)
Draw an half section curvature then rail revolve...
From: Michael Gibson
Hi Lara, fillet won't work on those edges since they are already rounded, although the rounding is squished down to only a small area.
You can't generate a filllet on an edge where the surfaces meeting there are already smooth, you can only put edge fillets on sharp edges.
Generally if you want a slightly rounded end cap it's better to build one larger curved surface using something like sweep or loft and have that cut the end of your object off using it as the cutting object in boolean difference:


- Michael
Image Attachments:
 lara1.jpg
lara2.jpg
lara3.jpg
lara4.jpg
lara1.jpg
lara2.jpg
lara3.jpg
lara4.jpg
From: Frenchy Pilou (PILOU)
Clean as usual :)
Else with my Rail Revolve above and the funny free Owlet
From: Lara (MALA)
Wow - MOI and you all are so cool...Thanks so much to everyone!!!
ML
From: Lara (MALA)
Hi Michael,
how do I construct this bended plane?
I guess - 2 lines, but then...?
Cheers, LM
From: Michael Gibson
Hi Lara, with 2 curves that cross each other like in the previous image:

You first select just one curve to use as the profile, then run the Construct > Sweep command, then select the other curve as the rail path, then push "Done" to finish the Sweep command.
- Michael
From: Lara (MALA)
It works. Thanks a lot. MOI is unbelievable wonderful...
ML
From: Lara (MALA)
Hi,
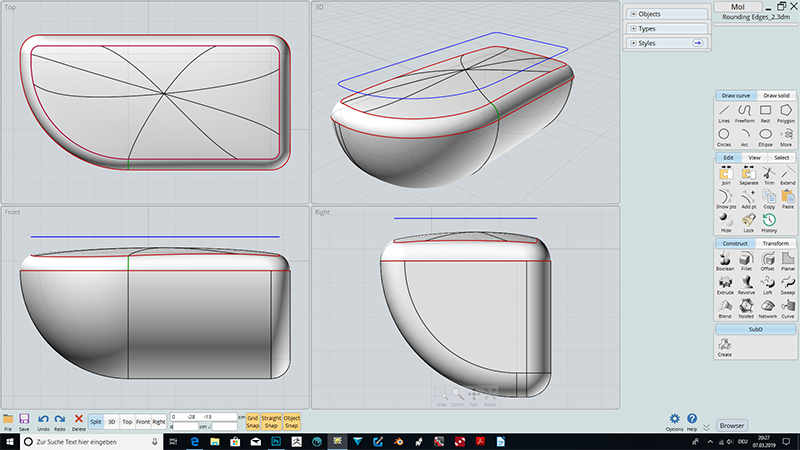
in order to learn more MOI, I also tried the revolve command.
But it doesn´t work. My workflow seems to be wrong?!
I first marked the arc line (as profile curve), then the big line (rail curve) and set the revolve command.
Now MOI wants to select the revolve axis start point - I took the arc´s point not in the middle - took the other one (sry. for my bad english). And then the end point of the arc in the middle of the planed plane.
Hmmm....
From: Frenchy Pilou (PILOU)
Select the curves who make the perimeter Rail : Edit / Join
Draw your half curve section with curvature wished (the arc like curve)
You can launch the Rail Revolve function! :)
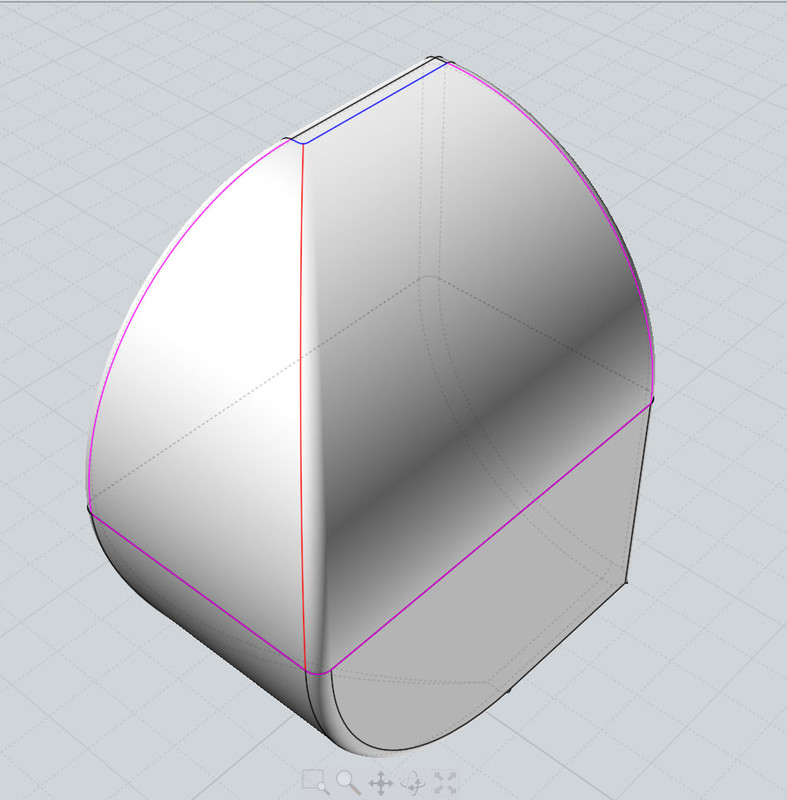
From: amur (STEFAN)
Hi Lara,
you did nothing wrong, except you did not used the proper start and end points
for the rail revolve axis. I marked the imaginary axis in red.
Regards
Stefan
From: Frenchy Pilou (PILOU)
Start and End Point axe can be anywhere on this infinite red vertical line even out of the future object for your result wished ! ;)
And even out the vertical axe but of course in this case result will be not your wished object but a funny one! :)
Even maybe not a solid but an open surface!
Play with the all possibilities! :)

Object above with a thickness Render free Owlet

From: Michael Gibson
Hi Lara, so yes for Revolve think of the axis line as if it were the pin in a door hinge, the shape will pivot around the axis line in a similar way.
If you're still having problems please post the 3dm model file that you're working with, it helps a lot to be able to examine your actual geometry instead of only seeing a screenshot alone.
- Michael
From: Lara (MALA)
Thanks for your very friendly tricks and KnowHow!!!
The bended plane I ´ve got it meanwhile.
An other thing is a sharp corner what I need a little impulse for to smooth...
Cheers, ML
From: amur (STEFAN)
Well, i did a quick test and i hope you can figure out what i did,
with deleting the faces filleting the edges and extending the red
curve so that i was able to network the patches. Maybe you need
a larger fillet radius with what i did. At least worth a try.
 https://www.file-upload.net/download-13530590/Smoothhardform2.3dm.html
Regards
Stefan
From: Lara (MALA)
Hi Stafan,
thanks...
...which face did you delete - the little top one or all faces (you wrote faces)?
Which command do extend red line - "fit fillet" I guess.
After deleting, before "fit fillet" you did the loft command using the lines?
Tried your test: It´s not that smooth what I need to reach...
From: amur (STEFAN)
Hi Lara,
i deleted the two large faces. The small one at the top i filleted the
edges. When doing so you need then to use the rounded line it
creates to trim the small surface. Like i said you probably need
to use a larger fillet radius to get it smoother. After that i used
the network command to recreate the two large faces.
I think if you could post the model without fillets people can come
up with a better solution.
The red line was extended by drawing a small line and then joining
both lines.
Regards
Stefan
From: Frenchy Pilou (PILOU)
Maybe you can draw some 2 - 3 horizontal open sections
pasted to the existing volume with your wished arounding then loft them ...
From: Lara (MALA)
Hi Stefan,
thanks a lot for your workflow!
I may try it out tomorrow...
For now I put the file without fillets here like you suggested..
Cheers, Lara
From: amur (STEFAN)
Hi Lara,
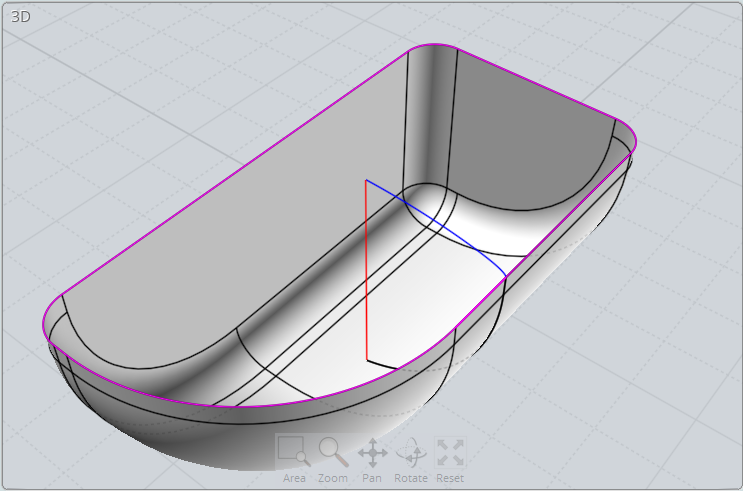
this is my new try. As you can see I copied / pasted the edges so that I have 3 red curves.
I then created a circle profile (green) and sweeped the circle along each red curve. Once
I had the 3 pipes I boolean subtracted them from the main surface. After that one only
needs to blend the edges. The remaining open triangular hole was networked.
Hope this helps!
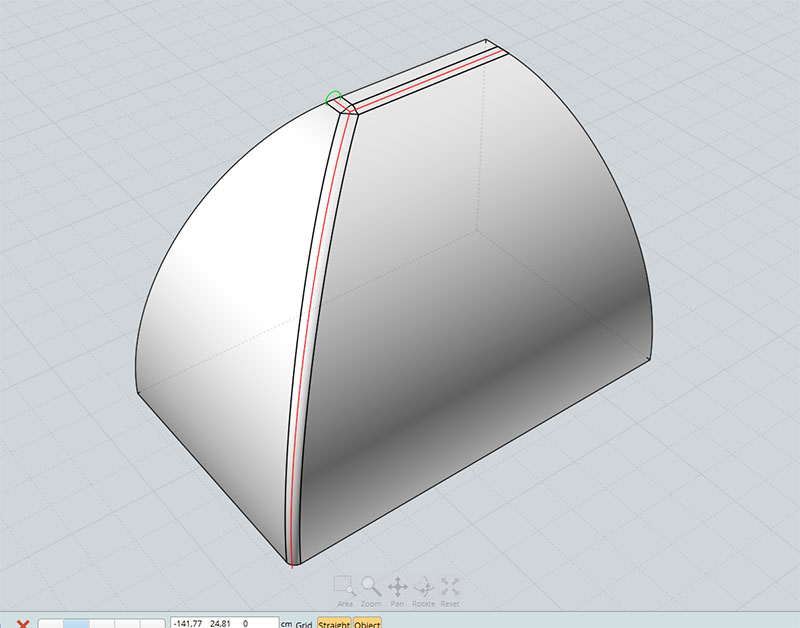
Regards
Stefan
Show messages:
1-4
5-24
25-35