Show messages:
1-18
19-35
From: amur (STEFAN)
Well, i did a quick test and i hope you can figure out what i did,
with deleting the faces filleting the edges and extending the red
curve so that i was able to network the patches. Maybe you need
a larger fillet radius with what i did. At least worth a try.
 https://www.file-upload.net/download-13530590/Smoothhardform2.3dm.html
Regards
Stefan
From: Lara (MALA)
Hi Stafan,
thanks...
...which face did you delete - the little top one or all faces (you wrote faces)?
Which command do extend red line - "fit fillet" I guess.
After deleting, before "fit fillet" you did the loft command using the lines?
Tried your test: It´s not that smooth what I need to reach...
From: amur (STEFAN)
Hi Lara,
i deleted the two large faces. The small one at the top i filleted the
edges. When doing so you need then to use the rounded line it
creates to trim the small surface. Like i said you probably need
to use a larger fillet radius to get it smoother. After that i used
the network command to recreate the two large faces.
I think if you could post the model without fillets people can come
up with a better solution.
The red line was extended by drawing a small line and then joining
both lines.
Regards
Stefan
From: Frenchy Pilou (PILOU)
Maybe you can draw some 2 - 3 horizontal open sections
pasted to the existing volume with your wished arounding then loft them ...
From: Lara (MALA)
Hi Stefan,
thanks a lot for your workflow!
I may try it out tomorrow...
For now I put the file without fillets here like you suggested..
Cheers, Lara
From: amur (STEFAN)
Hi Lara,
this is my new try. As you can see I copied / pasted the edges so that I have 3 red curves.
I then created a circle profile (green) and sweeped the circle along each red curve. Once
I had the 3 pipes I boolean subtracted them from the main surface. After that one only
needs to blend the edges. The remaining open triangular hole was networked.
Hope this helps!
Regards
Stefan
From: Lara (MALA)
Hi Stefan,
thanks for the nice concept...
But - I can´t boole the object to get the intersection lines...
How booling?
From: Frenchy Pilou (PILOU)
When you have the 3 red Lines or the curves edges that you show on your image
Take them for make some "tubes"
Boolean Diff or Trim these tubes with your solid or surfaces
Then you obtain "holes" and can Blend surfaces betwen them side by side
Last top hole triangle by Network
But I persist to believe that you will have more beauty rounding form with some horizontal loft curves with same number of Control points
From your little top rectangular (2 sides) to the big bottom one (2 sides)
A possible workflow :)
Make a vertical line Array Dir of a Point at the corner for have regular spacing
Draw the 3D solid plane
You can now draw the rounded curve(s) on it!
Of course you must better draw the first round plane curve than me !)
(i should make some tweaks :)
Some tricks : it's helping to draw temporary solid planes
For have intersection in some places where curioussly you can't have Snap : you can make a Boolean Merge between Plane & Curve
(that explain the little rectangle at the bottom of the solid planes)
Copy line line your rounding curves on each plane
Loft all the rounding curves
Of course erase all no needing at the end and make a solid plane on the ground - join all and you will have a beautiful solid! :)
With your hand wished rounding curve by hand and not an automatic one!
Speedy concept :)

From: amur (STEFAN)
Hi Lara,
you simple select the object and then tubes, like Pilou shows,
and boolean them. I hope the picture from Pilou makes it clear.
Regards
Stefan
From: Lara (MALA)
Thanks thanks thanks!!!
Now it worked. I´m not sure if it has to do with that thing: Two of my tubes had the same name. After renaming the 3rd one I was able to boole. (Not sure if this was the mistake or the fact that I´m in my MOI-Beginnings...)
The little bit more complex modelling concept I didn´t follow because it has geometrical things which do not fit to my geometrical aimes I intend to achieve...
All in all - very happy about the results and once more my deep respect for you, your kindness and patience and not at least for Michael and his MOI...and I can start printing 3D...
Cheers, Lara
From: Frenchy Pilou (PILOU)
A same object "Boat" even copyed can Boolean it with a copy (so same name) of itself! ;)
From: Lara (MALA)
Hi,
I thought I was through with the model!
But the modellier concept with the lasagna is, contrary to what I thought, the solution to my problem. Because at the bottom I need the small radius at the corner, but towards the top I need larger radii.
That worked out pretty well. Just a little more finetuning, I think.
Problems:
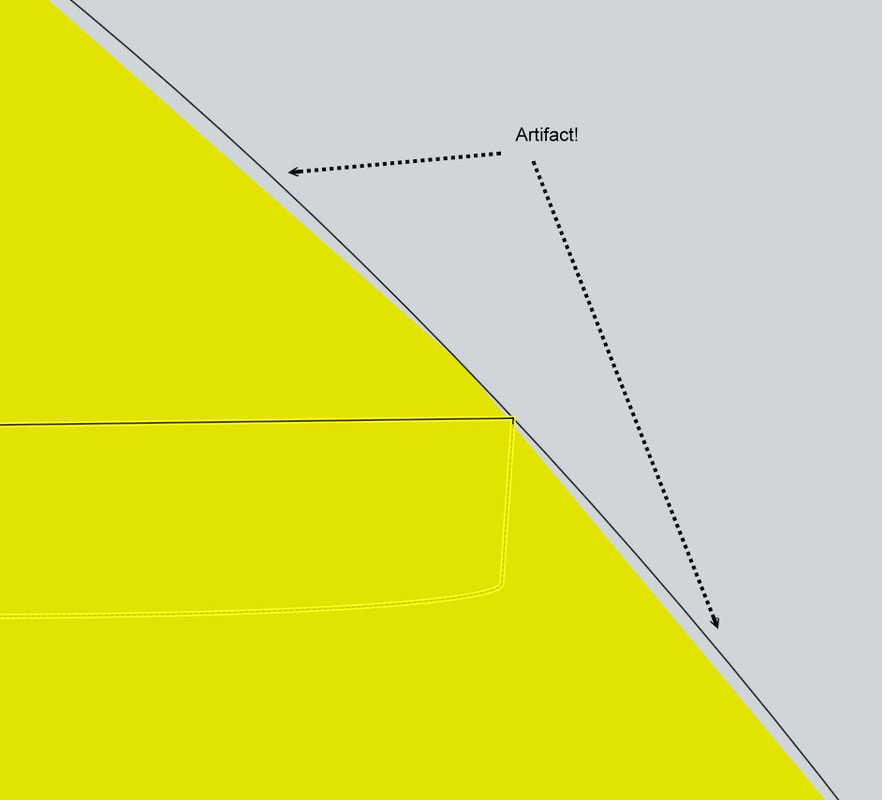
1. at the top, a line lapps beyond the shape.
2. The rounding could be a little softer.
Any ideas on what I could improve? That'd be great.
Cheers, Lara.
From: Michael Gibson
This is looking pretty good Lara, how are you constructing it is it using Loft?
If so one thing you could experiment with is setting the Loft style = "Loose" option. That will make a loft that does not exactly pass through each station other than the first and last but it could give you the softer shaping that you want. With a "Loose" loft the surface will behave similar to how a freeform curve with control points behave, where it's only forced through the first and last point and generally guided by the in between ones.
- Michael
From: Frenchy Pilou (PILOU)
Normally it's just artifacts of display used by Moi for speedy display!
(menu Option / Meshing Parameter )
If you export your model and render it you will see that is not existing! ;)
But in your case seems it's really a problem of geometry at the top :)
During the process of drawing one of your curve control points is too large!
artifact anywhere due the dispaly speed!;)
<< 2. The rounding could be a little softer
Just around more your drawing of curve!:)
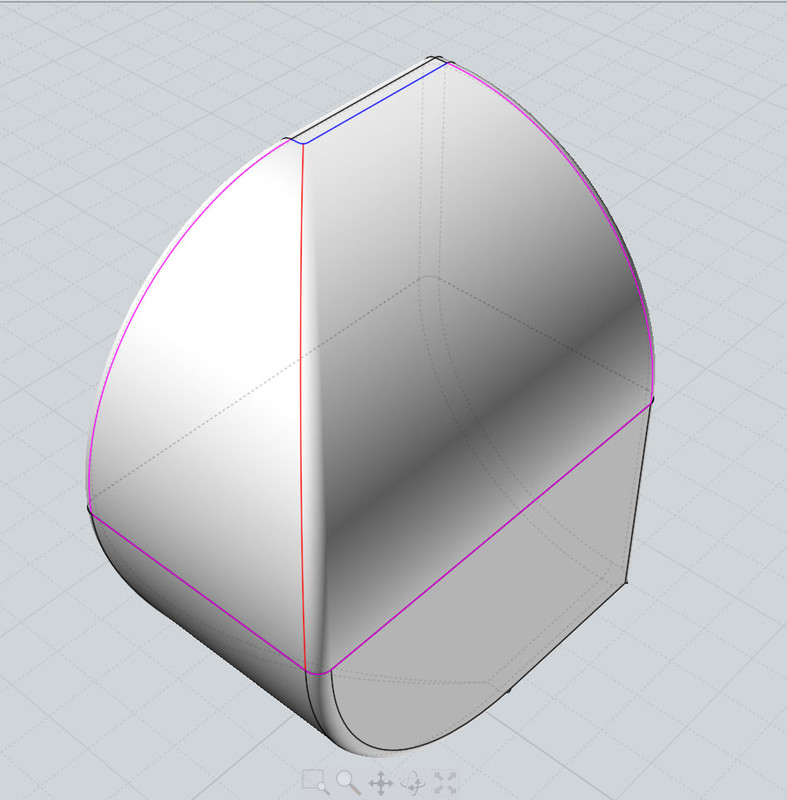
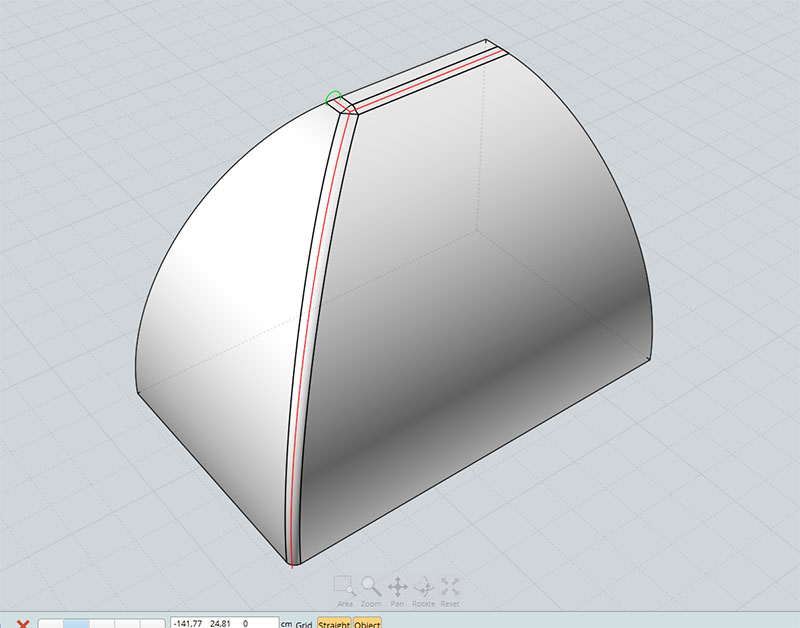
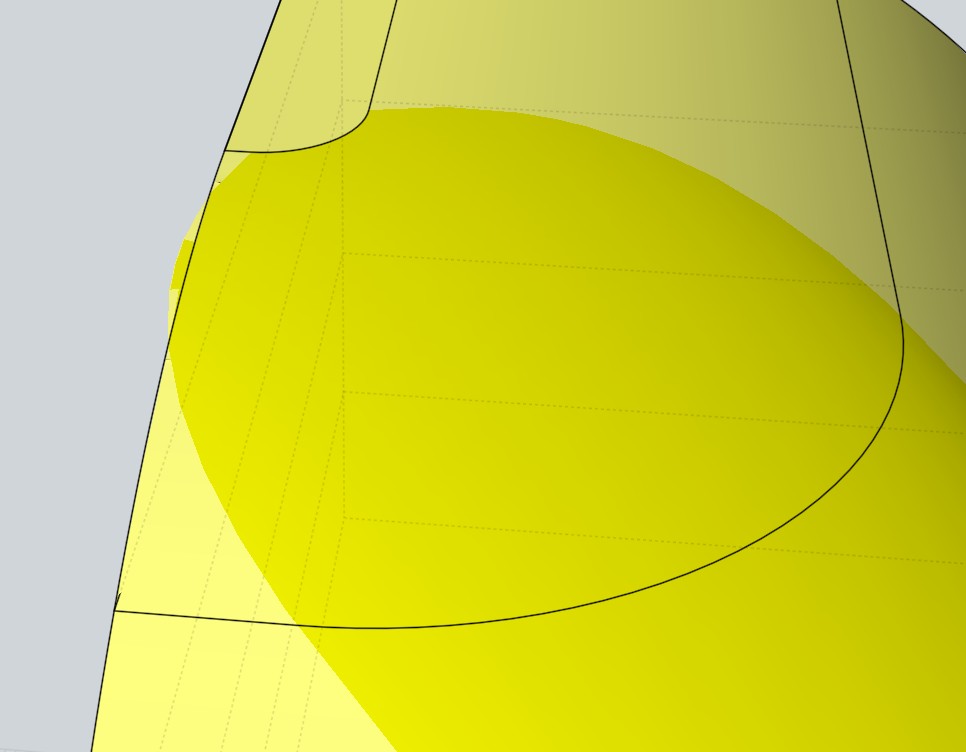
From: Michael Gibson
Hi Lara, another potential method you could experiment with would be to have your base shape be just 2 extrusions, then draw in 2 profiles in the top view and trim those away and put in a blend surface between them. You may need to manually flatten out the top and bottom of the blend.
That looks something like this though:


But maybe that won't work for you if you have some specific criteria for the radius at each position though.
- Michael
Image Attachments:
 lara_blend1.jpg
lara_blend2.jpg
lara_blend3.jpg
lara_blend4.jpg
lara_blend5.jpg
lara_blend1.jpg
lara_blend2.jpg
lara_blend3.jpg
lara_blend4.jpg
lara_blend5.jpg
From: Lara (MALA)
Hi,
can´t express how I love this little fine peace of software...I purchased it years ago but it slept...like me...
...now I´m relatively happy with my model.
If there is something that can be modelled better please do not hesitate telling me..
cheers, thanks to all, Lara
From: Frenchy Pilou (PILOU)
Your object is not a solid!
Select bottom edges : Construct / Planar : Select All : Edit / Join = Solid
Save as OBJ and render inside the free Simlab Composer Lite :) (Maxi 1920 * 1080 - commercial use permited! )
http://www.simlab-soft.com/3d-products/simlab-composer-lite.aspx

Show messages:
1-18
19-35