I have spent the last couple of months trying to learn MoI and am starting to get the hang of much of the program at a base level of understanding.
Lately, I have been trying to deconstruct and emulate a fairly complex design by an talented artist named Xuteng Pan in order to advance my skillset with MoI. (See attached photos)
I am banging my head against the wall, however, on how he has achieved the subtle side cut of this helmet design (highlighted in red). He seems to follow the curve of the profile of the helmet with a cut that carves out a small channel along the side and then bows out near the front of the helmet. The negative space that he achieves with this cut really helps sell the front of the mask/helmet.
I have tried many techniques, but cannot get anything to get close to this level of nuance. Is there anyone out there that can offer some clues, or know how about how to achieve that type of cut. There is the very good possibility that I am overthinking a solution, but it evades me nonetheless.
Additionally, I am wondering how he achieved his base level geometry for the helmet. Currently I am using MoI beta v4 to import a subd model from C4D, however, the base lines are a bit of a mystery to me.
I should point out that on his Artstation, he says he mainly used MoI, but also Fusion 360.
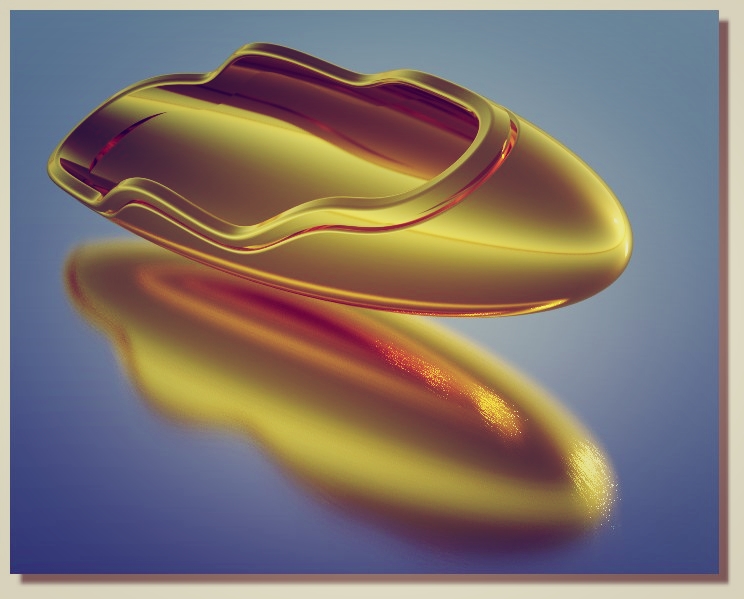
So for your first question, a sort of scalloped out cut like that can be done by building a cutting surface using things like loft or sweep and doing the boolean with the surface as the cutting object. That's instead of using just a 2D curve as a cutting object since that will be a straight direction type of cut.
So that looks something like this, here using sweep and boolean difference:
You can adjust the shapes of the sweep profile and rail and also the angle and depth of the surface in relation to the main body to get different looking cuts.
For the base geometry, judging from the patch junctures in these areas I'd say it is likely conversion from a sub-d model for the base shape:
The trick is to click "Face(s)" and not "solid(s)"! (else function don't work)
here "Inward" + "Grooved" on the top face
Union Top and Bottom solids
then Shell the top Face + Fillets on some edges
(with the real time free Simlab Composer lite max 1920 * 1080)
If you want to get some control over cut line position on the helmet, you can project a curve to the side. Since it will be a closed curve, split it in 4 pieces with trim points, so you get 4 sides for network (I highlighted front and back pieces). Add profiles roughly in the middle, they will define depth of the cut, my example is much deeper than on your model.
Narrow cut ("mouth") is obtained again from side projected curve, used as a rail for the sweep.