Show messages: All
1-11
12-16
From: Mike K4ICY (MAJIKMIKE)
I've been seriously looking into Thea Render (Studio.) They let you try out the interface as a demo and the Materials interface is pretty interesting.
You can layer and mix materials on a base level including main types for Solid, Glass, SSS, Thin Glass, and etc. while being able to tweak the attributes in various more complex sub-layers employing bitmap textures for nearly every function. Thea even supports true displacement. The TR render modes are even un-biased MLT engines, perfect for lighting.
Thea is perfect for me now because it is basically the upgrade of Kerkythea which I am used to.
Since I'm not made of money though, it'll have to wait a bit.
I've run into one caveat with Thea having to do with making a certain material.
It's not a deal-breaker, but you know, when you really want a certain result, hangups can eat you alive.
Fluorescent acrylic has always been a favorite material of mine. Somehow, the edges of anything made from this plastic glowed in neon brilliance.

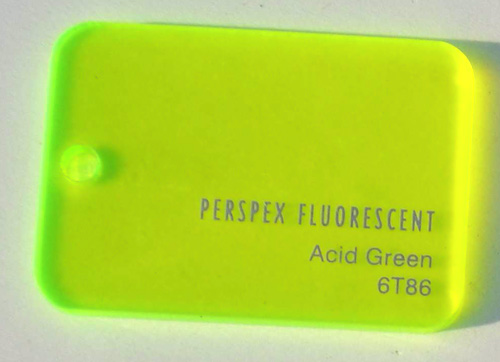
The "glowing edges" effect is achieved by two parts; first, light entering and moving through the acrylic is bounced around inside the same way it does in a fiber-optic material.
Photons glance off of the interior barrier of the material as it would on the exterior, so once the critical angle for reflection has been reached, most of the energy is deflected right back into the core of the material:
https://en.wikipedia.org/wiki/Angle_of_incidence
If the exterior of the acrylic during the manufacturing process is coated with a material with a different Incidence of Refraction then the barrier reflective properties become more pronounced.
Light entering the surface at more straight-on angles will mostly pass through. In fact, manufacturers state that the transparency rate is around %92.
Just as in a fiber-optic cable, light will tend to exit in the more confined edges of the material bulk because more of the photons are traveling in line with that edges normal.
In acrylic, the edges are sanded or roughed up to trap and release more photons not allowing for a clean incidence angle.
Now in most glass and plastic "dielectric" materials light will be absorbed as the depth of the material increases. This is an 'extinction' rate and often causes that nice green look you see in the deeper edges of glass objects as light in the opposite parts of the spectrum are absorbed. Using purer glass can reduce this loss, but fluorescent acrylic uses the obvious addition of fluorescing minerals to convert the UV components of light passing through to light seen in the visible spectrum. Because the long paths through the material allow for more concentrated conversion, the rough edges are made to pass more light, as it appears.
Okay, this was my best educated guess so don't grill me if I'm wrong. ;-)
Now for creating this material to be used in a rendered MoI model...
Looking online, I've actually found a few convincing attempts at fluorescent plastic.
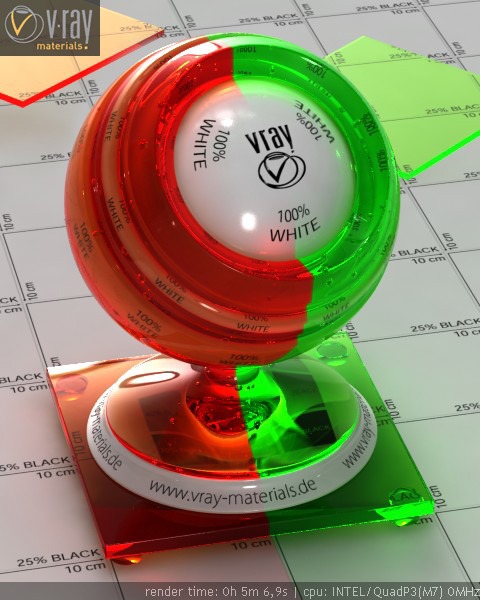
The V-Ray one is my favorite.
I actually spent a few hours in Kerkythea trying to create a realistic version for my own renders. I eventually figured it out.
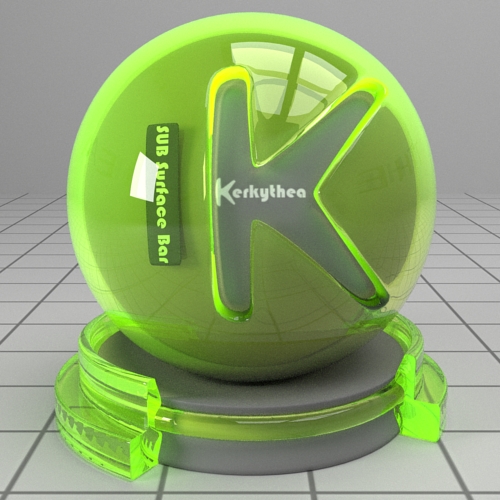
Here's how I did it:
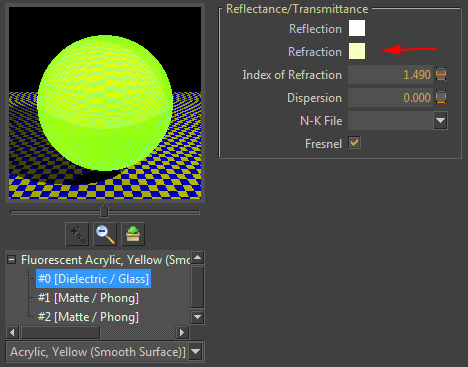
I made a 'multi-layered' material which included a Dielectric Glass and a Phong Shader.
The glass was given a the IOR measured for acrylic and a slight tint to Refraction to colorize it throughout via a direct viewing angle.
I also provided a Fog absorption color to add coloring through the long paths.
The problem first off was that I noticed that the long paths yielded a darker color, or loss in light.
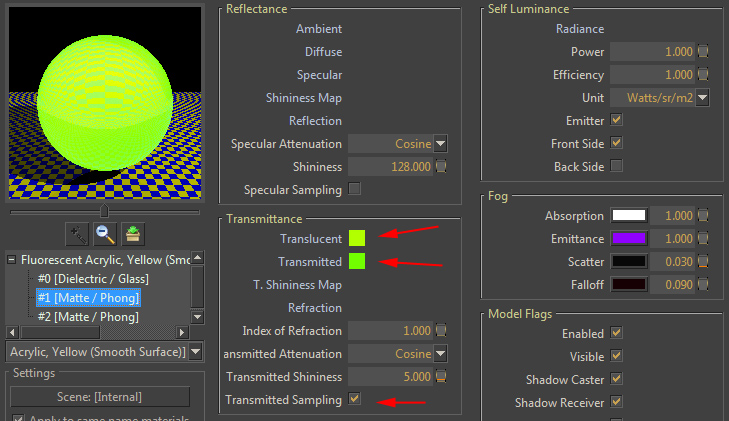
I then added the Phong shader to the layers. It has no data to define it except that I added some bright greenish/yellow coloring to both the Translucence and Transmitted values.
This really 'lit up' the material causing all sampled photons to practically illuminate the object. Transmitted Sampling was activated to add more light.
Doing this was surely breaking the law of energy conservation for this material, but for some reason, Kerkythea allowed the material to only be shown more through the long paths of the Dielectric. I even doubled the Phong layer to add more light.
Now, this material is assumed to be smooth all the way around and the effect is more evident only in bends and thinner edges.
The effect of simulated fluorescent plastic contains two elements; the clear smooth stuff it's made out of and and the rough parts that most light emanates from.
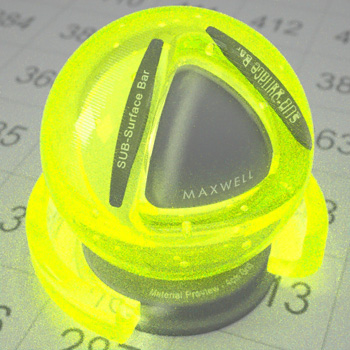
To make this rough material, I use the same material as above but I diffused it up with a noise texture for the Bump as well as lower the Shininess level with the Specular Sampling activated, and the effect isn't really realistic unless you add a small amount of Emission (light) to the material to simulate the added converted-UV component.
Here are two attempts using this material:


As for my caveat - here's where I could sure use help from any seasoned Thea Render users... or at least the sad truth.
Thea Render, though similar to the basic functions of Kerkythea, uses different 'heuristics' for their materials.
Sure you can layer them, but It appears that it will not mix clear glass and a solid shader in the same way to produce the viewing of the shader only through the long path of the glass.
I can see that other rendering programs are able to produce this effect so it may be that this might be a slight limitation to Thea Render.
Like I said, it's not a deal breaker. Thea appears to have fantastic realism and material construction strengths, so it wins in my book - plus, fluorescent plastic is NOT something I wish to use most of the time. I thought I'd share my little adventure in rendering.
From: OSTexo
Hello,
Thea Studio and plugins are on sale, Studio+Thea 4 Rhino is ~$270. In my opinion it's a great setup to create in MoI and drop into Rhino for rendering.
One option (if you can do this in KR) is to select a glossy transparent material, keep reflectance and transmittance as white, select the absorption color as the desired fluorescent and crank it up a bit. For your edges the only thing you need to change is the roughness value (mimicking the rougher cut edge surface, and perhaps crank up the absorption on that a bit more than the base material. There is no emitter used in this material, but I guess you could add a bit but I think doing that would sort of mess with what the material actually is. Here is a quick render I did to illustrate:
Hope it helps.

Image Attachments:
 FG.png
From: joe (JOEHARRIS)
Love it!
From: Mike K4ICY (MAJIKMIKE)
Just playing around with SketchFab again...
50 mb limit for non-pay account, sooo all round edges are highly faceted, but the fluorescent plastic effect looks well.
From: mkdm
Welcome back Mike (K4ICY) !!!
Bye!
Show messages: All
1-11
12-16