Show messages:
1-12
13-32
33-51
From: BurrMan
Hi Steve...
""""""""""I am seeing that as a possible solution to using a single cutter giving a result of a variable depth cut.""""""""
Well yes that is Greybeards ultimate goal. I posted the link for 2 reasons. In the very begining, he gives his method to prgamatically determine centerline for the times new roman charater.. He just iterates through tangent circles then draws a curve through points with the circles center points to create centerline.... The rest of the very arduous thread, gets into some other discussion like you mention, but also touches on the various complexities of "What is really the centerline anyway???"
Here' s the file I was going to present with the initial greybeard iteration:

But that was just blown out of the water with Michaels isec example with some quick trims... Way more work to create each letter with my method...Less than a minute to create the curves with MG's, then some setup for sweeping surfaces....
Found one cool thing in Michaels method... When you run isec...Just click the right mouse button "twice", which will run the isec on the curves a second time and create "points" at their intersections, which helped me visualize the areas I needed to focus on....Bonus!!!
Anyway...
From: steve (STEVE_HOME)
Hi Burrman,
Michaels methods is quick, although I would avoid using the actual letters for the surface creation.
The letters are OK for printing etc, but for smooth curves they can be quite bad, and would rebuild them before using them for building the surfaces.
- Steve
From: BurrMan
""""""""""although I would avoid using the actual letters for the surface creation. """"""""""""""
Hi Steve,
Could you explain what you mean here? Here is the Times New Roman "I" from Michaels example, and i dont really see anything wrong with the surfaces created. This one was done with sweep. I also did one with loft that produced a surface with less control points in it... But it appears they both make a smooth usable solid.... ?????
Are you refering to just "fonts" in general as being poor geometry to start with?
From: Michael Gibson
Yeah often times fonts can have pretty messy curve structures, things like many small segment fragments, slight kinks in between pieces instead of being tangent, stuff like that.
Those kinds of things don't particularly have an effect on making a 2D filled outline (which is what they are originally created for) but can be not so good for treating them as 3D geometry. So a rebuild step could be a good idea.
But Times New Roman itself seems to be pretty cleanly constructed though, so it's possibly one case where it may not be necessary.
- Michael
From: steve (STEVE_HOME)
Hi Burrman,
>>Are you refering to just "fonts" in general as being poor geometry to start with?<<
Yes.
A simple example would be the capital A in that font, if you explode/separate the curves you will find where the curves split due to bad curvature. .

That causes the sweep to create joined surfaces around that section
In may not matter, its probably just me liking continuous surfaces where possible.
edit. It took me that long to write this, that Michael got a post in first. I am slowing too much these days LOL.
Image Attachments:
 A.png
A.png
From: Michael Gibson
That's not particularly bad though, when fonts get messy they can get a whole lot messier than that, like 10 times as much segmentation...
From: steve (STEVE_HOME)
Hi Michael,
Yes,
I have seen numerous times where users of nurbs applications have been trying to put rads around solid text edges then they wonder why it can fail.
- Steve
From: Frenchy Pilou (PILOU)
Generally fonts are created for a 2D use :)
It's an artificial mode to have them in 3D
It's an another work to make an alphabet in 3D :)
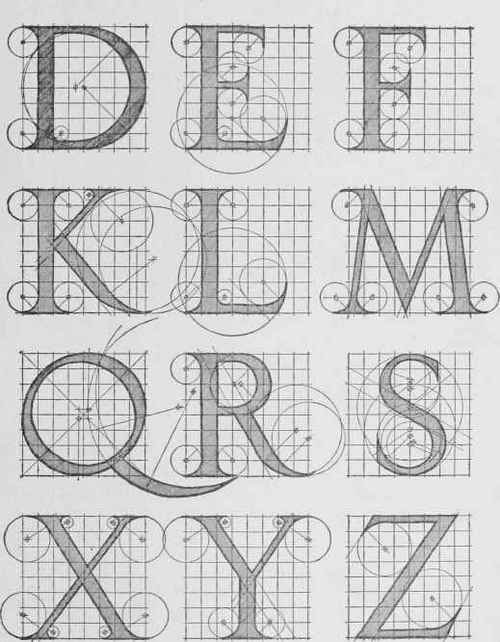
The famous Dürer one ;)
From: stefano (LIGHTWAVE)
RE: bevelled text / vcarve letters / chiselled shapes
Can someone please let me know, how do i fill this shape into a solid...
Also as this post is quite old any faster / alternative ways to acheive similar results ??
Attachments:
V_Carve_I.3dm
Image Attachments:
V_Carve_I.3dm - MoI.jpg
From: Frenchy Pilou (PILOU)
I don't believe you can without make some reparations :)

so after : explode all
and make some Sweep (and other reparations because your file is a true mess! ;)
(Curves at jonctions are not on the good vertices so no joint possible, no symmetry etc...)
Better is redraw it than make repairs!
From: stefano (LIGHTWAVE)
i was following michaels instructions on the "I" but likely did it too fast; will try again.
I could easily fix that missing 'joint' but only some surfaces would close if i clicked planar.
From: Michael Gibson
Hi Stefano,
re:
> Can someone please let me know, how do i fill this shape into a solid...
The general technique is above in this same thread:
http://moi3d.com/forum/index.php?webtag=MOI&msg=3723.12
For your case here to start with the curves need to be cleaned up so the pieces meet up exactly end to end and are precisely mirrored. You only need to bottom ones though, join those together into a single curve like this:

Then draw in an angled line here:

Select the line and run Construct > Sweep and pick the bottom closed curve as the rail path, that will generate these surfaces:

These are the surfaces you need but they need to be trimmed up. You can use the Edit > Trim command for that cutting them one by one but there is a shortcut you can use if your initial construction curves are clean and precise. The shortcut is that the boolean merge command can be used to extract out a center volume from a piece like this and slice away all the outer pieces in one shot. To use that you would need to put in a ground plane like this:

Now select all the surfaces and run Construct > Boolean > Merge and it can extract out the inner core solid:

3DM model file is attached.
> Also as this post is quite old any faster / alternative ways to acheive similar results ??
Using boolean merge will be quite a bit faster than trimming each individual surface. But make sure your starting curves are cleanly constructed, ends exactly touching and opposite pieces mirrored.
- Michael
Attachments:
V_Carve_I_solid.3dm
Image Attachments:
steve_I_sweep1.jpg
steve_I_sweep2.jpg
steve_I_sweep3.jpg
steve_I_sweep4.jpg
steve_I_sweep5.jpg
From: stefano (LIGHTWAVE)
Hi Michael,
Already tried following your initial instructions which is how I seemed to get 'close'.
It seems all I need is a closed curve of the font outline and a 45degree line, no trimming
required if bolean merge used and artwork perfect...
Could you please verify if this dxf; the origination of the "I" is ok to start with...
Cheers
Stefano
Attachments:
V_Carve_I.dxf
From: Michael Gibson
Hi Stefano, yes that DXF file works fine with the CorelDraw DXF import fix. It would not be a bad idea to replace the straight parts with simple 2 point lines. You can construct a solid without doing that but it might help with other operations further down the line.
Here is a screencap of the process just after opening that V_Carve_I.dxf file you posted:
- Michael
From: Michael Gibson
Hi Stefano, additional notes - the curved sides of the letter in your DXF file are not exact mirror images of each other but it seems to work ok still. But the center line where the pieces intersect will have a little undulation to it instead of being straight because of that variation.
Also if you want to draw a 45 degree angle line, type <45 and push enter to enable angle constraint.
- Michael
From: stefano (LIGHTWAVE)
i will try and do it in 56 seconds - thanks again...might take me 57 minutes to get there !
From: stefano (LIGHTWAVE)

Image Attachments:
RED+I.jpg
From: Frenchy Pilou (PILOU)
@ Michael
for your last video...the forum sytem don't resize so we have an enormous image even on a big monitor! :)
Does this normal ?
From: Michael Gibson
Hi Pilou, yes that's normal - the forum only resizes image elements and the video is an iframe element, not an image element.
You can also view it at:
https://www.screencast.com/users/MoI/folders/Camtasia%20Studio/media/5d54cfd1-206a-449a-ba84-cd9f40e4f6c7
that one will have a "full screen" control in the lower right corner, I think it should fit it to your monitor size.
- Michael
From: Frenchy Pilou (PILOU)
Yep this time that is perfect!
Show messages:
1-12
13-32
33-51