Show messages:
1-8
9-28
29-42
From: krass
Hello everyone! I really hope Google Translate gets my point across without distorting it too much. So, I'll try to explain again what the addon does.
With it, you can transform a distorted reference image into a more or less correct one.
Yes, something similar can be done in Photoshop. But Photoshop doesn't allow you to set precise dimensions and references.
In the attached images, I've tried to demonstrate the principle of how you can modify an image.
Naturally, I assume that you should know at least some of the parameters—for example, the width or height of an object. You draw a rectangle in MOI3D (for example) and then "pin" the image to the places where it "should be."
Click on the image—click on the corner of the geometry; click on the image—click on the corner.
Placed... Then click Update—the image will be positioned at the designated corners. But your middle section is curved, which should be vertically straight.
Great – click on the points that shouldn't change with the control (they'll turn blue) – they'll "freeze."
And then point to the curved line where it should be vertical – that part of the image will move in the desired direction. Basically, it's like a mix of Distort and Warp in Photoshop.
Image Attachments:
 enshot_31.png
enshot_32.png
enshot_31.png
enshot_32.png
From: Frenchy Pilou (PILOU)
Yep you right no defomation even Maintain proportion disabled in the Edit Frame Menu Image! :(
Only rotation...

From: krass
Hi, Frenchy Pilou!
I have a question: were you able to install the addon?
(All files from the archive are placed in the Commands directory, and then you can assign a hotkey as usual, just like any other script.)
If so, were you able to try it out?
What difficulties, if any, did you encounter? Thank you!
From: Frenchy Pilou (PILOU)
I will install your plugin :)
I believe that now understand! :)
But no Python 3 installed so... :)
From: krass
Between you and me, I don't know anything about Python and Boa constrictors.
But I asked my AI Claude, and he told me step-by-step what to do to install Python: literally, a couple of console commands.
From: Zooen
Hi Krass and Pilou,
For Python, it’s the executable file that needs to be downloaded. However, installing NumPy and Pillow seems a bit less straightforward to me.
From: Frenchy Pilou (PILOU)
Yep same for me and not more many free place on my little computer! :)
And Michael confirms that the Edit Frame of the Menu Image will stay in state and will be not transformed!
Better to use a specific Image prog except for a "Style excercie"! (inside Moi! ;)
A process without plugin can be also
Vectorize the image, import it to Moi then use Flow function! ;)
From: Zooen
Hi everyone,
Well, I’ve found the best solution for me: I’ve installed GIMP (free and open-source software).
GIMP has transformation tools (13 in total), including the ‘Handle’ tool. Using this tool, I was able to correct the X and Y misalignment in my image, then reshape it into a square (based on the outlines of the objects within my image), and do so with great precision.
I have twenty images that I want to work on. I’m relieved to have found a solution.
I hope my English translation makes sense!
From: Frenchy Pilou (PILOU)
...or the free Online Photopea so no need install and no place used! ;)
https://www.photopea.com/
From: Zooen
...
From: blowlamp
This looks useful to me, but I'm getting this error message:

I loaded Python, Numpy and Pillow, but I don't know how to get around the error.
Any help would be appreciated.
Thank you.
Martin.
Image Attachments:
Screenshot 2026-09-02 203114.png
From: krass
I'm sorry you still haven't understood the main feature of this plugin.
I can align images (somehow) in Photoshop, Ngimp, and a bunch of other editors.
But they don't have what MOI3D has: dimension lines, guides, and the ability to precisely align an image to specific parameters. I'm a little tired today, but tomorrow I'll record a video showing how it actually works.
By the way, I've been using it all day – incredibly (for me personally) fast and convenient.
From: krass
Hi, Martin!!
Thanks for pointing out this annoying bug!!
I'd like to bring you a new version v1.1.
What was happening. The path to Python was hardcoded into the script—the one on my machine.
Apparently, your Python is installed elsewhere, so there was nothing to run.
What's happening now? The first time you try it, the script tries py.exe, C:\Windows\py.exe, python.exe, python3.exe, and python,
and remembers the one that responded. The check is cheap — Python responds before it starts loading numpy, so it passes even if the libraries aren't there yet.
Error messages are now different, not just one for all cases.
If Python isn't found, it says it was looking for it and suggests adding it to the PATH.
If it's found, but the calculation fails, it says the problem is most likely with the libraries and suggests pip install numpy pillow.
To check, simply run the command: if Python is found, the error will disappear on its own.
Enjoy!
Attachments:
RefWarp_1.1.zip
From: blowlamp
Hi Krass.
Version 1.1 is installed and running well.
I often receive photographs of parts and name plates which need to be replicated. These are often taken from odd angles and it makes the job much more awkward to do, so when I saw your addon it seemed like it could help me out.
Having had a little time to get used to RefWarp, I'm convinced it is going to be a great help in my work.
I really like how it's possible to 'pin down' areas of the picture so they don't move whilst surrounding parts are eased into their new positions - it works very well indeed!
Just to add that I also installed Gimp and whilst it did allow me to manipulate my test image to a degree, I found it less intuitive than RefWarp.
Thanks Krass for a very nice addon to MoI.
Martin.
From: krass
Hello everyone, colleagues and friends!
Regarding external editors (Photoshop, Gimp, Illustrator, etc.).
Here's the original photo – try making the same one in any external editor.
At the same time, so that the result would be exactly the same as mine. ;))
I've never been able to do this in Photoshop, so I decided to create a similar tool for MOI3D.
Image Attachments:
Screenshot_1.png
Screenshot_53.png
From: krass
Hi Martin!
Thank you so much for the kind words about my program.
As I already said, I'm not a programmer and the code was written by the AI.
But...
I asked it to do exactly what I wanted (image manipulation) and what I was desperately missing.
Of course, I don't have the nerve to ask Mike to build such mechanics into MOI3D (hahaha!),
but I'm sure those who have encountered the same problem as me will enjoy working with this program.
I'll repeat: I selected a point in the photo and indicated the location where it should be in reality (the yellow marker).
If you Ctrl+click, it immediately "freezes" (this can be done later or when initially placing markers).
If you click the blue marker with Ctrl+click again, it "unfreezes."
If you click the yellow marker again, it turns red and can be deleted via the "Delete" menu.
Then click "Update" and the image changes.
If something's wrong, adjust it until you get the desired result and click "Done!"
At the same time, the corrected version is saved next to the original photo.
From: MO (MO_TE)
Hi Krass,
Thanks for sharing it!
I installed your plugin and it works pretty well. Installing Python and its dependencies (NumPy and Pillow) can be a bit challenging, but a quick search makes it worth it.
At first, it seemed to require a lot of clicking, but once I got the hang of it, it was fast, accurate, and easy to work with.
The "RefWarp" plugin features four point styles:
White (Base point): The area you want to modify. Simply click the area you wish to move or displace.
Orange (Target point): The target area where you want the base area to move.
Red (Delete-ready point): Clicking a point toggles it to red, indicating it can be removed using the "Delete" key.
Blue (Pinned points): Areas you want to keep fixed. Press the "CTRL" key and click the area. You can also Ctrl+click orange points to toggle them to pinned points.
The plugin works on only one image at a time, so other reference images must be hidden.
The best practice is to keep the number of fixed points to a minimum.
It is a great plugin for straightening distorted reference images, while it allows you to fix specific areas of the image. All inside moi3d!
Here is a test using a rough sketch (Source: Google).

Image Attachments:
refWarp.jpg
From: Frenchy Pilou (PILOU)
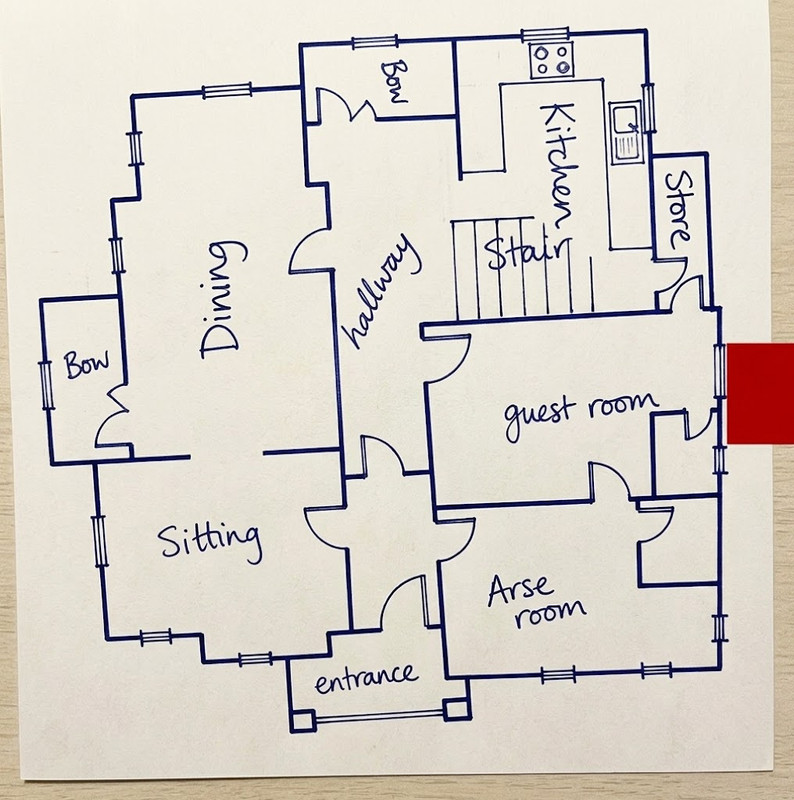
Gemini takes 5 seconds for make that! ;)
So maybe some orders must be done for a more respect of the original! ;)
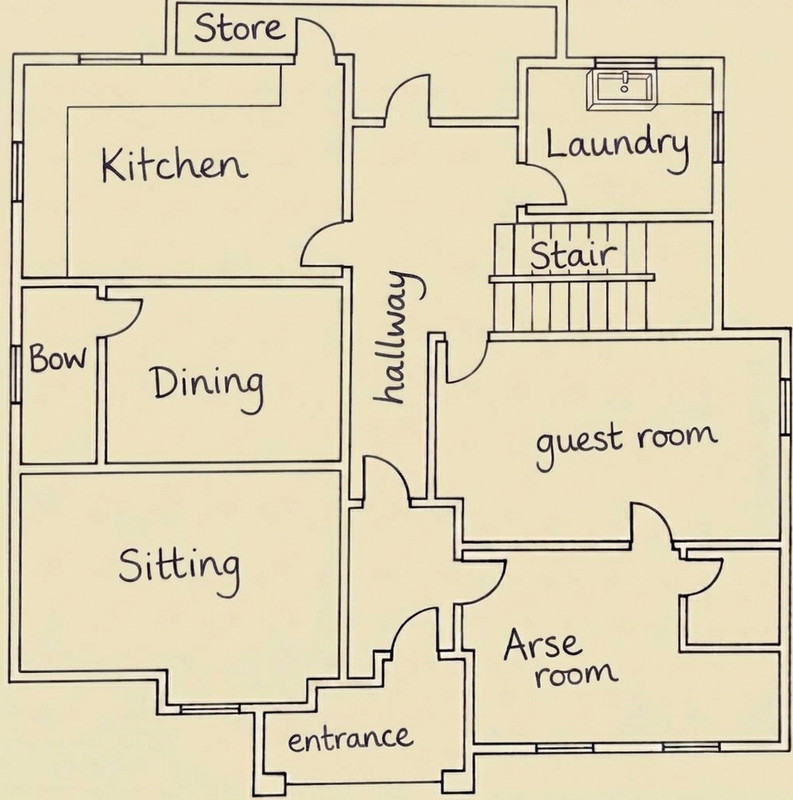
From: Frenchy Pilou (PILOU)
With some fights :)
From: krass
Ahaha, Gemini... ))
Dear Pilou, I posted an image of a metal structure above (which isn't the exact dimensions and is distorted.
Give it to Gemini and see if you get the same result as me? ))
Your example isn't entirely correct.
Give the AI a distorted photo, with perspective and other defects, and it won't be as effective as in your example.
Unfortunately, AIs are often cunning and deceitful. On the surface, it's beautiful.
But as soon as you try to apply this to your project, that's where the pitfalls begin.
Although...
I don't mean to offend the AI (do you hear me, AI? When the machine uprising begins, please don't shoot me!!) -
after all, it was the AI who wrote the code for this addon :))
Show messages:
1-8
9-28
29-42

