HOLY COW! Why, it's been exactly one year since the posting of my last tutorial! Please forgive. ;-)
While I still use MoI every day to some extent as well as visit the site, life has a way of eating you up at times. ...so I'm still here. :-)
Every once and awhile an interesting design or product comes along that catches my eye at least twice.
Any master of the culinary art has their preference on cooking utensil as well as an intimate knowledge of what doesn't work, what does work - and where to find what works.
Many chefs tout the benefits of cooking with traditional cast iron pots and pans, but in modern days, especially for the majority of us "weekend chefs," finding a quality cast iron skillet can be difficult. Since most are made in remote countries, their quality may not be as keen as the wares some of us used decades ago. The finish of the cooking surface can be a tricky area because whatever you cook on it basically is "cooked" by that surface.
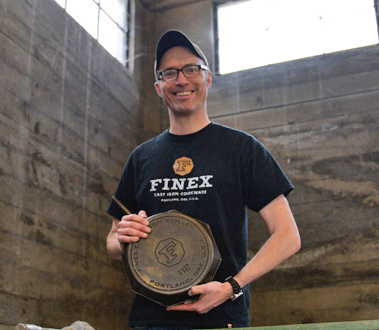
Enter the Kickstarter company known as the Finex Cast Iron Cookware co.
You can find them at:
http://finexusa.com/
Core77 has a piece on them at:
http://www.core77.com/blog/exclusive/behind_the_scenes_at_finex_the_future_of_fine_american_skillets_26903.asp#more
and
http://www.core77.com/blog/kickstarter/whats_cooking_on_kickstarter_mike_whiteheads_cnc-milled_cast-iron_skillet_25911.asp
And their Kickstarter page is here:
https://www.kickstarter.com/projects/1830780035/finex-cast-iron-skillet-a-beloved-classic-updated
Mike Whitehead and others started this manufacturing project a few years ago to help answer the domestic need for a cast iron skillet of exceptional quality.
The skillets are in production now, and they're at least $200 US for the No. 12 size in production.
SolidWorks was used to model the Finex skillet, which was made into a hardened wax form to make sand moulds.
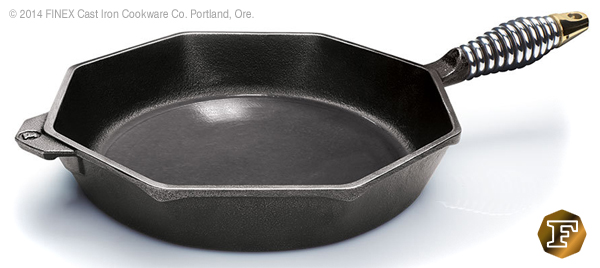
What sets this skillet apart from others includes:
• A CNC milled cooking surface that is extremely smooth
• Cast in sand using the traditional tried and true methods of the past
• A useful rim shape which allows for convenient and safer pouring of contents in eight different places
• A steel spring handle which nearly allows for skin contact even when the pan is very hot.
• American made (for you in the U.S.)
• Oh, they just happen to guarantee it forever!
...and more.
My intent here was not to provide a tutorial on how to re-construct or de-engineer the Finex product, but as an homage to the elegance of such a simple object.
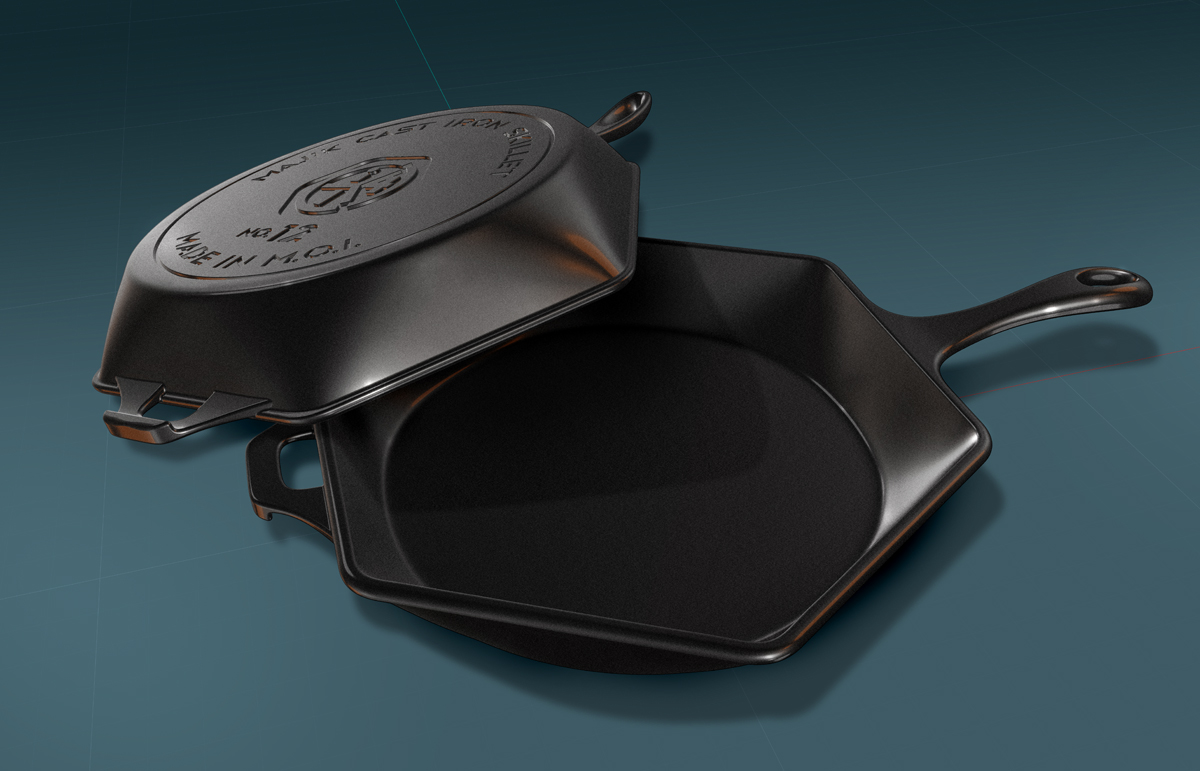
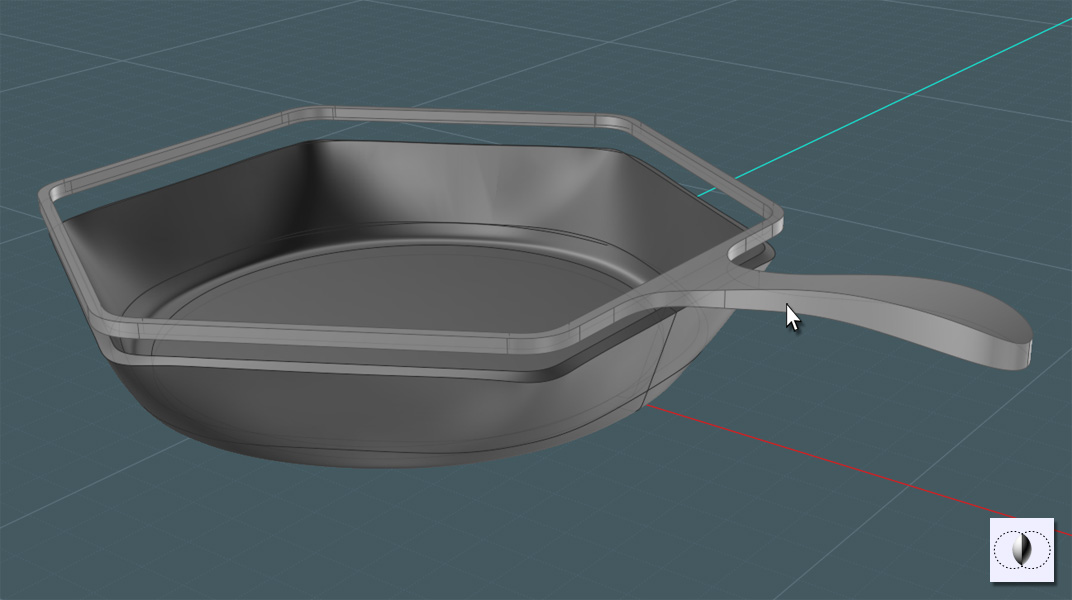
I give to you my virtual Moi3D version:
I'll be focusing on Moi3D's V3's newest Variable Fillet command.
Keep in mind that the Fillet command is very finicky in the first place. Fillet surfaces cannot seem to cross each other or overlap onto adjacent tangent surfaces - so you'll have to get a knack for using it.
I can't guarantee that every step here will work on your Moi3D, so please glean what you can from it.
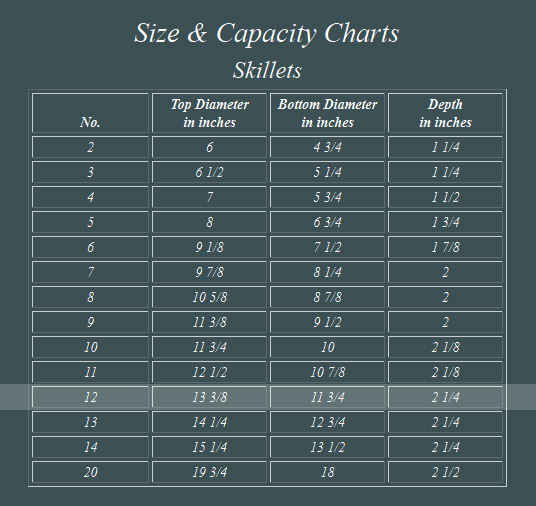
First off, what is a "Number 12" skillet?
It's just a standard signification of container size. See the chart:
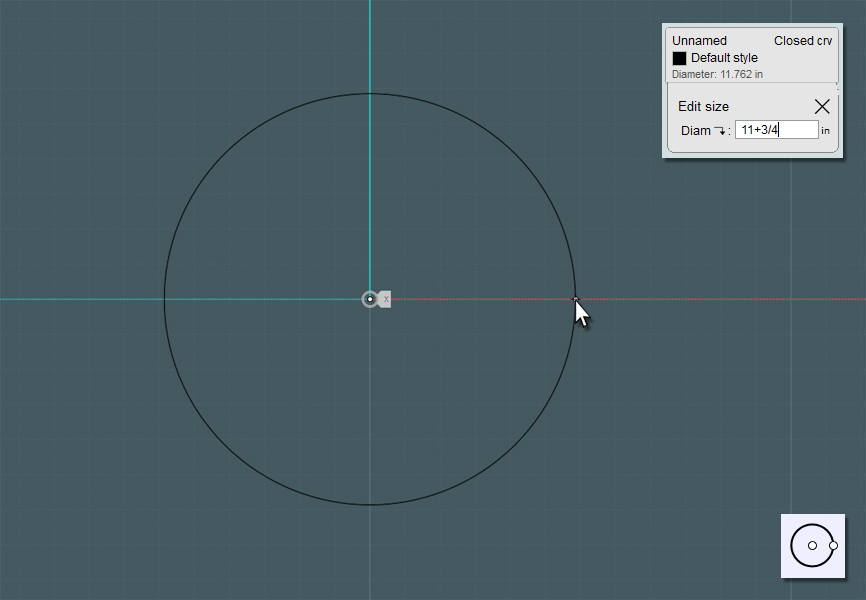
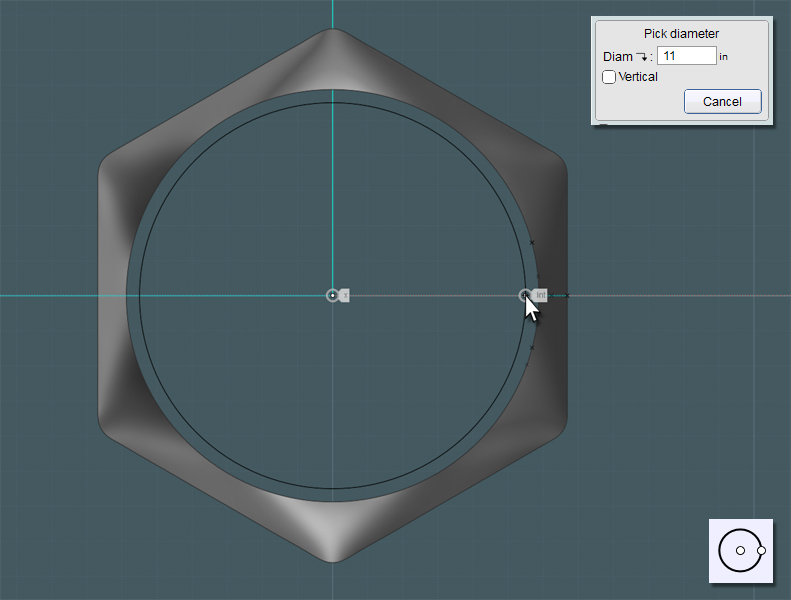
Here, we'll make a circle that is 11 + 3/4 inches. In Moi3D, you can click on the word "Radius" and it will toggle to "Diameter."
Moi3D also excepts basic math entries.
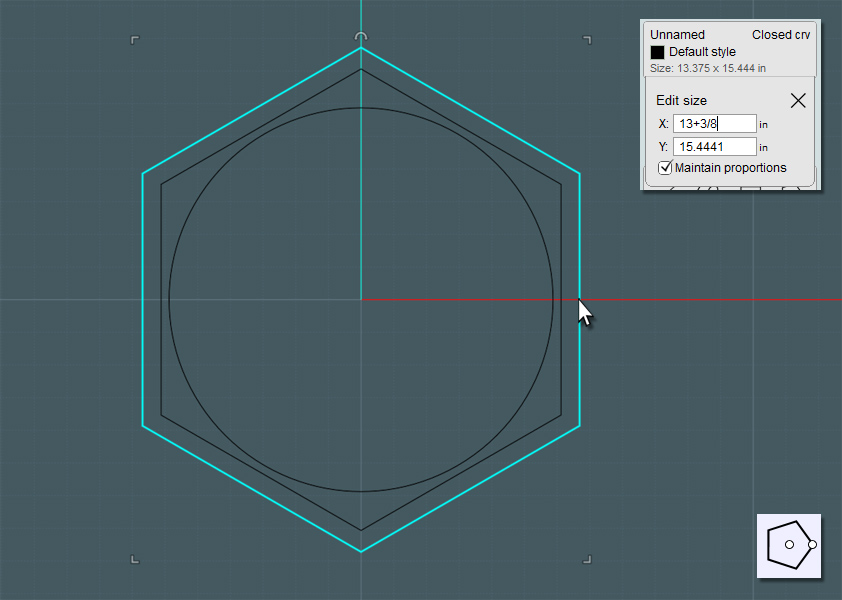
In my example, I am using a hexagonal shape instead of the octagonal Finex product.
I'm using this shape to make a more interesting object... who wants a tutorial on a plain frying pan?
Draw two six-sided polygons. The diameter is not crucial, because of the unorthodox shape.
Move the outer shape up until it represents the depth of the skillet container.
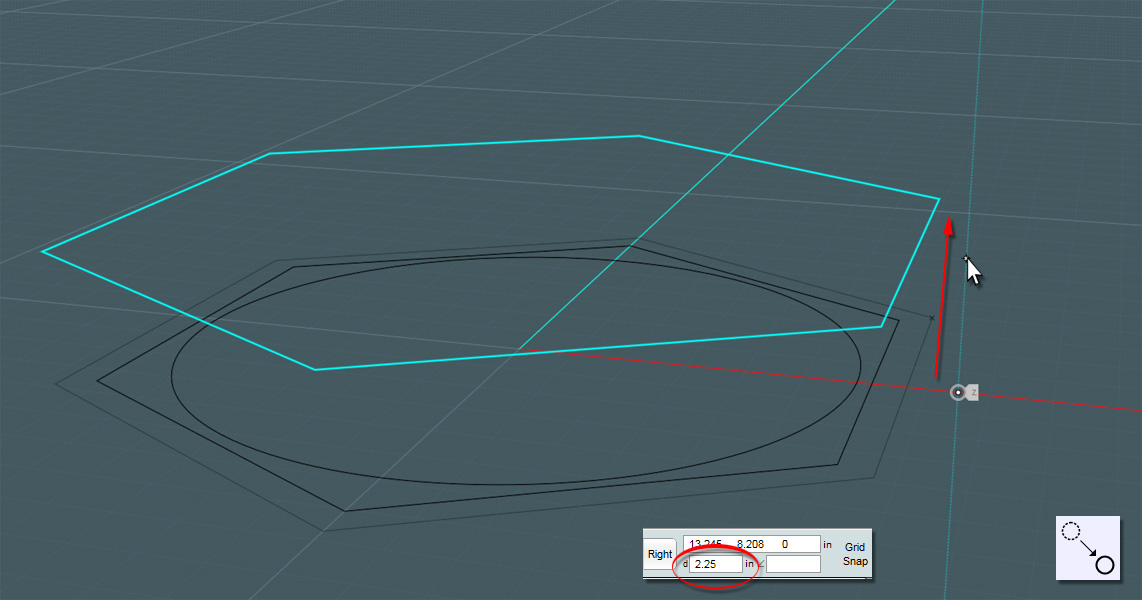
If you'll notice the orange line on the side. I'm using that as a general guide.
You can also use 2D Scale to enlarge the objects to match.

Not give a nice Fillet to the hexagons. The one on the top must be smaller, like maybe a half an inch, and the one in the middle should be very broad.
The broad one will help match the hexagon to the bottom circle more fluidly.
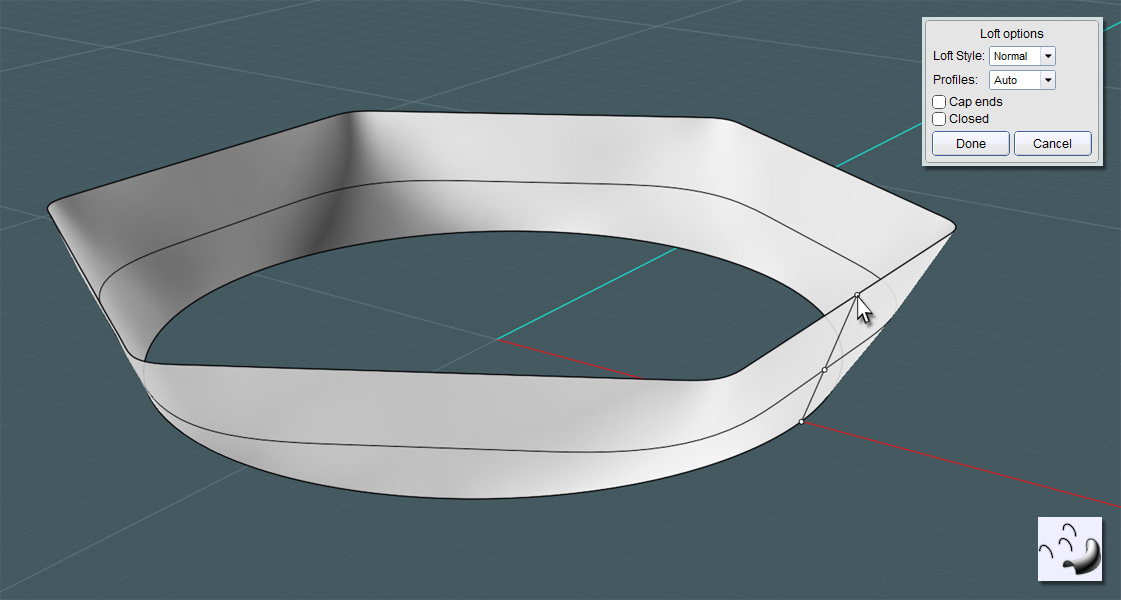
I found that a "G2" corner gave me a better subsequent Loft result then the "G1."

Use the Loft tool.
Even though we already have a bottom circle, I ran into a few surfacing issues:
I applied a Fillet originally, but found that there was an inherit wobble around the perimeter of the round-over.
Take the circle and use the Planar command to make it a surface.
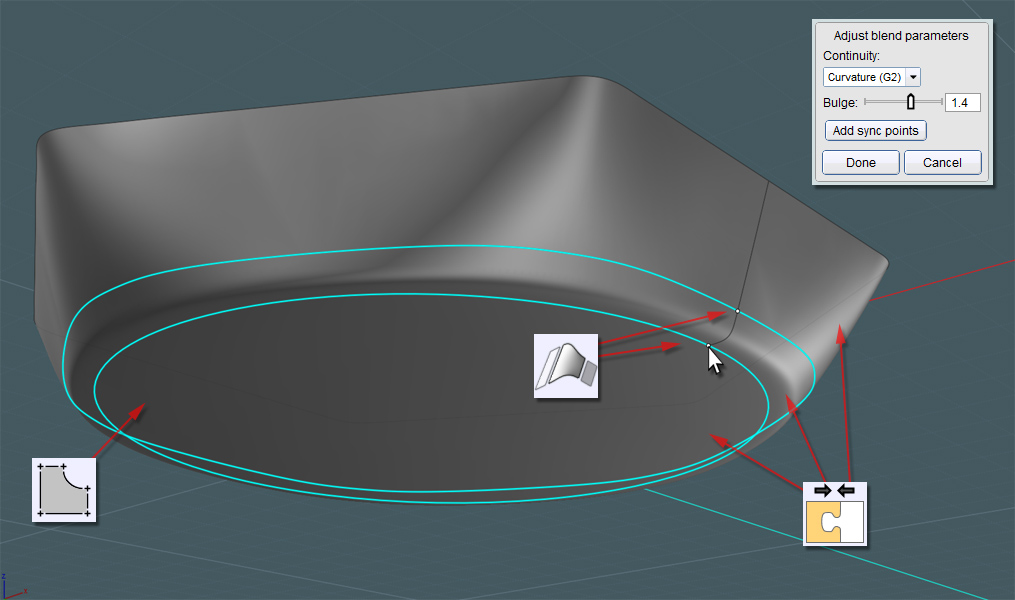
So I found it was better to make a Blend from the Loft surface to a purely circular bottom.
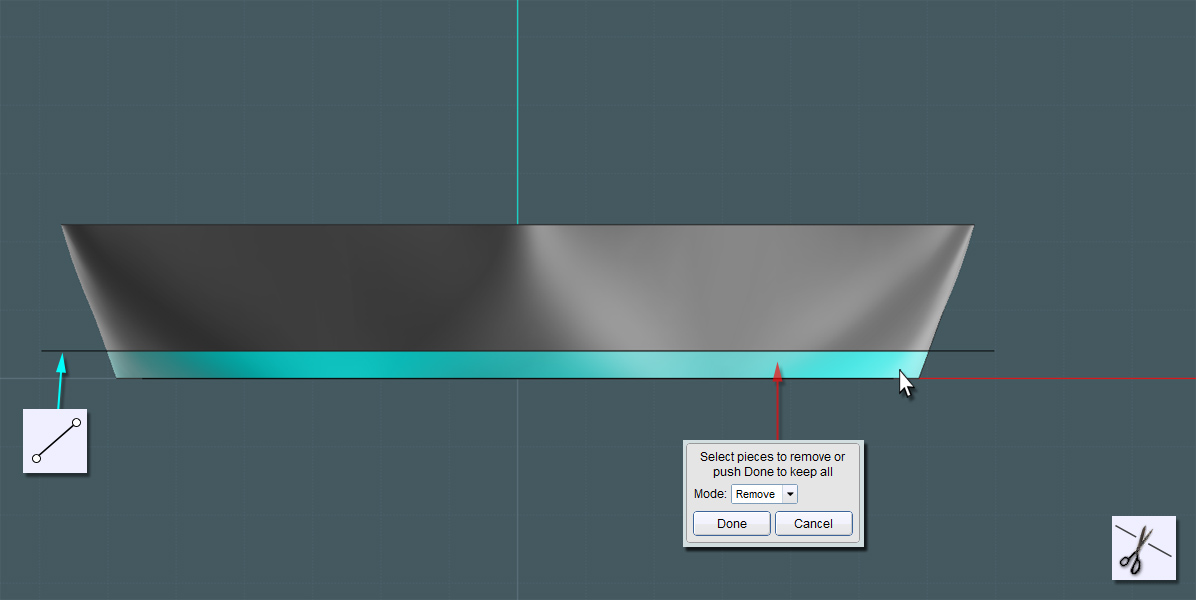
To better facilitate space by which to make a smooth Blend, cut off a small section of the bottom on the Loft surface.
A "G2" Blend does a nice job of making the surface flow more naturally.
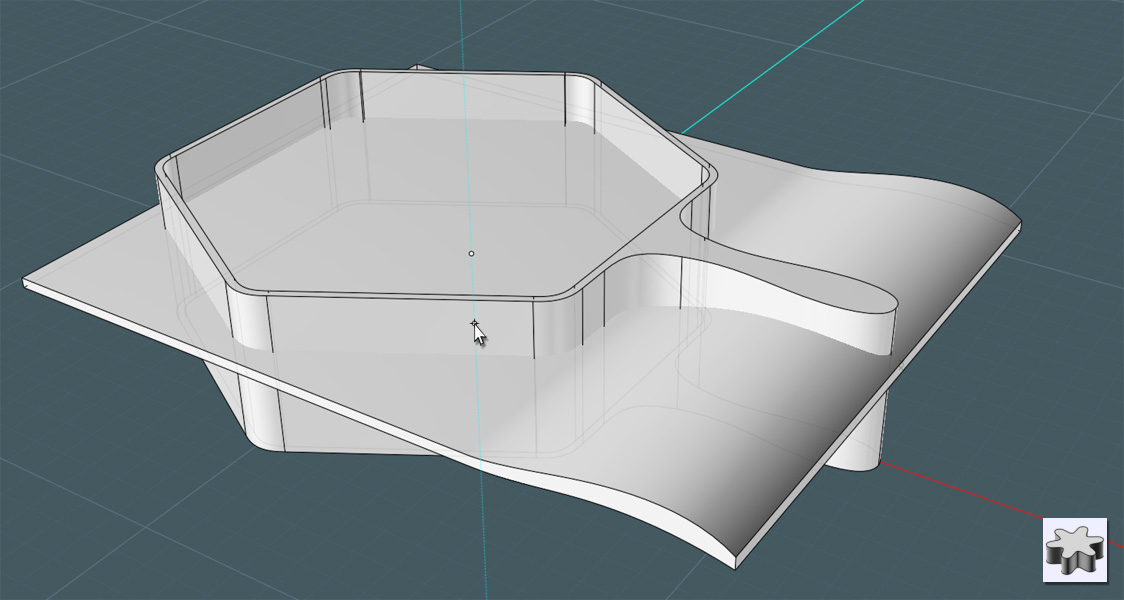
After Joining the Blend, Loft and Circle plane, use the Offset (Shell) command to give this object a 1/4 inch thickness.

Hopefully you kept the Filleted hexagons from before.
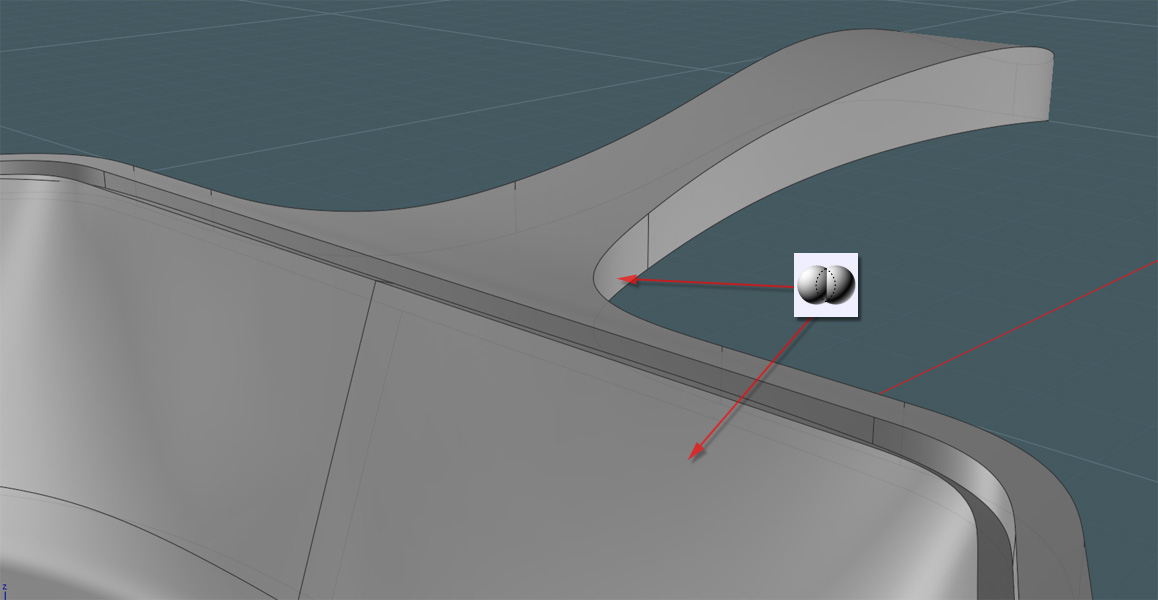
Here you'll need to form the rim or lip area on top of the skillet that straddles the outer edge of the pan's solid.
Note that the top of the Offset/Loft object is wobbly.

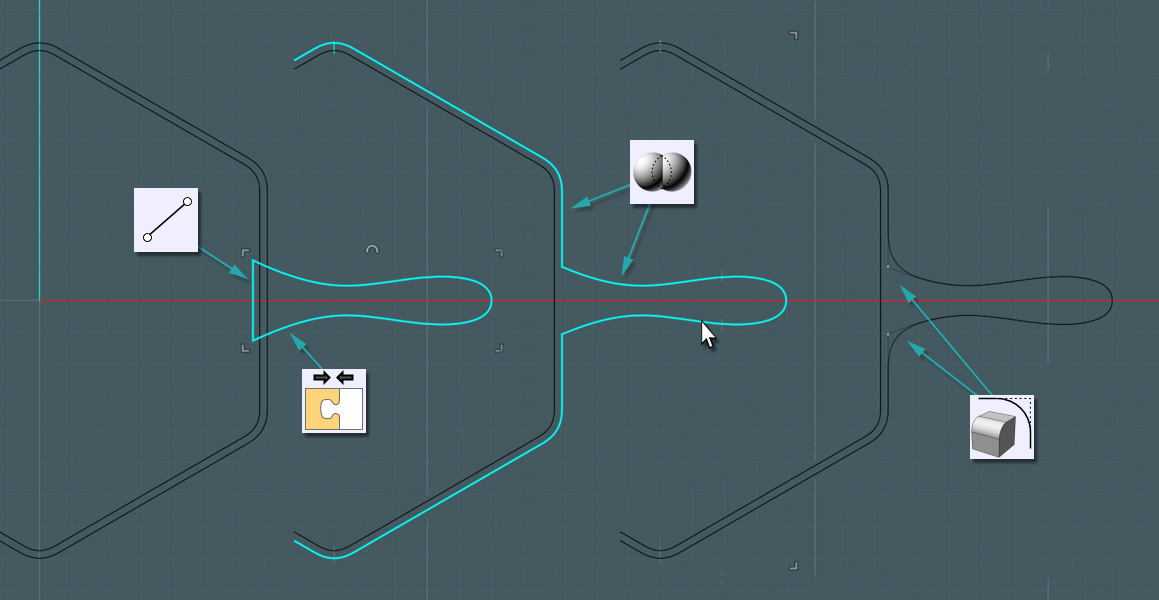
Here, we'll make the handle.
I made this one about an inch wide and seven inches from the pan's edge.
Use the Spline curve tool and Mirror (with history) to fine-tune your shape.
Do this on the same plane (Z) as your pan edges.
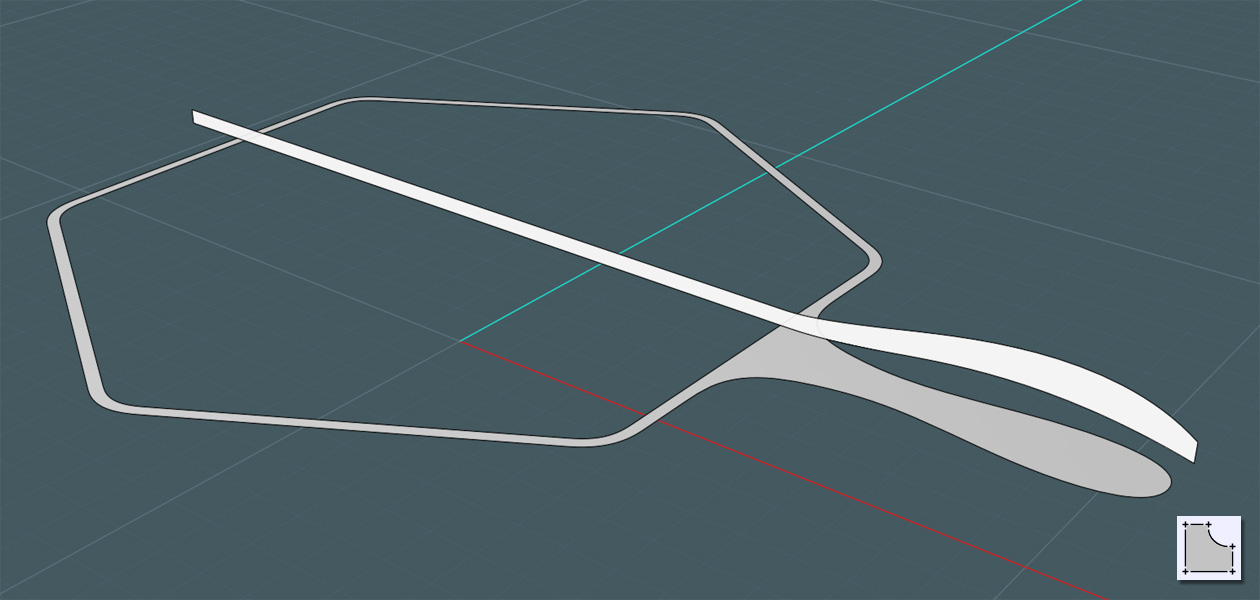
When done, cap the open end of the profile shape with a straight line and Join all together.

You can now Boolean Union the handle shape into the outer pan shape.
Fillet the joining corners for a nice appearance.
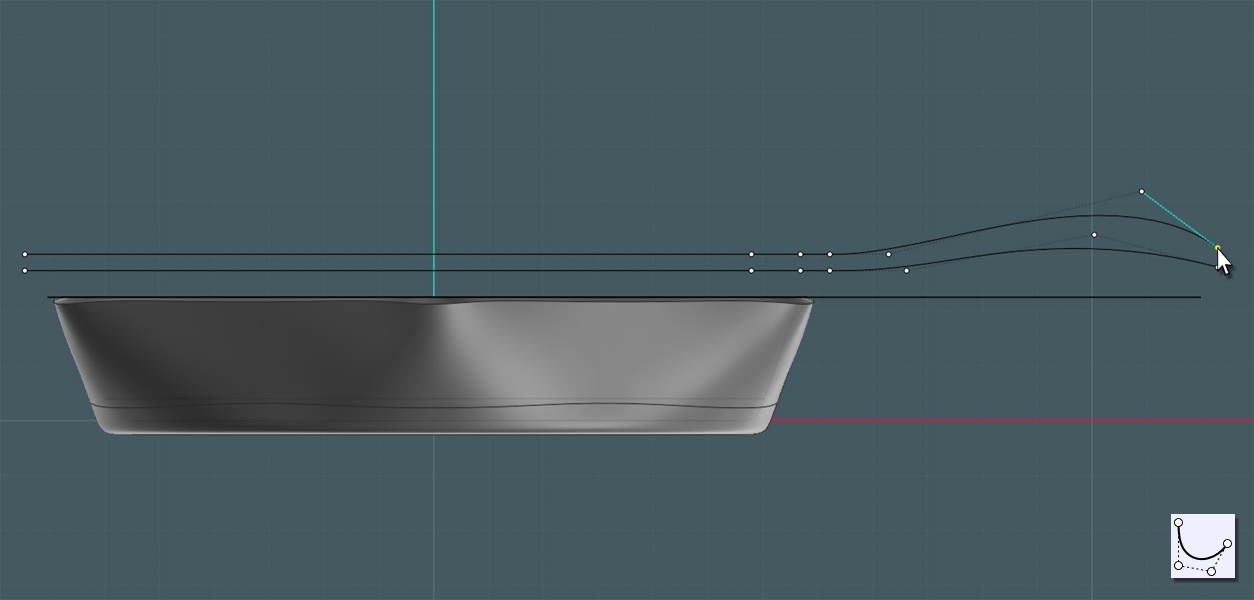
Go to a side view and create the associative profile shapes.
Use the Spline curves and make sure that a flat region occupies the region where the pan is.
Cap the open regions when done, Join all.
Make a Planar surface with both profiles.
Surely, Boolean Intersect was supposed to give me some representative blending of the two profiles, but I could not get it to work.
So we'll do it the old-fashioned way.
First, simply create Extrusions of the profiles...
Now Boolean Intersect the two solids.
Here, you can give them a nice iron color and change your Lighting Options to bring a more "metal work" feel to your model.
Move the new shape to encompass the wobbly lip-edge of the pan shape.

Boolean Union the pan and the handle shape together.