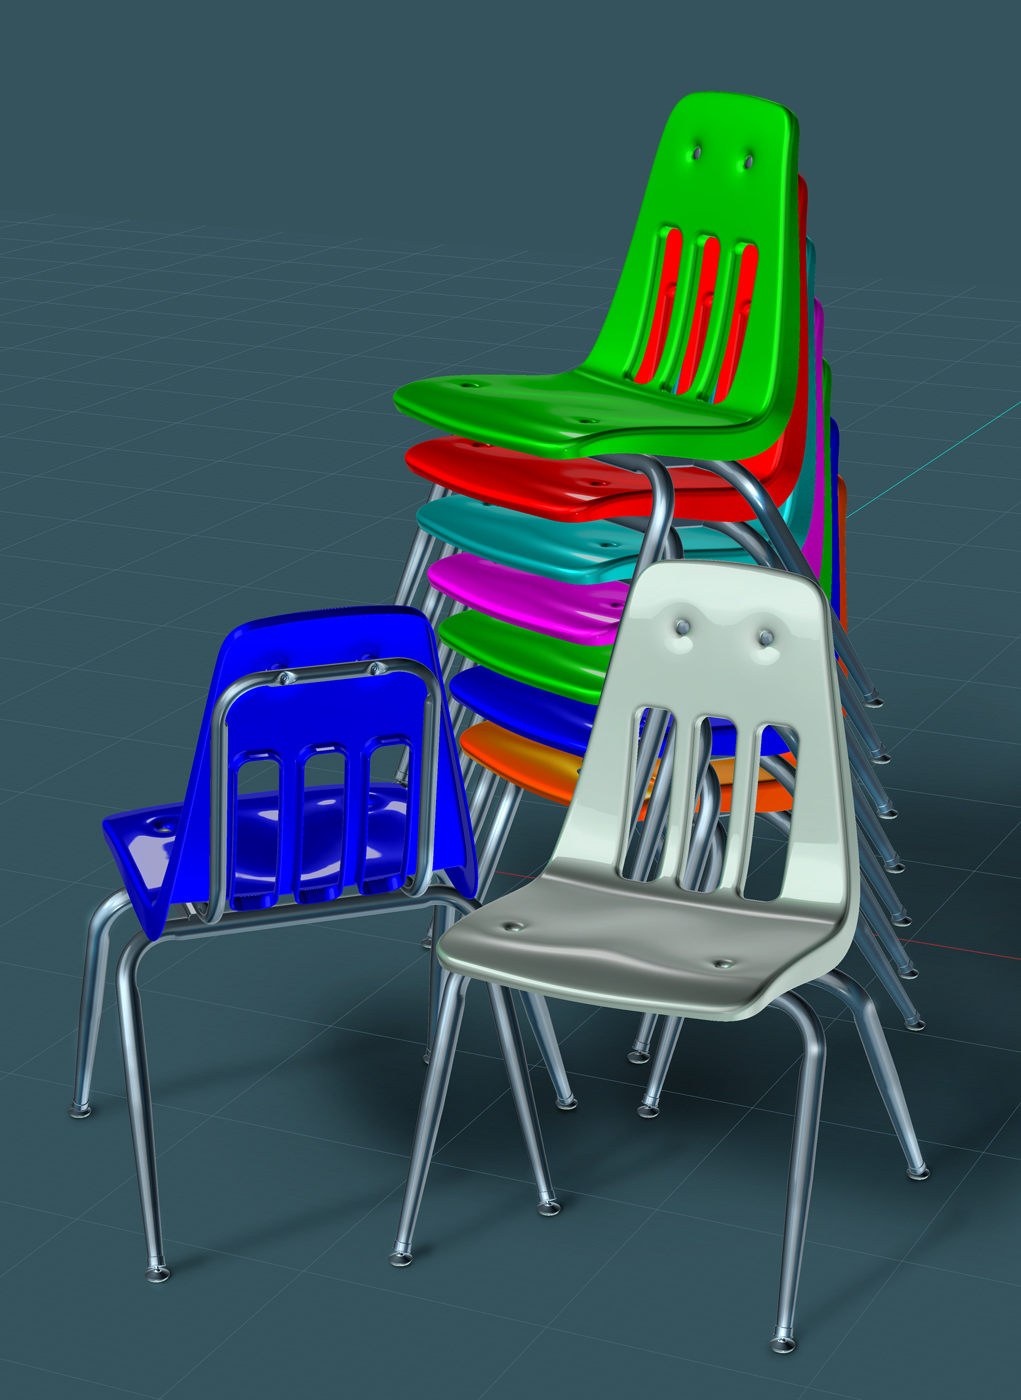
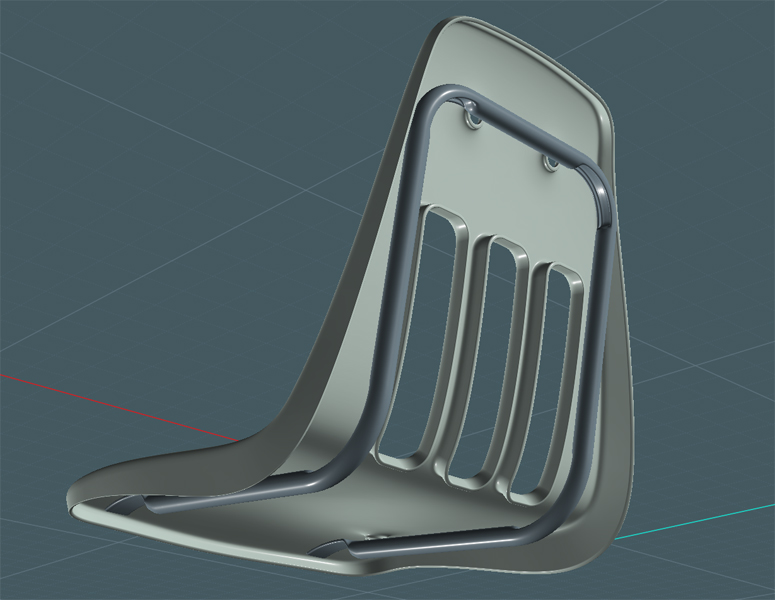
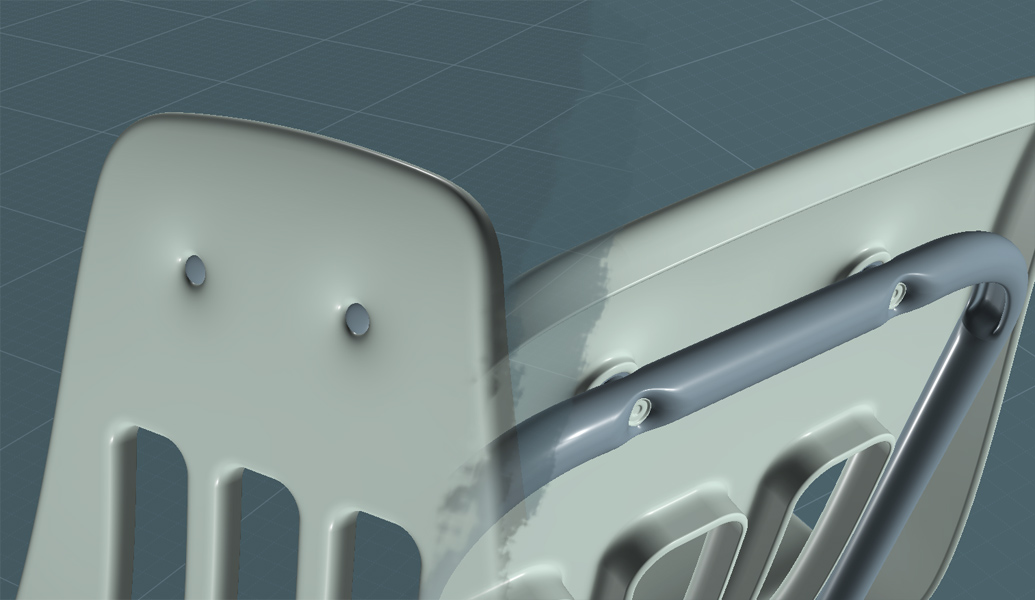
This particular chair has a steel frame that provides support for the both the chair back and the legs.
Since the plastic shell is flexible, it requires this support.
Other similar types of chairs may employ a combination of structural ribs and metal lumbar braces to achieve the same stability.
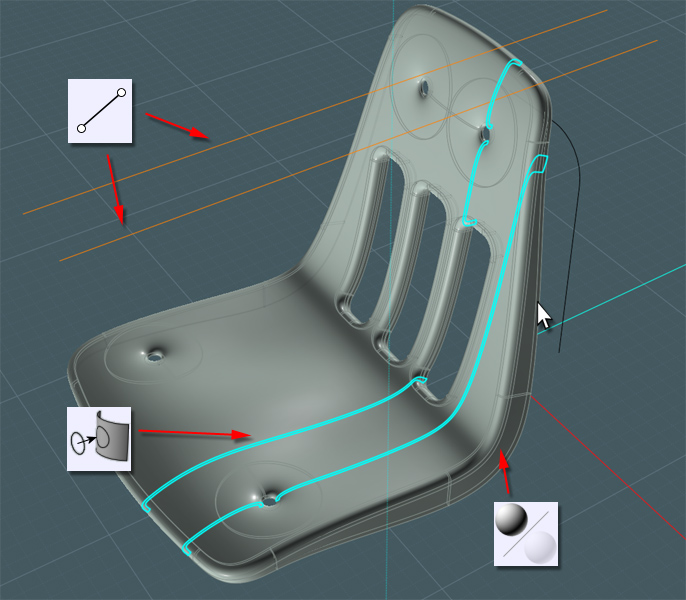
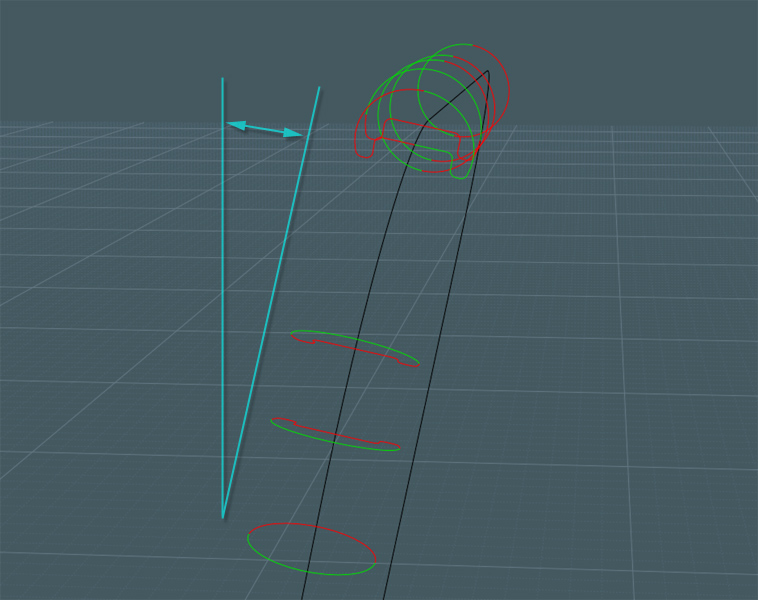
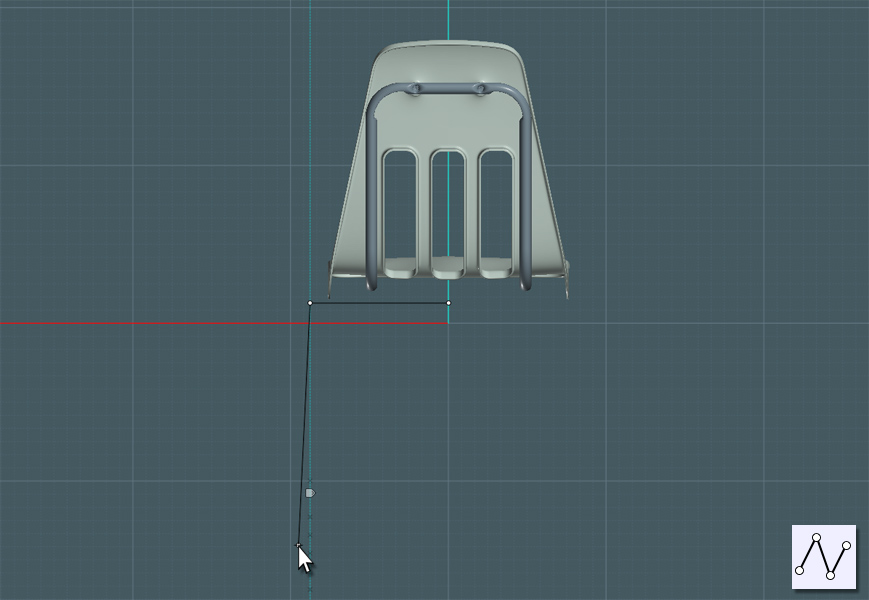
Draw a line that will represent the rise of the back part of the shell frame.
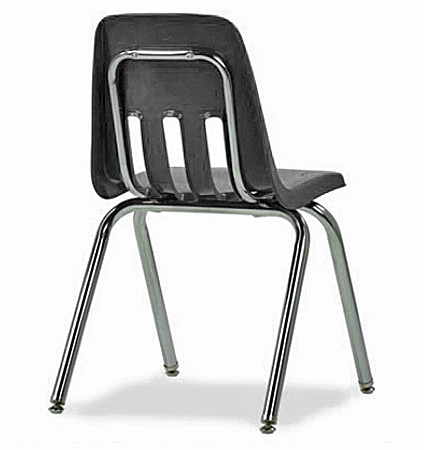
The frame will consist of a single length of steel tubing that is bent in several places to run the course around the shell.

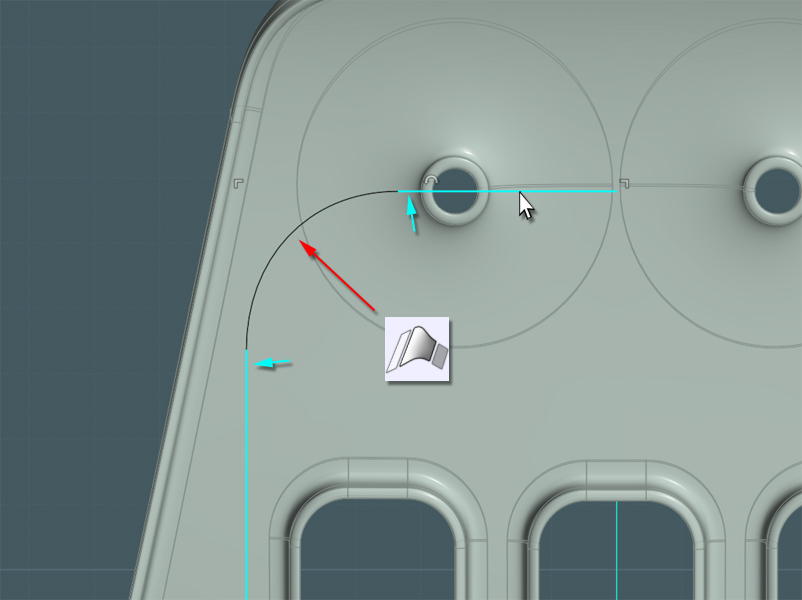
Make a line to represent the top.
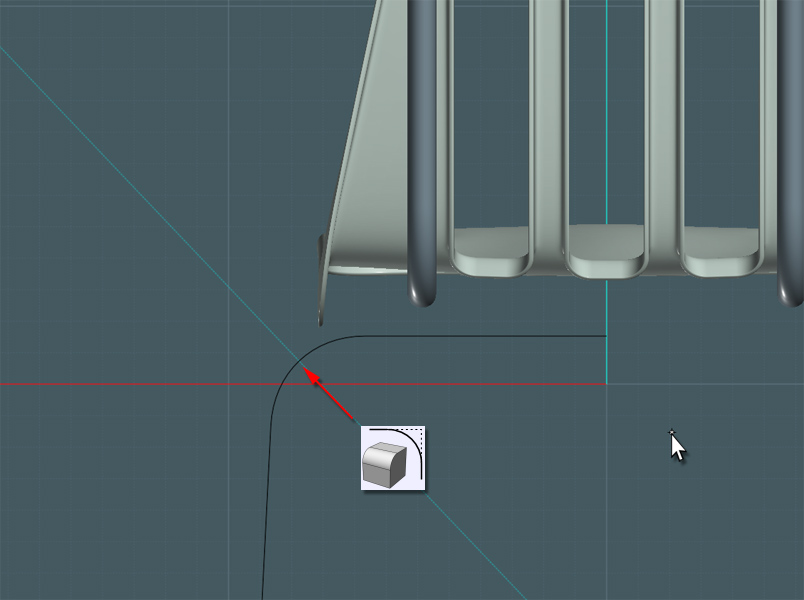
Use the Blend tool to create a fillet for the top of the frame... or simply Fillet a box.
Here is an example of the chair's frame structure:

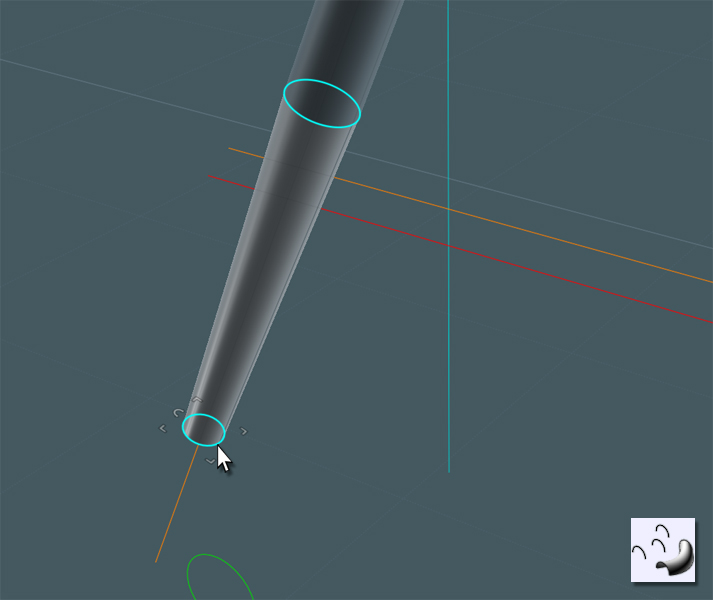
I need to have some way to know where to route the path for the frame.
The shell is pretty complex, so for accuracy I Projected a few lines on the shell form to give myself an idea on where to place the frame.
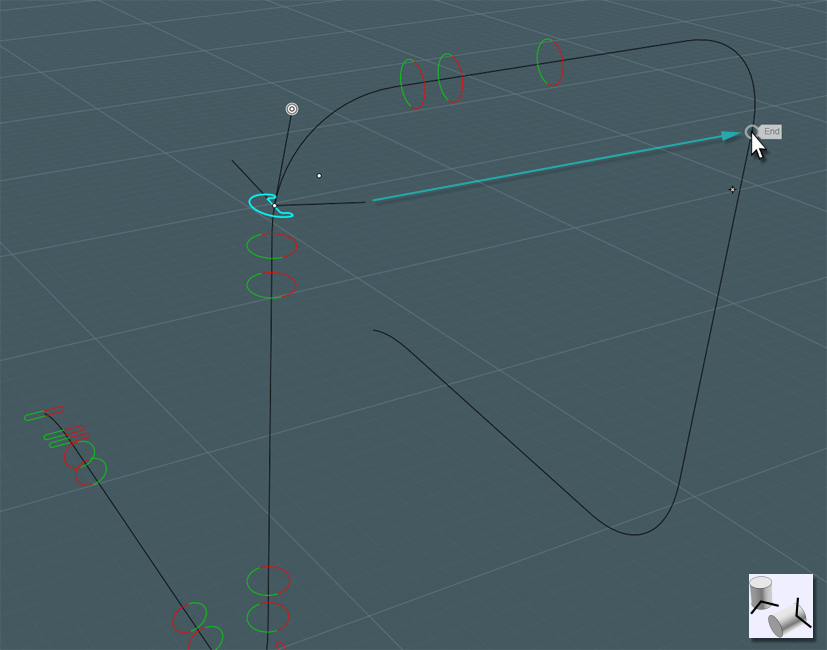
In a side-view I'm now able to complete the bottom part of the frame using Lines and Blends. Join all.
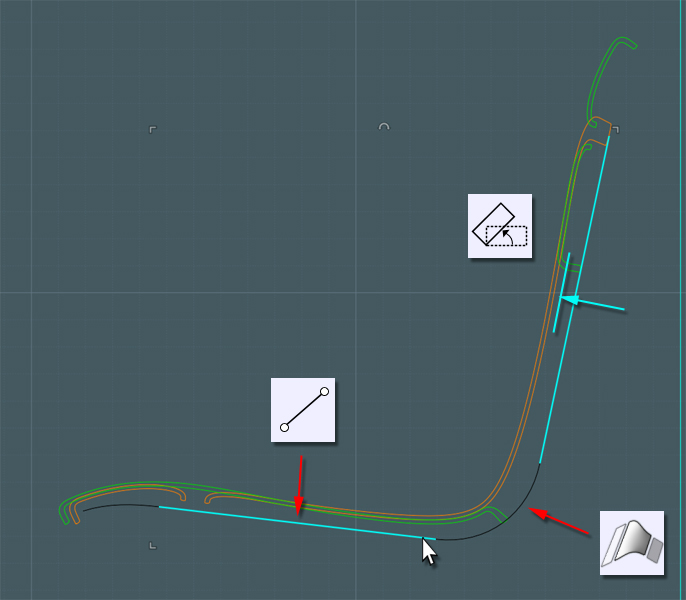
The frame is symmetrical so I Mirror the path.
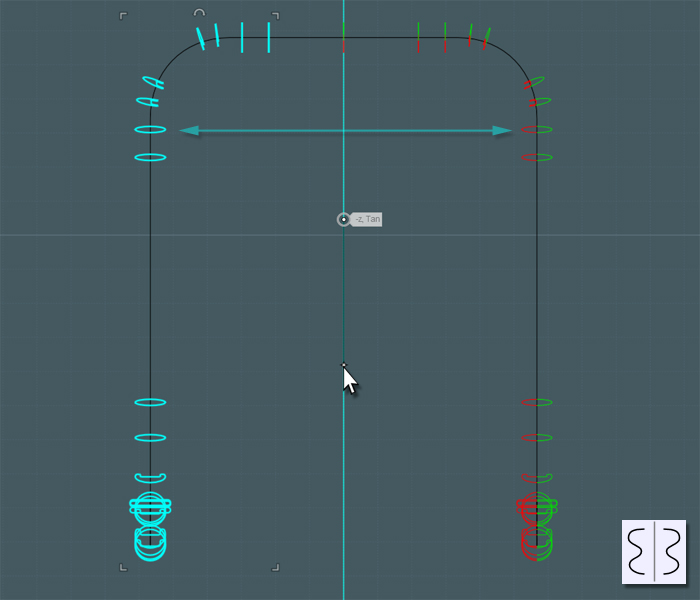
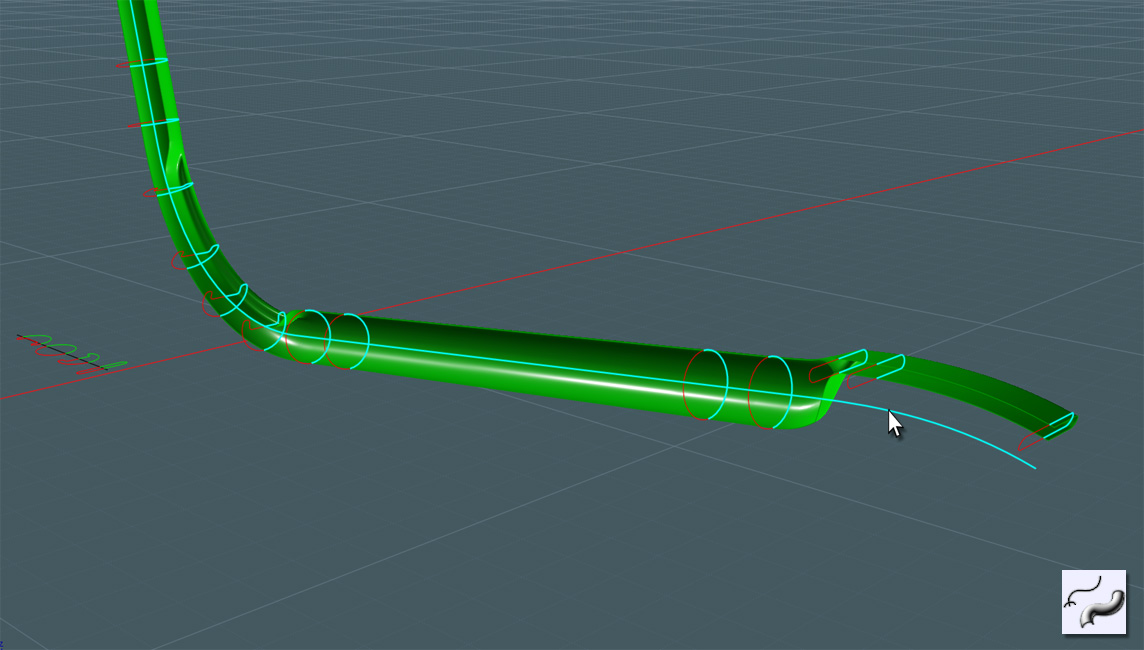
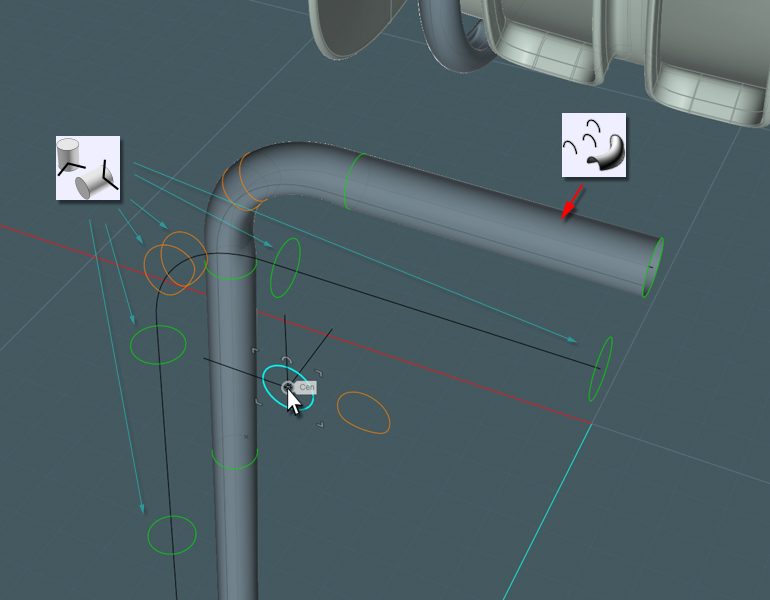
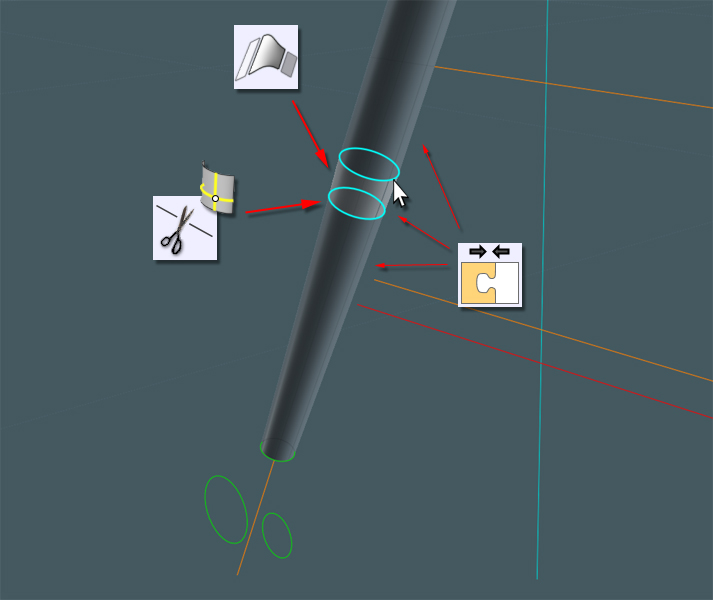
To make the frame tube, I'd like to use a few profiles to represent where the tube is round and where it has been bent using machined creases.
The creases add structural support with their "I beam" shapes as well as preventing the excess area of metal from crumpling once compression forces are applied in the bending process.
Using the Orient tool, I place these profiles in appropriate areas along the frame path.
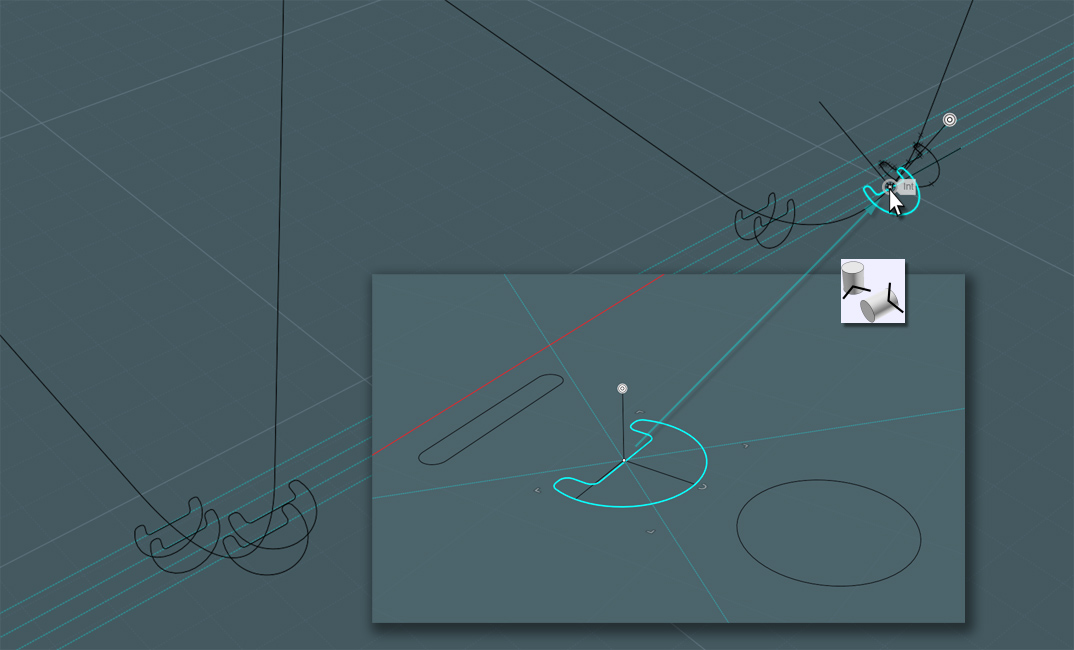
Each profile shape represents what a Sweep will do once applied to the path.
OH NO... Moi! "The Sweep tool - not the sausage-link tool!"
It appears that the Sweep tool lacks the ability to reliably negotiate the 'normal' orientation and 'start-point' of the profile curves.
Back to the drawing-board...
Let's try another approach:
We'll do this in two controllable Sweeps using a common path!
Use Trim to cut your profiles in half. The "bendy" profile at the top has been turned to the side as it represents the tube which will be bent at a different orientation that another part of the same tube... I colored each half for visibility.
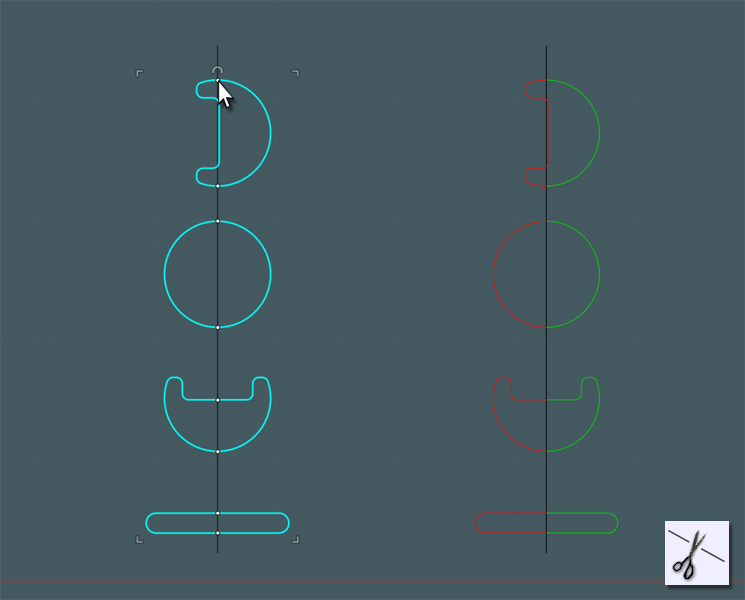
Don't worry about the color here we'll just orient each profile (set) where we need them.
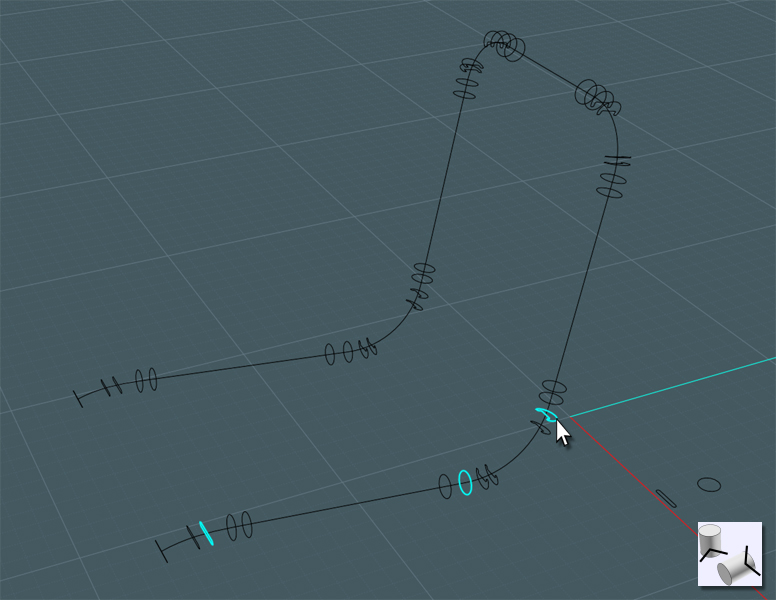
Please note that since the tube is set at an odd angle, the orientation of the profiles need to follow suit.
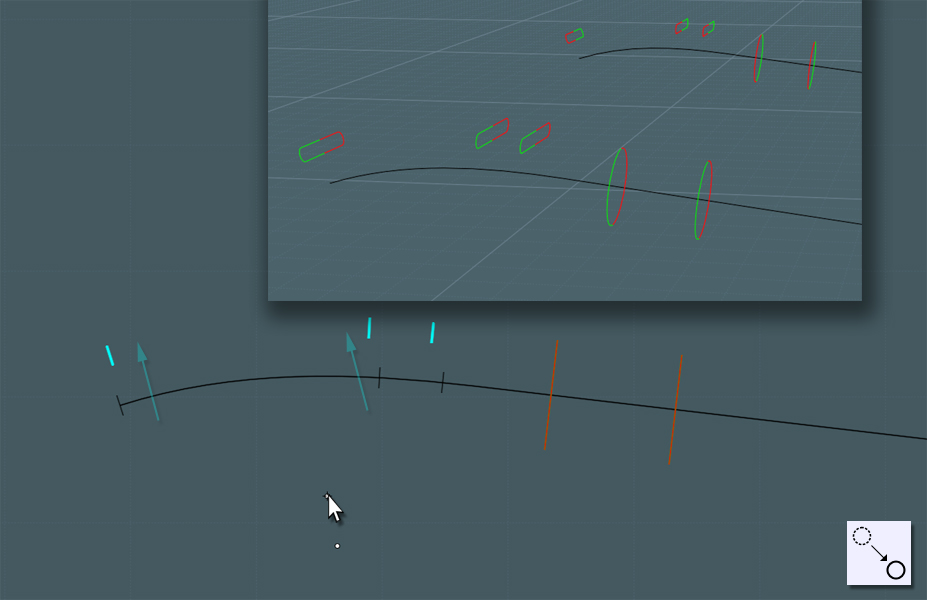
When using the Orient tool, once set in position along the path, use the snaps along the opposite side of the path to help control orientation.
(sorry if this is confusing... It took me a while to figure this out)
Just mirror the profiles when set.
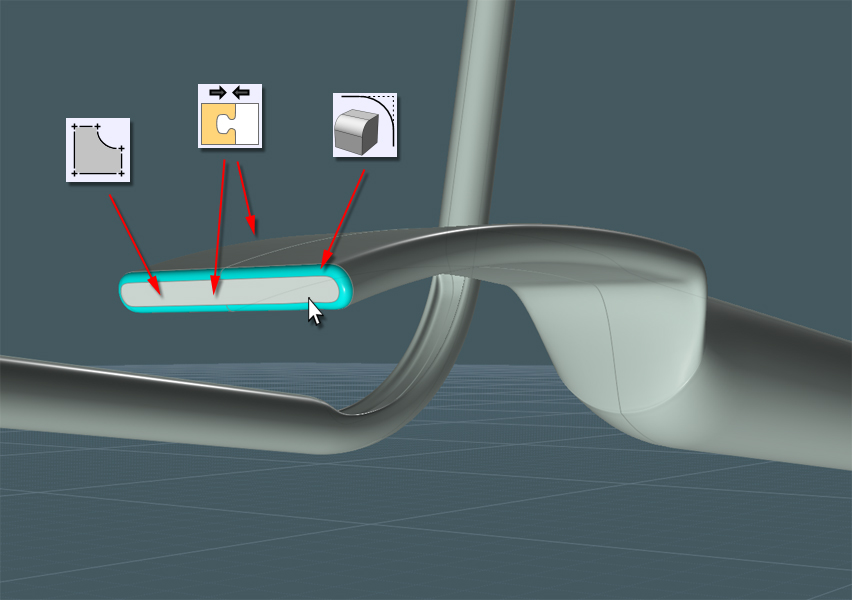
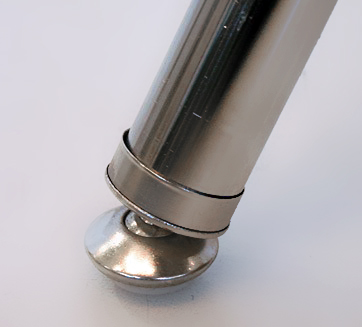
A clever engineering trick was used at the ends of the frame tube.
The ends were pressed flat to both cap the ends as well as serving as a springy support for the knee area of the chair's shell.
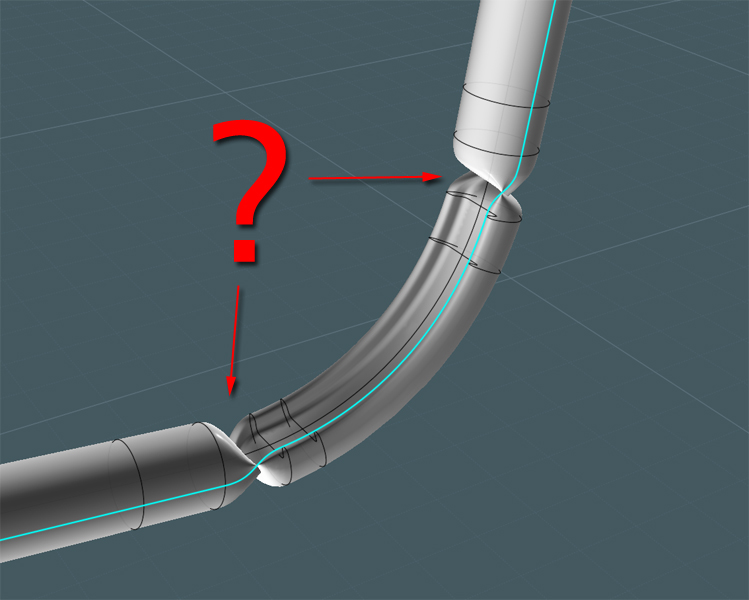
Now Sweep half of the profiles.
Sweep the counterpart side and Join them together. Now we have a great measure of control here.
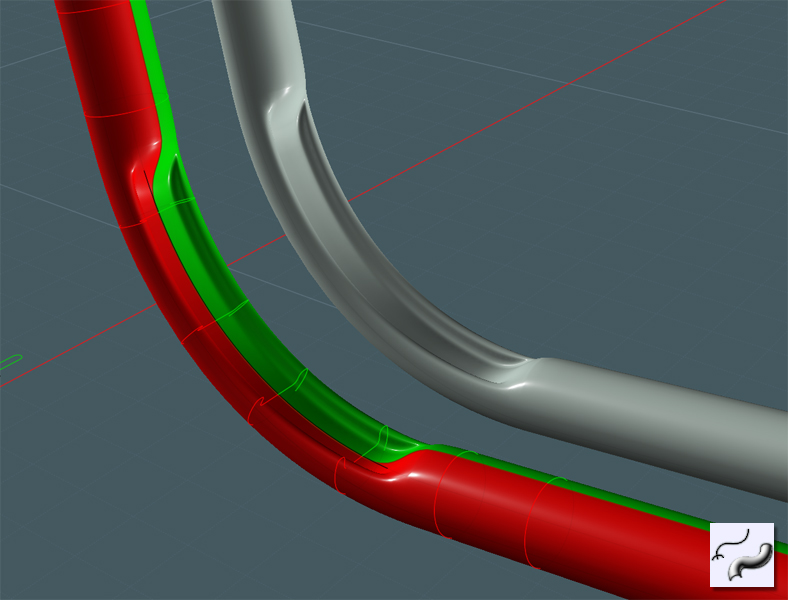
To make this a solid, I capped the ends with Planar and added a nice Fillet.
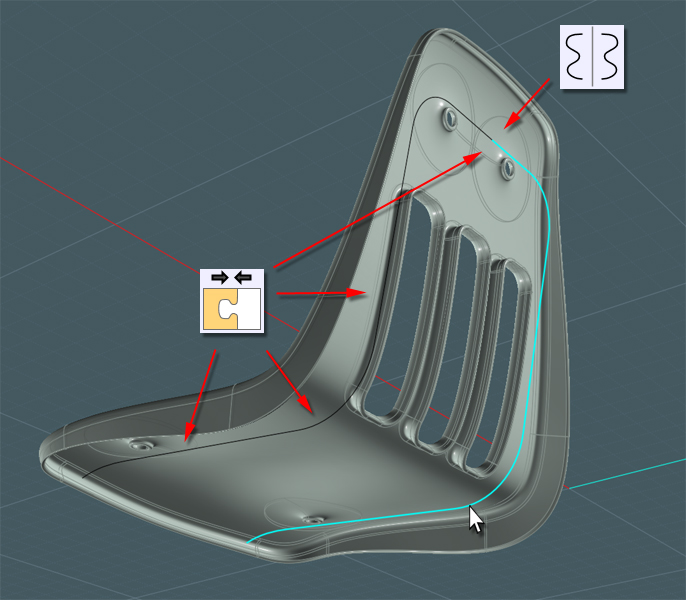
Adjust the new frame shape to more accurately fit the shell form.
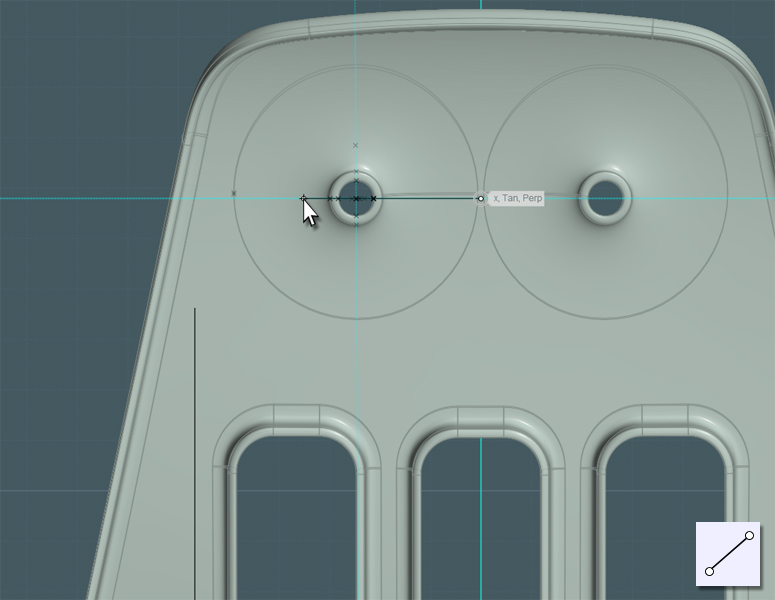
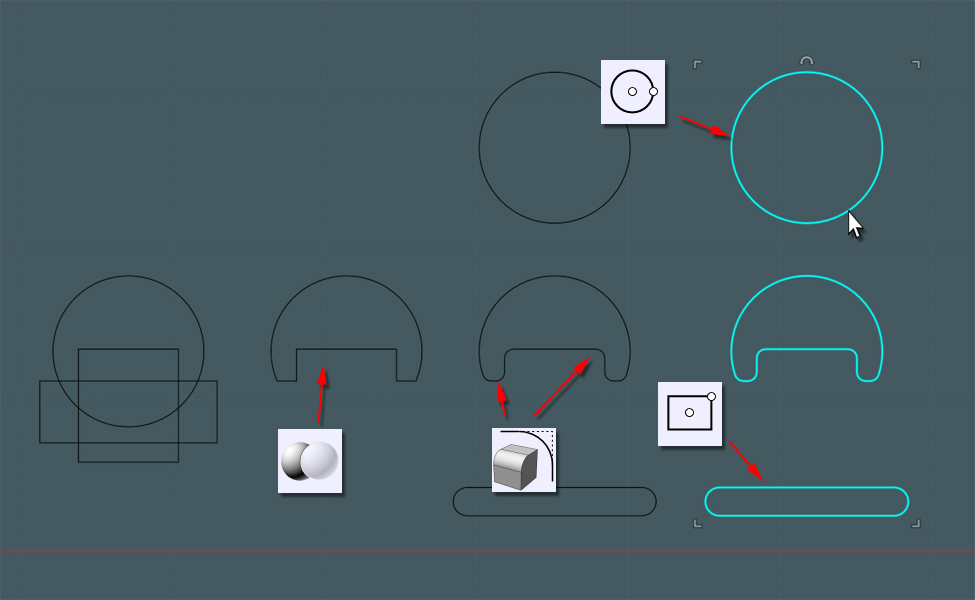
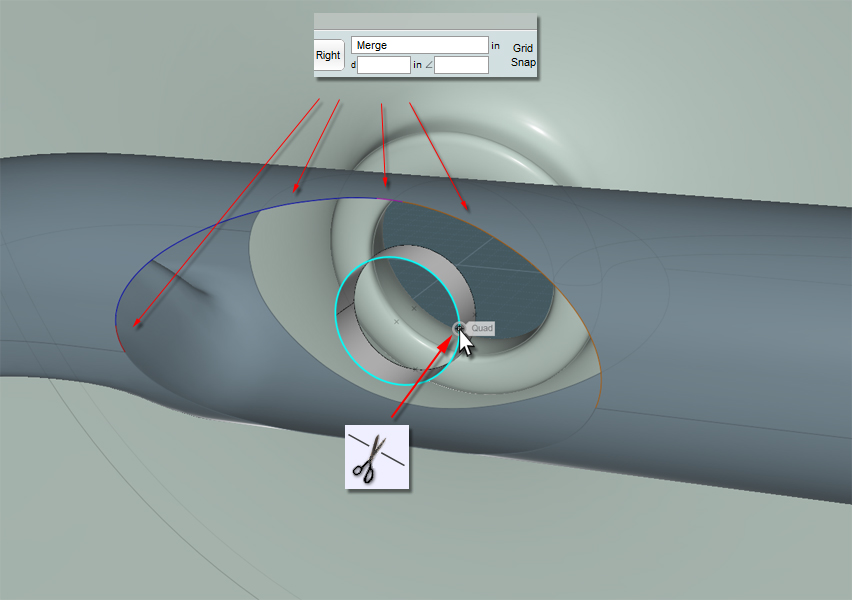
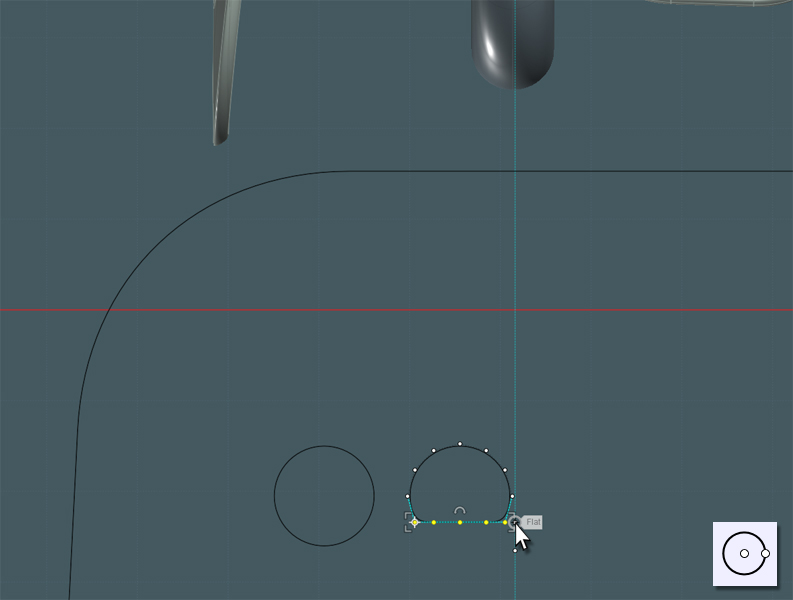
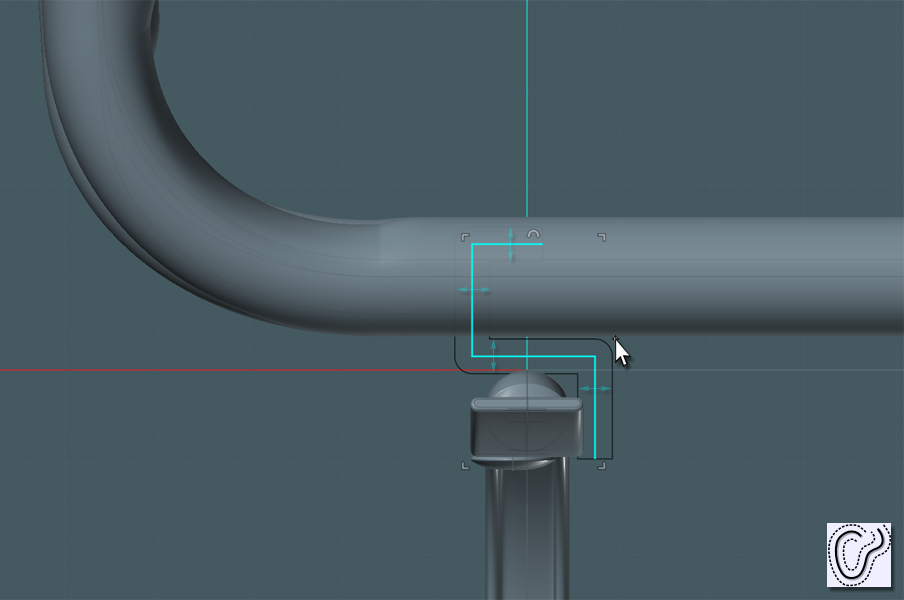
Lets add the dimples which hold the rivets through the shell.
Draw an Ellipse over the holes from the back-view.
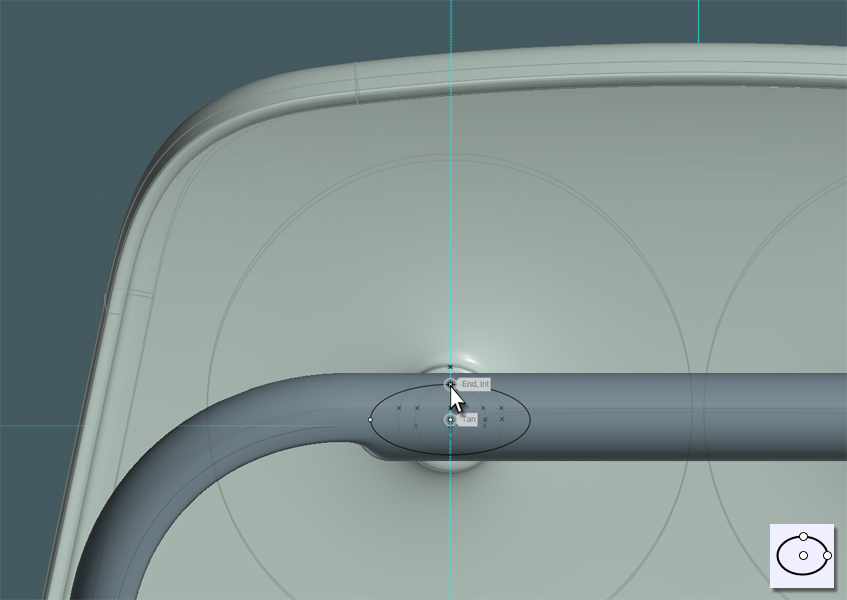
Project the Ellipse so that it creates a front and back result.
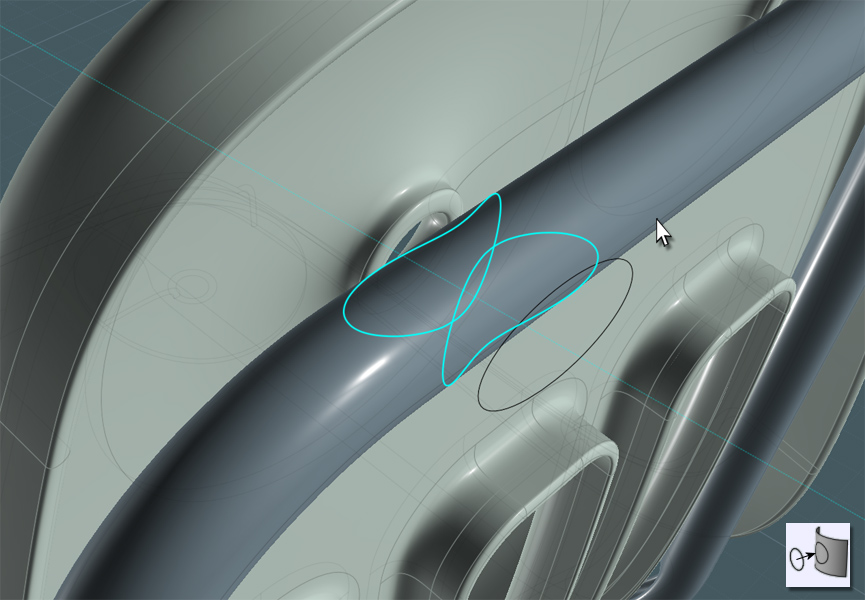
Use Trim or Boolean Difference to cut the shapes out of the tube.
Extrude a circle to create a this inside part. A cylinder will work as well without the caps.
You'll notice once you 'drill-select' into the edge curves that some they may be composed of separate pieces.
Just combine them using the non-UI "Merge" command entered into the field.
Also, As you may end up with two section to match in your surfaces, go ahead and use Trim to cut the center edge curve into two corresponding halves.
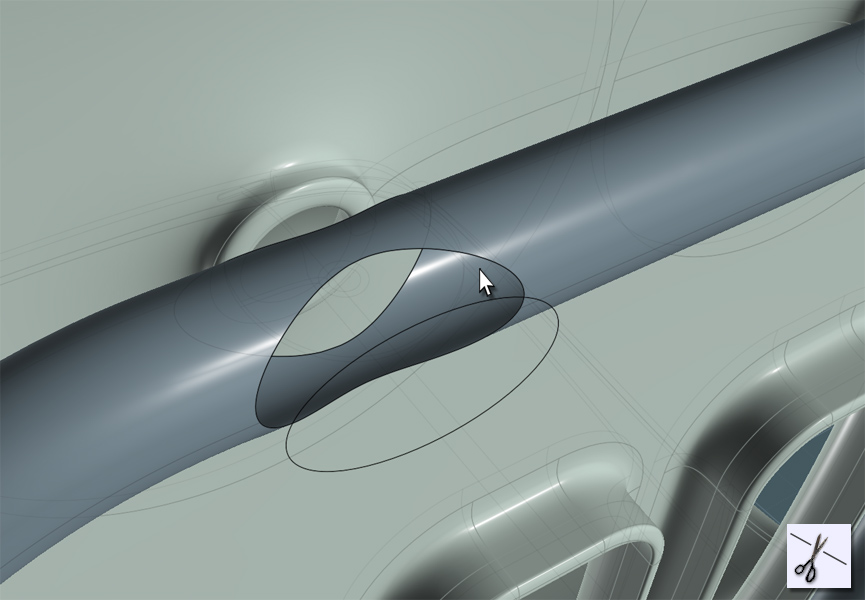
Blend these sections by selecting corresponding edge curves, then Join them all together.
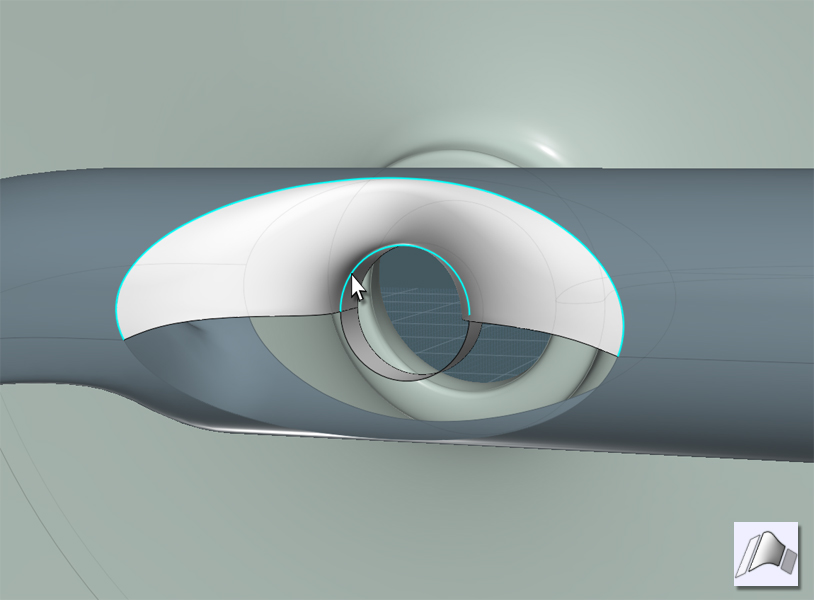
Do this for each of the four holes.
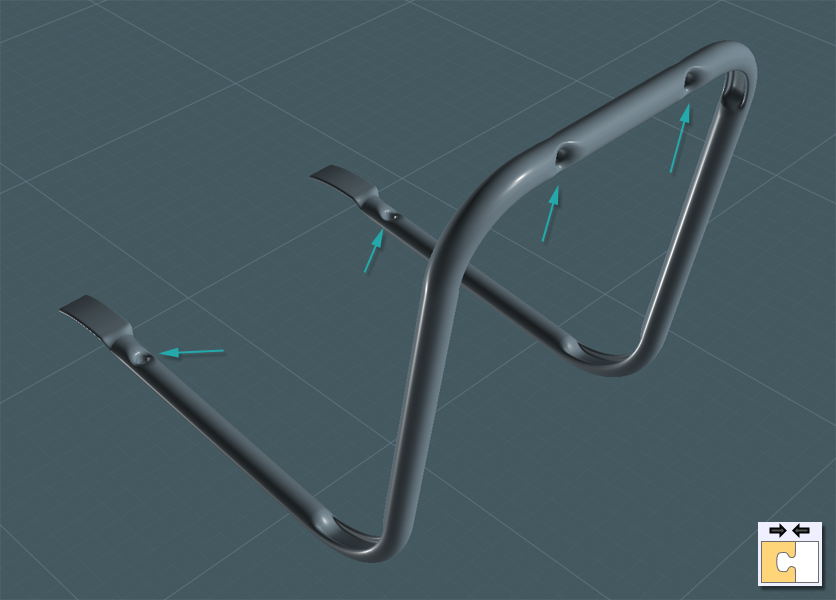
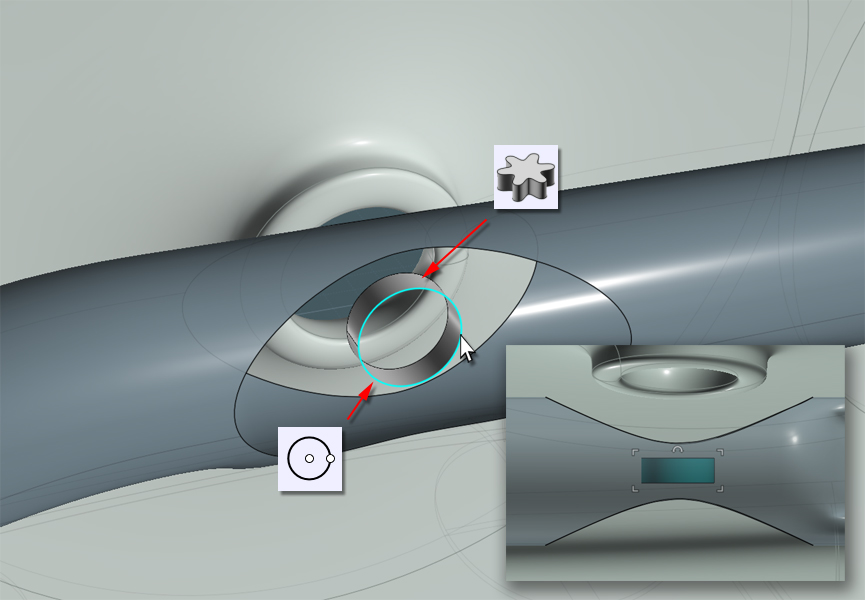
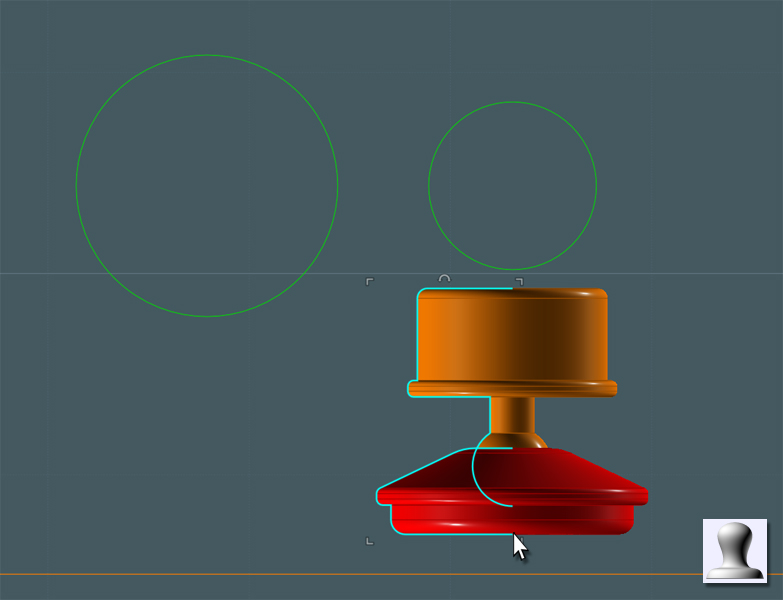
Now we need to make something that "looks" like rivets. Since this is not a mechanically-accurate model, we'll have to visually fake things.
For reference we can copy our main circles here and hide everything else.
Revolve some profiles and place them as best as you can in relation to your reference circles.
I find that it is easier to simple go to two 'ortho' views and do rotation adjustments in each one.
...rivets applied...
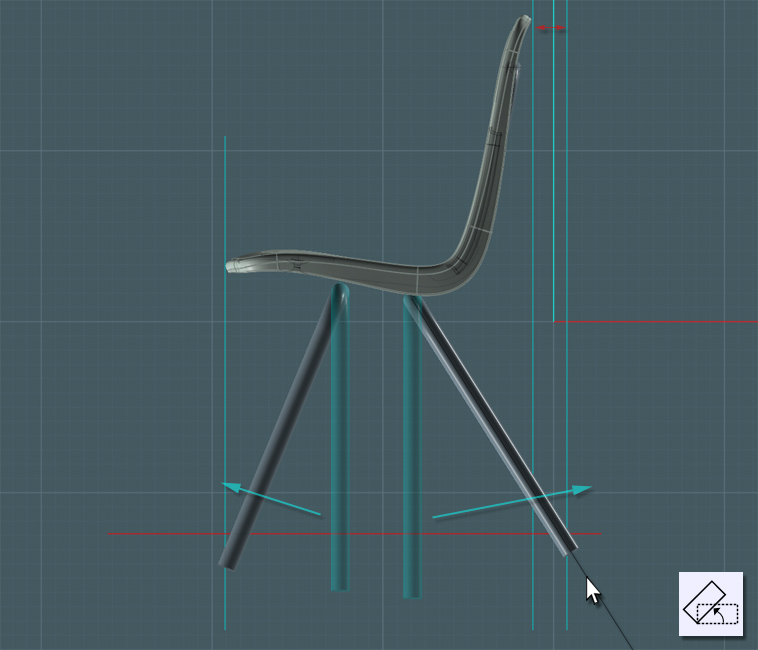
Let's build the legs. These are also rolled steel tubes.
Lets draw a few lines to be used as Sweep paths.
Note that the legs have a slight taper to the sides.
Just Fillet the corners. Keep in mind, the spacing away from the shell's lip and the frame.
Make a profile Circle for the main tube and a version that has a more flattened are which is where the tube will bend.
Since this Sweep was simpler, it gave me little issue.
Use your guides!!! Guides are a tricky thing to teach as they are so versatile and intuitive in Moi3D.
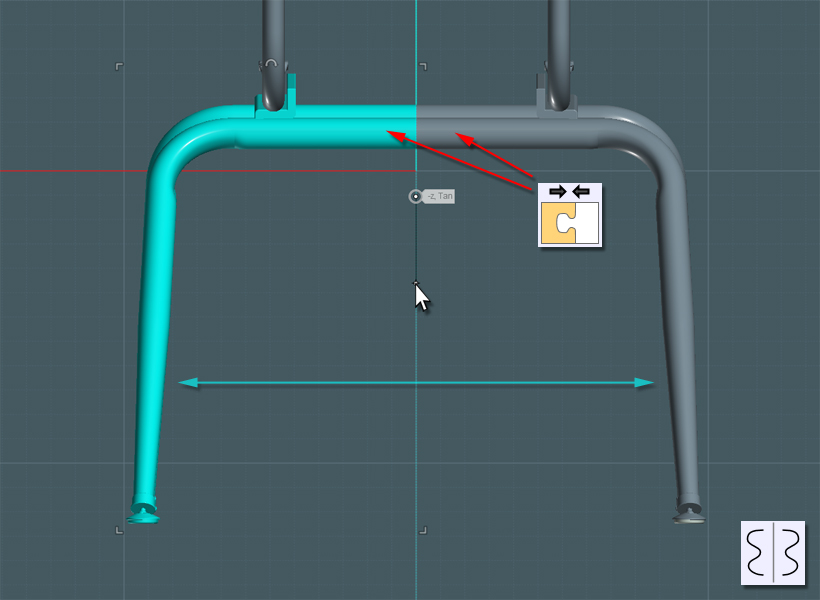
I want to use the Copy tool to make a second tube.
I wanted the second tube to follow exactly along the frame as the first. Since the frame is set at an inclined orientation,
I can't simply just copy the tube laterally.

In the side-view, I'll Rotate the legs into their angled positions.
Note that the the back leg is orientated so that the feet always contact an adjacent wall before the back of the chair,
plus it offsets the center of gravity for the user.
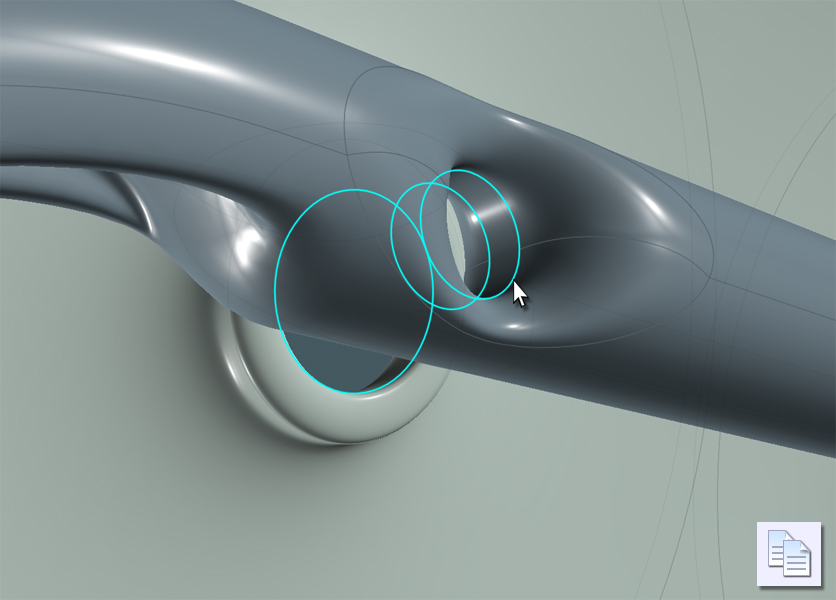
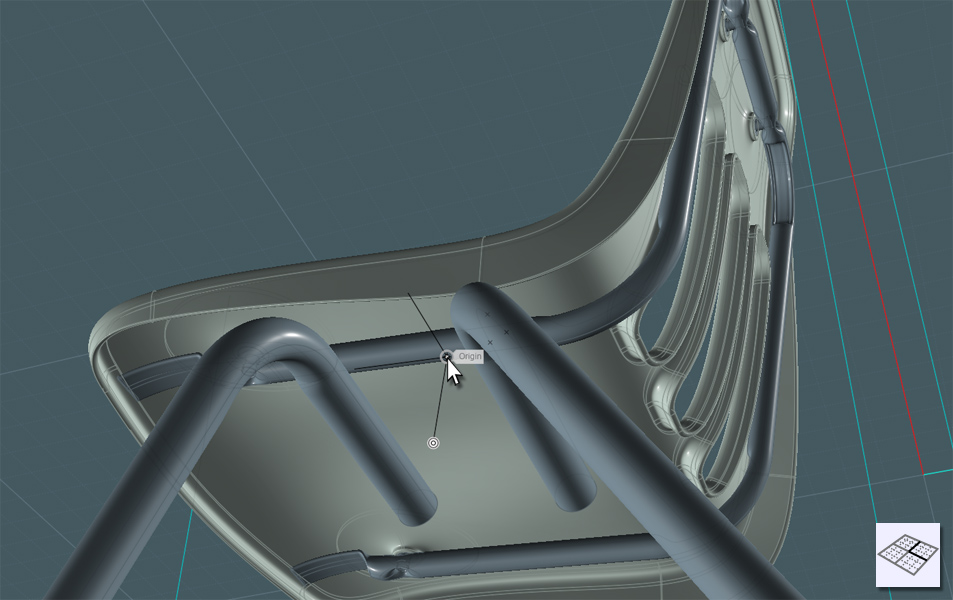
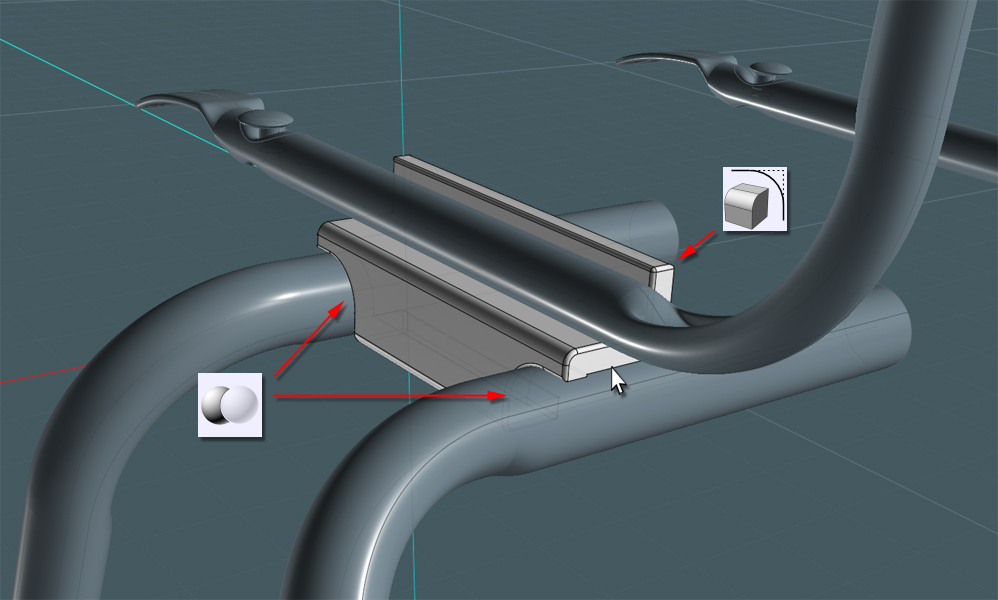
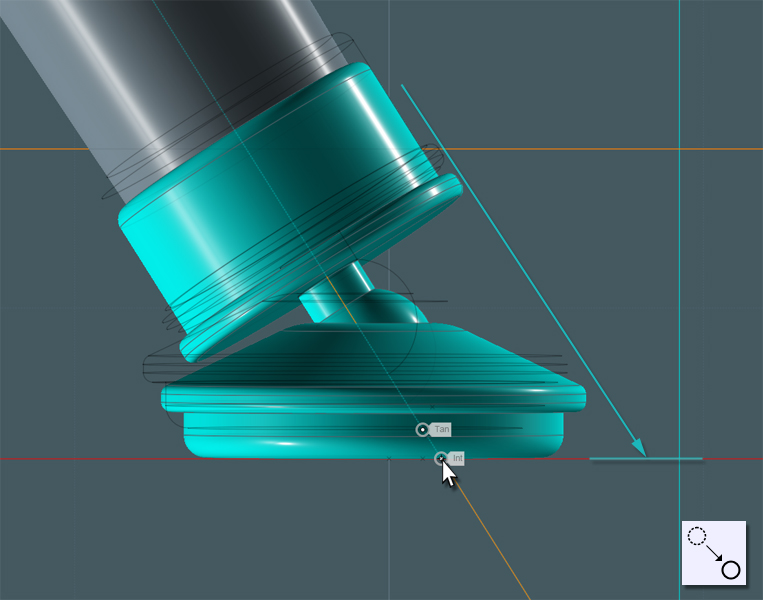
Here comes a tricky part... there needs to be a reinforcing truss to connect the legs to the frame.
This is at a strange angle so we'll need to program the C-Plane orientation in the View menu so that we're working inline with the frame.
Use the seam line on the frame part where the legs meet.
I create an interesting brace profile here by creating a poly-line and Shelling the line to add thickness.
Extrude the profile, trim other profiles and Fillet where needed to complete the shape.
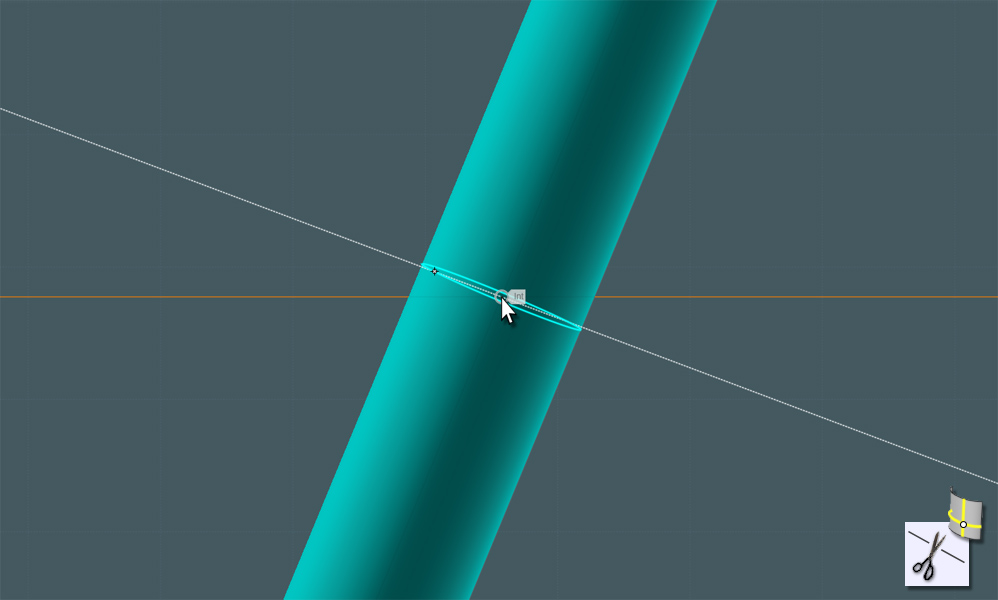
Use the new V3 Iso-Curve tool to cut the leg pipes short about halfway up.
Use Trim with Iso-Curve to save a step.
Make sure you kept the original Sweep path curve. ;-)
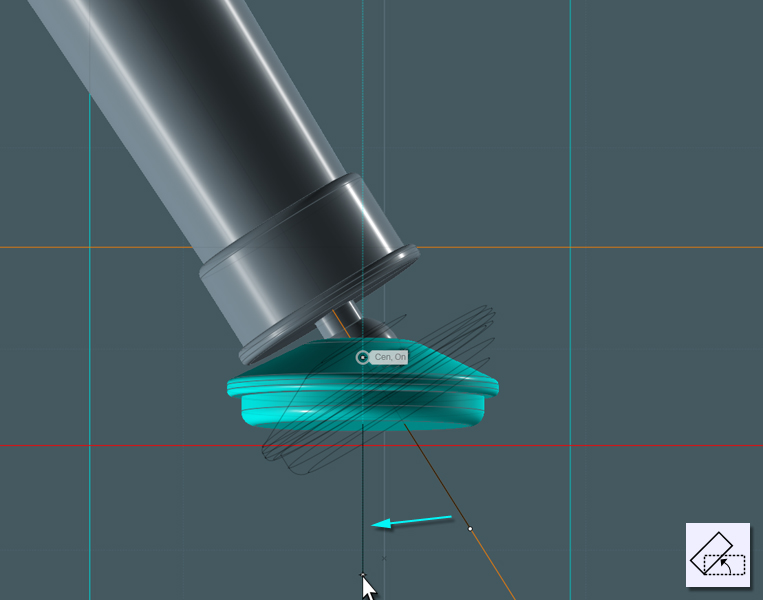
Make a Circle that is smaller than the one used for the legs and Orient it at the bottom where the feet will be.
Use Loft to create a new conical shape.
To connect the shorter leg tube with the conical tube, I used Trim with Iso-Curve to cut each shape back a little.
Then I used Blend to bring the two parts together smoothly. Just Join all parts.
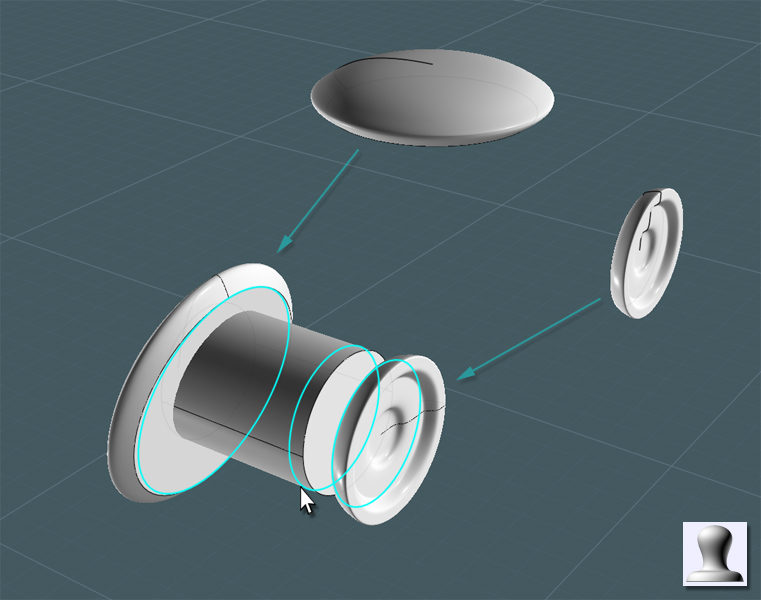
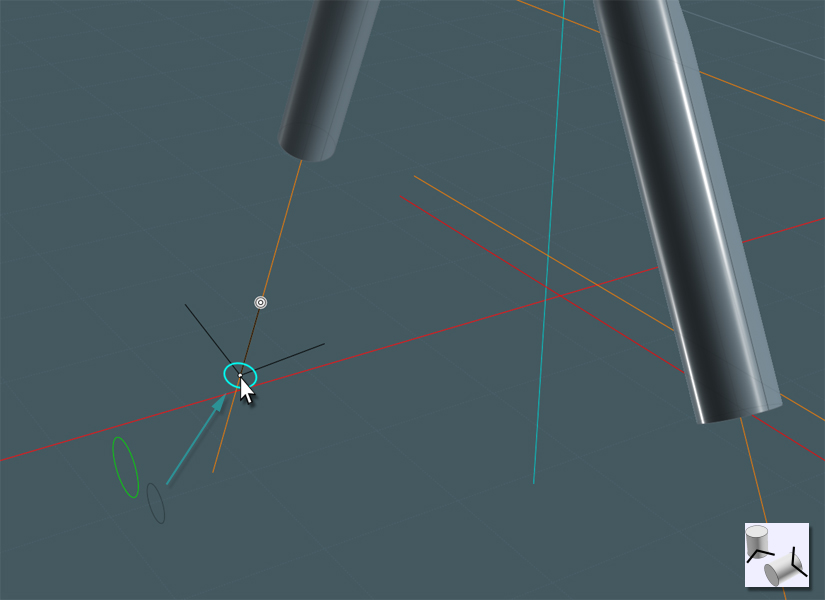
Lets make some feet castors:
One part holes the nylon pad and the other has a ball part for swivel action... a 'ball and socket' joint.
By using the saved Sweep path curve as reference, you can use the Orient tool to place the castor.
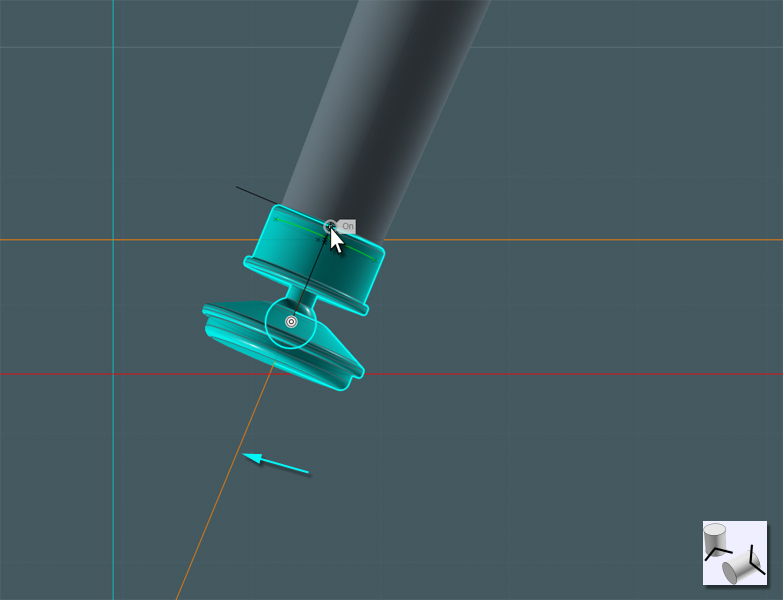
To make the castor pad flat to the floor plane, the easiest way I found was to go to two different 'ortho' views, like Right and Front,
and use Rotate to fix the angle of the objects.
There was a "Center" snap point present inside the 'ball', which is what I used to perfectly orient the part from two views.
Using the Move tool, use the Sweep path to guide the part to the 'floor'.
Now all you have to do is Mirror the completed legs to the other side...
Join the tubes.
...and now you're done!
Enjoy your chair design, and send your schools to Virco for a well-designed and time-tested chair. ;-)