Sorry for the delay M-Dynamics.
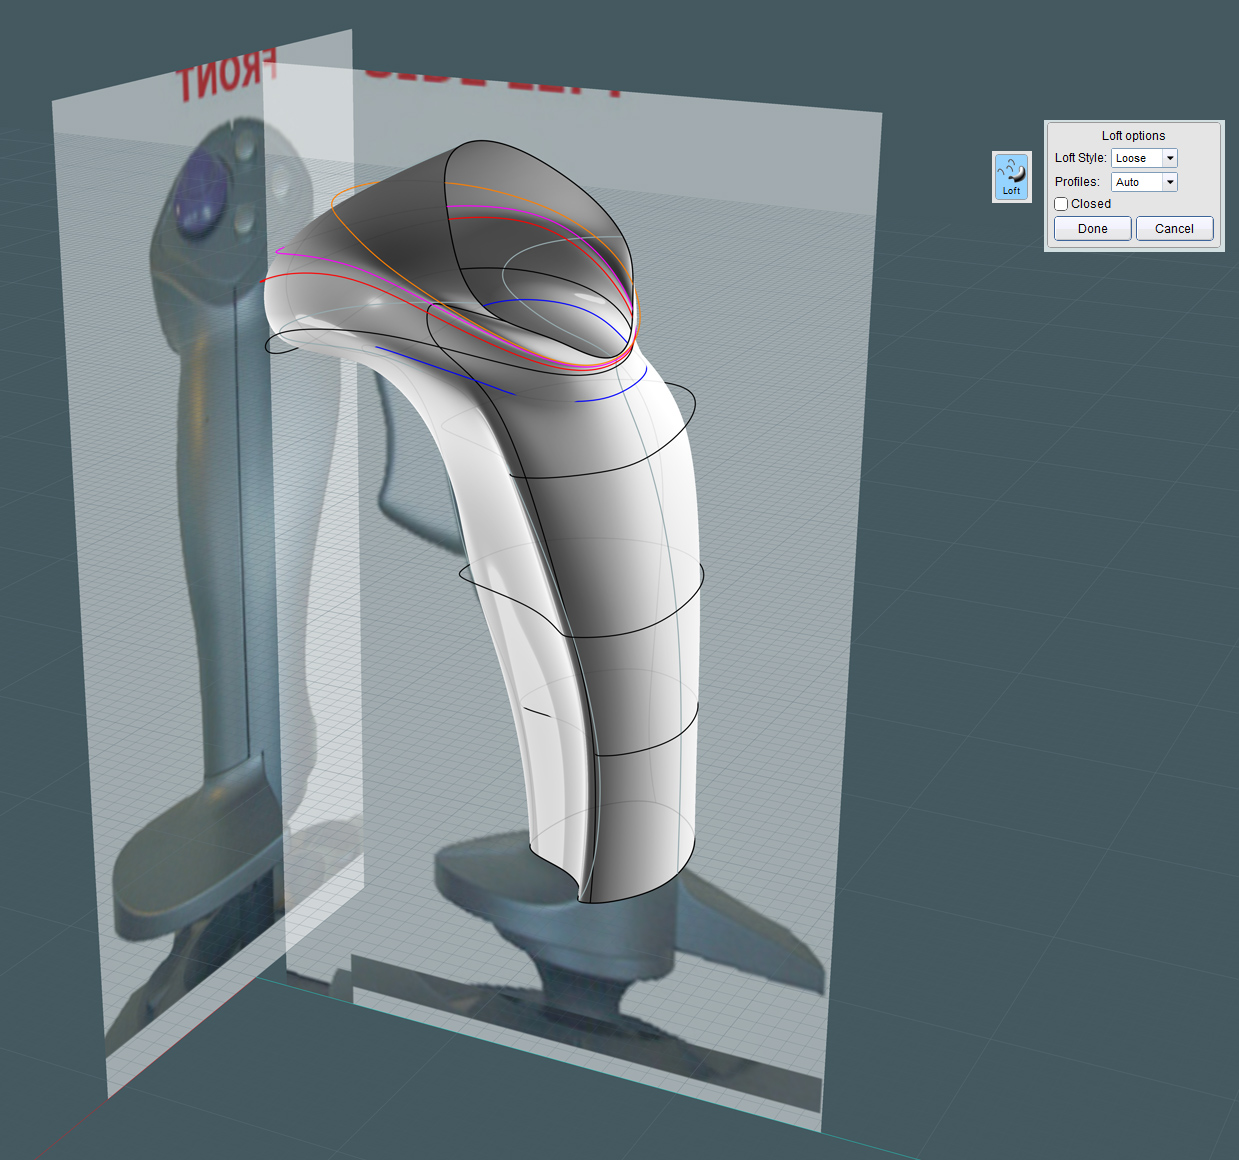
I took my stab at building the surface shape for the handle... Not the best result I anticipated, but at least an example for reproducing this shape using an alternative method.
This handle is a little more complex than it appears (as you can see): There's a concaved area on one side with a pinched ridge.
And then, if you look at the neck of the handle, on the sides just below the top bulge - the body motion of the surface at the top suddenly changes directions. This makes this complex shape hard to do in one piece.
So in my opinion, this handle should be done in sections. Clearly defined, like the lower handle, the foot, and the top rounded part separately, then Blended.
M, your approach with using a sweep was very effective. It looks clean!
Now if you were to make that Sweep again, but twice over -
Do one version with the pinched, concaved side and the other with a bulge, then cut both kinds in half and combine the appropriate sides.
My approach was to try a Network first.... hmmm.
I carefully constructed rail curves to represent the rising quadrants of the handle.
I made a shape at the bottom and one at the buttons face area. Just this would not work alone. It's that sudden shape motion just above the concave and on the more lower section of the top rounded shape that are hard to work with.
Since Network does the best it can at creating surfaces based on an average of where the rail curves go, curvature continuity is very hard to control.
Adding more rails and rings to the Network only add to the imperfections and difficulty in control.
Since you already tried using a Sweep, I decided to try a Loft!

Attached is the 3dm file:
http://www.mediafire.com/?f8c9ufjgde5hyjh
In the folder:
http://www.mediafire.com/?3tlre2zc6y1qh
I used the quadrant rails I made for the Network attempt as a visual reference instead...
1) Draw the profile rings from an above view, then manipulate the control points in the side views and even in 3D view to form them into a good representative shape of that section of the model.
2) Use the Loft command on the rings, selecting them in succession.
3) Because a lofted surface, just formed with keep a history, adjust the points on the rings until the main Lofted surface more-so conforms to what you want.
You can try tweaking the ring points in the provided file, or even add rings until the main shape looks closer to what you want.
I'd build the bottom by Blending in the curvature to the foot object and then do a little trimming.
Also:: I keep thinking that it may be possible to create the bottom section of the handle using a sweep to get both the bulge and the crease...
Create the top rounded part where the buttons will go, and somehow use Blend to tie those two sections together.
I'm pretty sure that the odds are great that the people that manufactured the plastic blown-molded shell for the actual handle, had to be using Solidworks or an industrial equivalent. NURBS is generally the preferred route for that type of manufacturing.
..it's just the "figuring out how they did it" part.
I don't feel I really hit the mark with this. Plus, I only had a couple of photos to go from instead of the real thing.
But I welcome other MoI users to try their hands at this. I'm very curious to see how someone else gets close to the mark.
Mike